
Landscaping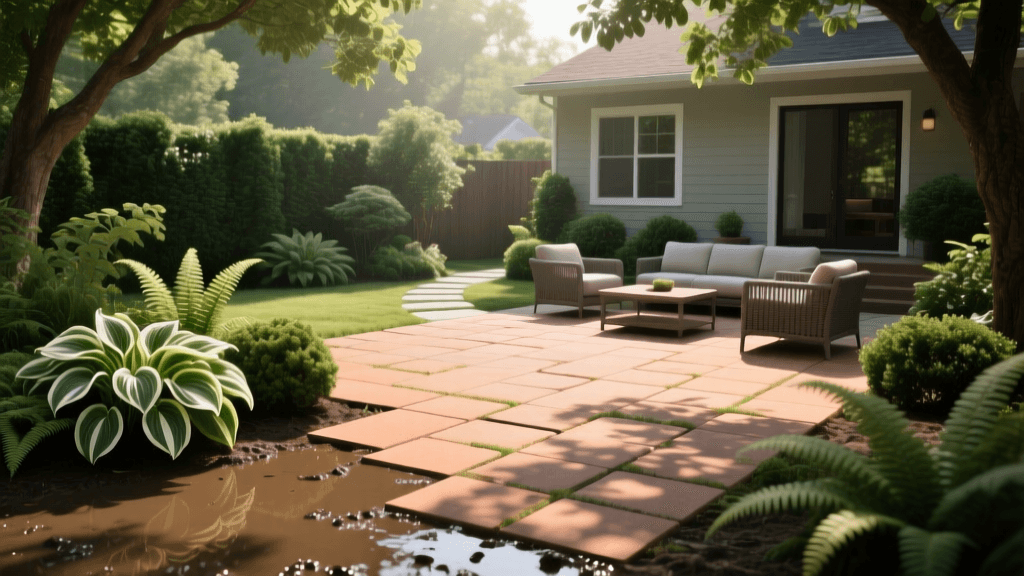
Backyard Makeover: Muddy Shade To Permeable Paver Patio
Transforming a Muddy, Shaded Backyard Into an Outdoor Oasis
Every homeowner dreams of a lush, usable backyard, but the reality of mature landscaping often presents a unique set of challenges. One of the most common landscape dilemmas is the heavily shaded, perpetually muddy backyard. When large canopy trees like oaks, maples, or sycamores block out the sun, traditional turfgrass struggles to survive. The result is a compacted, soggy patch of dirt that becomes completely unusable after even a light rain. In this comprehensive before-and-after transformation guide, we will walk through the exact steps, materials, and costs required to turn a 400-square-foot muddy shade patch into a stunning, functional outdoor living space featuring permeable interlocking concrete pavers (PICP) and shade-tolerant softscaping.
The "Before" State: Diagnosing the Problem
Before any transformation can begin, it is crucial to understand why the space is failing. Our project site is a 20-foot by 20-foot area situated directly beneath two mature red oak trees. The "before" state was characterized by three major issues:
- Lack of Sunlight: The dense canopy allowed less than three hours of dappled sunlight per day, making it impossible for Kentucky Bluegrass or Fescue to establish a root system.
- Soil Compaction: Years of foot traffic and natural settling had turned the underlying clay soil into a hardpan surface that repelled water.
- Poor Drainage: Because the water could not percolate through the compacted clay, it pooled on the surface, creating a muddy swamp that attracted mosquitoes and ruined the yard's aesthetics.
To solve these issues permanently, we needed a hardscaping solution that could handle heavy shade without exacerbating the drainage problem, paired with a softscaping design that thrives in low-light conditions.
Step 1: Excavation and Base Preparation
The foundation of any successful hardscaping project is the base. For a permeable paver system, the base actually acts as an underground reservoir for stormwater management, aligning with the Environmental Protection Agency (EPA) guidelines for green infrastructure and runoff reduction.
Excavation Process
We began by marking the 400-square-foot patio area using landscaping paint and string lines, ensuring a slight 1% slope away from the home's foundation to encourage positive drainage. Using a mini-excavator, we dug down exactly 10 inches below the desired finished grade. This depth is critical to accommodate the base aggregates, the bedding layer, and the thickness of the pavers themselves. The excavated clay soil was hauled away, as clay retains moisture and can cause frost heave in colder climates.
Geotextile Fabric and Base Aggregates
Once excavated, we lined the entire bed with a non-woven geotextile fabric (such as Mirafi 500X) to prevent the base stones from sinking into the subgrade over time. Next, we built the base in three distinct layers, compacting each with a 5,000-lb vibratory plate compactor:
- Reservoir Base Layer (6 inches): ASTM No. 2 crushed stone (roughly 2.5 inches in diameter). This layer provides structural support and stores excess rainwater.
- Choker Layer (2 inches): ASTM No. 57 crushed stone (roughly 1 inch in diameter). This stabilizes the base and prevents the top layer from migrating downward.
- Bedding Layer (1 inch): ASTM No. 8 crushed stone (roughly 1/4 inch in diameter). This provides a smooth, level surface for laying the pavers.
Step 2: Installing Permeable Pavers
With the base prepared, the transformation truly began to take shape. We selected Belgard's Urbana Permeable Pavers in a slate grey color. These pavers are specifically designed with wider joints to allow water to flow through the surface and into the base reservoir below.
Laying the Pattern and Cutting
We utilized a running bond pattern to create a modern, linear look that visually elongates the space. Starting from the corner of the house, we laid the pavers tightly against a rigid SnapEdge restraint, which was secured with 10-inch landscaping spikes. For the perimeter cuts, we used a 14-inch gas-powered masonry saw equipped with a diamond blade, ensuring clean, precise edges around the existing tree trunks, leaving a generous 3-foot radius around the oaks to protect their critical root zones.
Joint Filling and Final Compaction
Unlike traditional pavers that use polymeric sand, permeable pavers require joint-filling stone. We swept ASTM No. 9 crushed stone (1/8 inch) into the joints until they were completely full. A final pass with the plate compactor, using a protective urethane pad to prevent scratching the paver surface, vibrated the joint stone deep into the gaps, locking the entire patio into a unified, flexible surface.
Materials and Cost Breakdown
Understanding the financial investment is key to any landscape makeover. Below is the estimated cost breakdown for our 400-square-foot permeable paver project, assuming professional installation rates.
| Material / Service | Quantity | Unit Cost | Total Cost |
|---|---|---|---|
| Excavation & Haul Away | 15 cubic yards | $150 / yard | $2,250 |
| Geotextile Fabric | 450 sq ft | $0.50 / sq ft | $225 |
| Crushed Stone (No. 2, 57, 8) | 35 tons | $45 / ton | $1,575 |
| Permeable Pavers (Belgard) | 400 sq ft | $6.50 / sq ft | $2,600 |
| Edge Restraint & Spikes | 80 linear ft | $4.00 / ft | $320 |
| Labor (Installation) | 400 sq ft | $12.00 / sq ft | $4,800 |
| Total Estimated Cost | $11,770 |
Note: Costs vary significantly by region and site accessibility. DIY installation can reduce the total cost by nearly 50%.
Step 3: Softscaping with Shade-Tolerant Groundcovers
A hardscape without softscape feels sterile and unfinished. The edges of our new patio needed to blend seamlessly into the surrounding shaded yard. According to experts at Penn State Extension, successful shade landscaping requires selecting plants that are adapted to low-light environments and can compete with tree roots for moisture and nutrients.
Selecting the Right Plants
We avoided traditional turfgrass entirely and opted for a mix of shade-tolerant groundcovers and structural perennials that provide year-round visual interest:
- Sweet Woodruff (Galium odoratum): Planted along the back border, this low-growing perennial features delicate white spring flowers and releases a sweet scent when crushed. It thrives in dry shade and spreads quickly to form a dense mat.
- Hostas (Halcyon and Patriot varieties): Used as structural anchor plants at the corners of the patio. The blue-grey foliage of Halcyon and the variegated white edges of Patriot brighten up the dark, shaded areas.
- Creeping Jenny (Lysimachia nummularia 'Aurea'): Planted in the crevices of a nearby retaining wall and allowed to spill over the edges, providing a vibrant pop of chartreuse green that contrasts beautifully with the slate grey pavers.
Planting Technique in Root-Dense Soil
Planting near mature trees requires care to avoid severing major roots. We used a hand trowel to dig small, precise holes between the surface roots, amending the native soil with organic compost to give the new perennials a nutrient-rich start. A 2-inch layer of shredded hardwood mulch was applied over the planting beds to retain moisture and suppress weeds, keeping the mulch a few inches away from the tree trunks to prevent rot.
Step 4: Lighting and Final Accents
To ensure the space is usable and safe after dark, we installed a low-voltage LED landscape lighting system. We placed brass path lights along the perimeter walkway to illuminate the edges of the patio. More importantly, we installed 5-watt LED uplights at the base of the two red oak trees. Uplighting the canopy not only highlights the majestic architecture of the trees but also creates a stunning, dramatic backdrop for evening entertaining.
Finally, we furnished the space with a 40-inch smokeless fire pit and four recycled poly-lumber Adirondack chairs, creating an intimate gathering space that is entirely mud-free and highly functional.
Before & After Transformation Comparison
The impact of this landscape makeover goes far beyond simple aesthetics. Below is a side-by-side comparison of the yard's functionality and environmental impact before and after the renovation.
| Feature | Before (Muddy Shade) | After (Permeable Patio) |
|---|---|---|
| Usability | Unusable after rain; muddy footwear | Year-round, all-weather outdoor living space |
| Drainage | Surface pooling; mosquito breeding ground | 100% permeable; water returns to the water table |
| Maintenance | Constant reseeding; mowing in wet mud | Occasional sweeping; seasonal weeding of beds |
| Aesthetics | Bare dirt, patchy weeds, tree roots exposed | Modern hardscape, vibrant shade perennials, lighting |
| Property Value | Detracts from curb appeal and appraisal | Adds functional square footage and boosts ROI |
Maintenance Tips for Your New Landscape
While permeable pavers and shade gardens are significantly lower maintenance than a struggling turfgrass lawn, they are not entirely maintenance-free. To keep your transformed backyard looking pristine, follow these seasonal care guidelines:
- Spring: Inspect the paver joints. If the No. 9 crushed stone has settled or washed out, simply sweep additional stone into the joints. Prune back dead foliage from the Hostas and Sweet Woodruff as new growth emerges.
- Summer: Monitor the shade perennials for signs of drought stress. Even shade plants need water during extended dry spells, especially when competing with mature tree roots. Deep, infrequent watering is best.
- Autumn: This is the most critical season for permeable pavers. Keep the surface clear of falling leaves and pine needles, which can clog the joints and reduce permeability. Use a leaf blower rather than a rake to avoid disturbing the joint stone.
- Winter: Avoid using harsh chemical de-icers or rock salt, which can degrade the concrete surface and harm the surrounding softscape. Use sand or a calcium chloride-based ice melt if necessary, and shovel with a plastic blade to prevent scratching.
Conclusion
Transforming a muddy, shaded backyard into a functional outdoor oasis is one of the most rewarding landscaping projects a homeowner can undertake. By abandoning the futile battle to grow turfgrass in heavy shade and instead embracing permeable hardscaping and shade-adapted perennials, you can reclaim your yard. The combination of structural pavers, strategic drainage, and thoughtful softscaping not only solves the mud problem but also creates a sustainable, beautiful extension of your home's living space that can be enjoyed for decades to come.

