
Gardening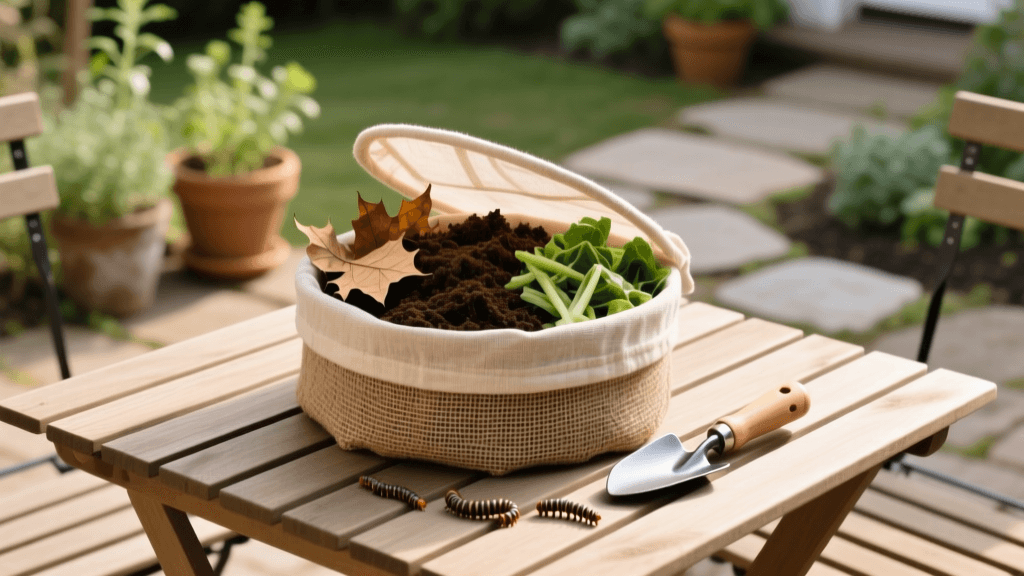
How to Balance Carbon and Nitrogen in Home Compost
The Science of Composting: Why the C:N Ratio Matters
Gardening success starts long before you plant your first seed; it begins beneath the surface in the soil. For home gardeners looking to build vibrant, nutrient-dense soil without relying on synthetic fertilizers, mastering the art of composting is essential. At the heart of successful composting lies a simple but critical biological equation: the Carbon to Nitrogen (C:N) ratio. Understanding and balancing this ratio is the difference between a foul-smelling, stagnant pile of waste and a thriving, hot composting system that produces black gold in a matter of months.
Composting is essentially the managed decomposition of organic matter by microorganisms, including bacteria, fungi, and actinomycetes. These microscopic workers require two primary elements to survive, multiply, and break down your garden waste. Carbon provides the energy and structural building blocks for microbial cells, while nitrogen is crucial for protein synthesis and rapid microbial reproduction. According to the Environmental Protection Agency (EPA), the ideal C:N ratio for a compost pile is approximately 30 parts carbon to 1 part nitrogen (30:1). When you hit this sweet spot, microorganisms operate at peak efficiency, generating enough heat to kill weed seeds and pathogens while rapidly breaking down organic matter.
Identifying Your Browns and Greens
In the gardening community, carbon-rich materials are commonly referred to as 'browns,' while nitrogen-rich materials are called 'greens.' However, color is not always the best indicator of a material's chemical makeup. For instance, dried green grass clippings are a 'green' (nitrogen) source, while fresh green pine needles can act more like a 'brown' (carbon) source due to their high lignin content. The Cornell University Compost Resource emphasizes that knowing the specific C:N ratios of your available materials is the first step toward building a balanced pile.
Below is a comprehensive data table detailing common household and garden materials, their classifications, and their approximate C:N ratios.
| Material | Category | Approximate C:N Ratio | Decomposition Speed |
|---|---|---|---|
| Fresh Grass Clippings | Green (Nitrogen) | 15:1 to 20:1 | Very Fast |
| Vegetable Kitchen Scraps | Green (Nitrogen) | 15:1 to 25:1 | Fast |
| Coffee Grounds | Green (Nitrogen) | 20:1 | Fast |
| Cow Manure (Aged) | Green (Nitrogen) | 20:1 | Moderate |
| Dry Autumn Leaves | Brown (Carbon) | 40:1 to 60:1 | Moderate |
| Straw or Hay | Brown (Carbon) | 50:1 to 80:1 | Moderate |
| Shredded Newspaper | Brown (Carbon) | 100:1 to 175:1 | Slow |
| Pine Needles | Brown (Carbon) | 60:1 to 110:1 | Very Slow |
| Sawdust / Wood Chips | Brown (Carbon) | 200:1 to 500:1 | Extremely Slow |
The 3-to-1 Rule: Measuring and Mixing
While the target chemical ratio is 30:1, you do not need to mix materials by weight to achieve it. Because 'browns' are typically bulkier, drier, and less dense than 'greens,' home gardeners should aim for a volumetric ratio of roughly 3 parts browns to 1 part greens. This 3:1 volume ratio naturally approximates the ideal 30:1 chemical weight ratio required by soil microbes.
Building the Pile Layer by Layer
To build a hot compost pile that reaches temperatures between 130°F and 160°F, size matters. Your pile should be a minimum of 3 feet wide, 3 feet long, and 3 feet tall (1 cubic yard) to retain heat effectively. Start with a 4-inch base layer of coarse twigs or straw to promote bottom airflow. Then, alternate layers: add 6 inches of fluffy browns (like dry leaves or shredded cardboard), followed by 2 inches of dense greens (like kitchen scraps or fresh grass clippings). Sprinkle a thin layer of native garden soil or finished compost between every few layers to inoculate the pile with local microbes. Water each layer lightly as you build.
Moisture and Aeration: The Supporting Pillars
Even with a perfect C:N ratio, your compost will fail if moisture and oxygen levels are ignored. Microbes require a moisture content of about 40% to 60%. The easiest way to test this is the 'sponge test': grab a handful of compost (wearing gloves) and squeeze it tightly. It should feel like a wrung-out sponge, yielding only one or two drops of water. If it is bone dry, microbial activity halts. If water streams out, the pile is anaerobic and will rot rather than compost.
Oxygen is equally vital. Aerobic decomposition requires regular turning. Use a pitchfork or a specialized compost aerator tool to turn the pile every 5 to 7 days. This moves the cooler outer materials into the hot center and introduces fresh oxygen, reigniting microbial activity and ensuring an even breakdown of all organic matter.
Troubleshooting Common Compost Imbalances
Even experienced gardeners encounter compost hiccups. Fortunately, your pile will usually tell you exactly what it needs through smell, temperature, and visual cues.
- The Pile Smells Like Ammonia or Rotten Eggs: This indicates an excess of nitrogen (too many greens) and a lack of oxygen. The microbes are overwhelmed and the pile has gone anaerobic. The Fix: Turn the pile immediately to introduce oxygen, and aggressively mix in dry, bulky browns like shredded leaves, straw, or shredded cardboard to absorb excess moisture and balance the C:N ratio.
- The Pile is Not Heating Up: If your pile is sitting at ambient temperature and showing little sign of breakdown after two weeks, it likely has too much carbon (too many browns) or is too dry. The Fix: Check the moisture level first and add water if necessary. If moisture is adequate, mix in high-nitrogen greens like fresh grass clippings, coffee grounds, or an organic nitrogen booster like blood meal or alfalfa meal to jumpstart microbial reproduction.
- The Pile is Attracting Pests: Fruit flies, rodents, and raccoons are attracted to exposed food scraps. The Fix: Always bury your kitchen greens deep within the center of the pile and cover them with a thick 4-inch layer of browns. Never add meat, dairy, or oils to a standard home compost bin.
Cost Analysis: Homemade vs. Store-Bought Compost
From a financial perspective, balancing your own compost pile offers massive returns on investment for your garden. Purchasing high-quality, OMRI-listed bagged compost at a local garden center typically costs between $5.00 and $8.00 per 1.5-cubic-foot bag, equating to roughly $4.00 per cubic foot. Bulk compost delivered by landscape suppliers is cheaper, averaging $30 to $60 per cubic yard (27 cubic feet), which breaks down to about $1.50 to $2.20 per cubic foot.
In contrast, homemade compost costs virtually nothing in raw materials, requiring only an initial investment in a compost bin or tumbling system ($50 to $150) and your physical labor. For a medium-sized vegetable garden requiring 2 cubic yards of compost annually, making your own saves you anywhere from $60 to over $400 a year, all while diverting household yard waste from local landfills.
Applying Finished Compost for Maximum Soil Health
Once your compost has transformed into a dark, crumbly, earthy-smelling humus (usually after 3 to 6 months of active hot composting), it is ready to feed your garden. The application method depends on your specific gardening setup:
- New Raised Beds: Use compost as a primary soil component. A highly effective and well-draining mix for raised beds is 30% finished compost, 60% high-quality topsoil, and 10% aeration material like pumice or coarse perlite.
- Existing Vegetable Gardens: Apply a 1-inch to 2-inch layer of compost over your garden beds in the early spring or late fall. Use a broadfork or garden fork to gently incorporate it into the top 4 to 6 inches of soil, minimizing deep tilling to protect existing soil structure and fungal networks.
- Lawns and Perennials: Use finished compost as a top-dressing. Sift the compost through a 1/4-inch mesh screen to remove large, uncomposted chunks, then spread a thin 1/4-inch layer over your turfgrass or around the drip line of perennial flowers and shrubs.
Pro Tip: Always let your compost 'cure' for 2 to 4 weeks after it finishes its active heating phase. Curing allows the pH to stabilize and ensures that any remaining organic acids break down, preventing potential root burn on delicate seedlings and transplants.
By mastering the balance of carbon and nitrogen, monitoring moisture, and turning your pile regularly, you transform everyday household and garden waste into the most powerful, biologically active soil amendment available. Your plants, your soil food web, and your wallet will reap the benefits for seasons to come.

