
How to Balance Carbon and Nitrogen for Perfect Compost
The Science of Soil Health: Why the C:N Ratio Matters
When we talk about building thriving, resilient gardens, the conversation must always begin beneath the surface. The foundation of any productive landscape is its soil, and the most effective way to regenerate depleted earth is through the application of high-quality compost. However, not all compost is created equal. The secret to producing nutrient-dense, biologically active compost lies in understanding the dietary needs of the microscopic organisms that drive the decomposition process. These bacteria, fungi, and actinomycetes require a precise balance of two primary elements: carbon and nitrogen.
According to the USDA Natural Resources Conservation Service, soil health is defined as the continued capacity of soil to function as a vital living ecosystem that sustains plants, animals, and humans. By feeding the soil food web with properly balanced compost, you introduce billions of beneficial microbes that suppress plant diseases, improve soil structure, and unlock bound nutrients. If your compost pile is lacking in either carbon or nitrogen, the microbial engine stalls, resulting in a slow, smelly, or biologically dead end product.
Understanding Carbon (Browns) and Nitrogen (Greens)
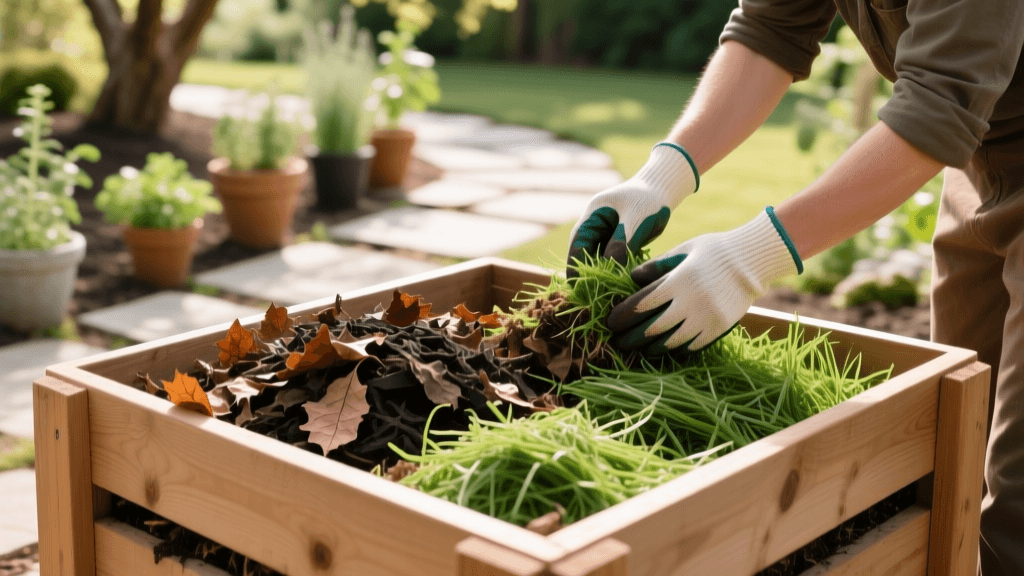
In the composting world, carbon-rich materials are universally referred to as "browns," while nitrogen-rich materials are called "greens." Understanding the distinct role each plays is crucial for soil health.
Carbon (The Browns)
Carbon provides the energy and basic building blocks for microbial life. It is the carbohydrate source that fuels the intense metabolic activity required to break down organic matter. Carbon materials are typically dry, woody, and brown in color. They also provide essential bulk and aeration to the pile, preventing compaction and allowing oxygen to reach aerobic microbes. Without sufficient carbon, your pile will become a slimy, anaerobic mess.
Nitrogen (The Greens)
Nitrogen is the protein source that microbes use to grow, reproduce, and build cellular structures. Nitrogen materials are usually moist, fresh, and brightly colored or green. While they are the catalyst for rapid decomposition, adding too much nitrogen leads to a rapid release of ammonia gas, which not only creates a foul odor but also robs your finished compost of valuable nutrients.
The Golden Ratio: 30:1 Explained
The ideal target for a hot, fast-acting compost pile is a Carbon-to-Nitrogen (C:N) ratio of roughly 30:1 by weight. This means 30 parts carbon for every 1 part nitrogen. The Environmental Protection Agency (EPA) notes that maintaining this balance is the single most important factor in achieving optimal decomposition temperatures, which should ideally range between 130°F and 160°F. At these temperatures, weed seeds and harmful pathogens are effectively destroyed, leaving behind a safe, crumbly humus that is perfect for garden integration.
Because measuring exact weights of varied organic materials is impractical for the home gardener, experts recommend using a volumetric approach. A general rule of thumb is to mix two to three parts browns to one part greens by volume. However, knowing the specific C:N ratios of your ingredients will help you fine-tune your recipe for explosive results.
Comprehensive C:N Ratio Ingredient Chart
Use the table below to guide your ingredient selection. Keep in mind that materials like wood chips take much longer to break down and are best used as a bulking agent or in long-term fungal compost piles, whereas materials like coffee grounds act as rapid accelerators.
| Material | Approximate C:N Ratio | Category | Preparation Tip |
|---|---|---|---|
| Wood Chips | 400:1 | Brown | Shred finely; use sparingly in hot piles |
| Dried Autumn Leaves | 60:1 | Brown | Shred with a mower to prevent matting |
| Straw / Hay | 75:1 | Brown | Moisten thoroughly before layering |
| Corrugated Cardboard | 350:1 | Brown | Remove tape; tear into 2-inch pieces |
| Coffee Grounds | 20:1 | Green | Excellent accelerator; mix well with browns |
| Fresh Grass Clippings | 15:1 | Green | Apply in thin layers to avoid anaerobic clumping |
| Vegetable Kitchen Scraps | 25:1 | Green | Chop into small pieces to increase surface area |
| Herbivore Manure (Cow/Horse) | 20:1 | Green | Ensure it is from herbivores only; no meat/dairy |
Step-by-Step Guide to Building a Balanced Pile
To harness the full power of the soil food web, you need to create an environment where thermophilic (heat-loving) bacteria can thrive. Follow these actionable steps to build a perfectly balanced compost pile:
- Size it Right: Your pile must be at least 3 feet wide, 3 feet long, and 3 feet tall (1 cubic yard). This critical mass is required to insulate the core and retain the heat generated by microbial respiration.
- The Lasagna Method: Start with a 4-inch base layer of coarse twigs or straw for bottom drainage and aeration. Alternate 6-inch layers of browns with 2-inch layers of greens. Water each layer lightly as you build.
- The Sponge Test: Moisture is the transport medium for microbial nutrients. Your pile should feel like a wrung-out sponge (about 40-60% moisture). If water drips when you squeeze a handful, it is too wet; add dry shredded leaves. If it crumbles and falls apart, it is too dry; add water or fresh grass clippings.
- Aeration Schedule: Oxygen is the final piece of the puzzle. Use a tool like a Fiskars compost aerator or a pitchfork to turn the pile every 3 to 4 days during the first two weeks. This introduces oxygen, redistributes heat, and ensures all materials are exposed to the hot core.
- Monitor Temperatures: Invest in a long-stem compost thermometer. When the core drops below 110°F after turning, the active hot phase is complete, and the pile will enter the curing phase, where mesophilic organisms and fungi take over to stabilize the humus.
Troubleshooting Common Compost Imbalances
Even experienced gardeners encounter compost hiccups. Here is how to diagnose and fix the most common C:N imbalances:
- Symptom: The pile smells strongly of ammonia or rotting garbage.
Diagnosis: Too much nitrogen (low C:N ratio).
Solution: Immediately incorporate high-carbon bulking agents like dry straw, shredded newspaper, or sawdust. Turn the pile aggressively to release trapped gases and restore aerobic conditions. - Symptom: The pile is cold, dry, and decomposition has stalled.
Diagnosis: Too much carbon (high C:N ratio) or lack of moisture.
Solution: Add nitrogen-rich activators. You can use fresh grass clippings, liquid kelp, or a commercial organic starter like Jobe's Organics Compost Starter. Water the pile thoroughly while turning. - Symptom: The pile is damp and warm but not reaching high temperatures.
Diagnosis: Pile volume is too small, or ingredients are too coarse.
Solution: Add more material to reach the 1-cubic-yard threshold, or run your materials through a wood chipper to increase the surface area for microbial attack.
Integrating Finished Compost into Your Garden
Once your compost is dark, crumbly, and smells like a forest floor after a heavy rainstorm, it is ready to bridge the gap between your backyard composting efforts and your garden's productivity. According to research highlighted by Cornell University's Waste Management Institute, applying finished compost drastically improves soil cation exchange capacity (CEC). This allows your soil to hold onto essential nutrients like calcium, magnesium, and potassium for longer periods, preventing them from leaching away during heavy rains.
For new garden beds, incorporate 2 to 3 inches of compost into the top 6 inches of native soil using a broadfork or a gentle garden tiller. This creates a rich, loamy transition zone that encourages deep root penetration. For established lawns and perennial beds, use a technique called top-dressing: spread a 1/4-inch layer of finely sifted compost over the surface after core aeration. This not only feeds the soil biology but also improves water retention and reduces the need for synthetic fertilizers.
For an immediate foliar and soil drench boost, consider brewing Aerated Compost Tea (ACT). By placing a few cups of finished compost in a mesh bag, submerging it in a 5-gallon bucket of dechlorinated water, and using an Active Aqua air pump to oxygenate the mixture for 24 hours, you can multiply the beneficial microbial population exponentially. Adding a tablespoon of unsulfured blackstrap molasses provides a quick carbohydrate food source for the bacteria, resulting in a liquid superfood that can be applied directly to plant leaves to outcompete airborne pathogens. By mastering the carbon-to-nitrogen ratio, you are not just disposing of yard waste; you are actively manufacturing the most powerful, life-giving soil amendment available to the modern home gardener.

