Pest Control
Before And After: Transforming A Grub-Damaged Lawn
Introduction: The Heartbreak of a Ruined Lawn
There are few sights more heartbreaking for a dedicated homeowner than stepping out on a crisp autumn morning to discover that their once-lush, emerald-green lawn has been reduced to a patchy, brown wasteland. If the turf feels spongy underfoot and rolls back like a freshly unrolled carpet, you are likely the victim of a severe white grub infestation. White grubs—the larval stage of beetles such as the Japanese beetle, June bug, and European chafer—feed voraciously on grass roots, severing the plant's connection to water and nutrients. But a grub-destroyed lawn is not a lost cause. Through a strategic, multi-phase Integrated Pest Management (IPM) approach, you can orchestrate a stunning before-and-after transformation. This guide walks you through the exact steps, products, and timelines required to eradicate the pests, renovate the soil, and cultivate a thick, resilient turf.
The Before Scenario: Assessing the Damage
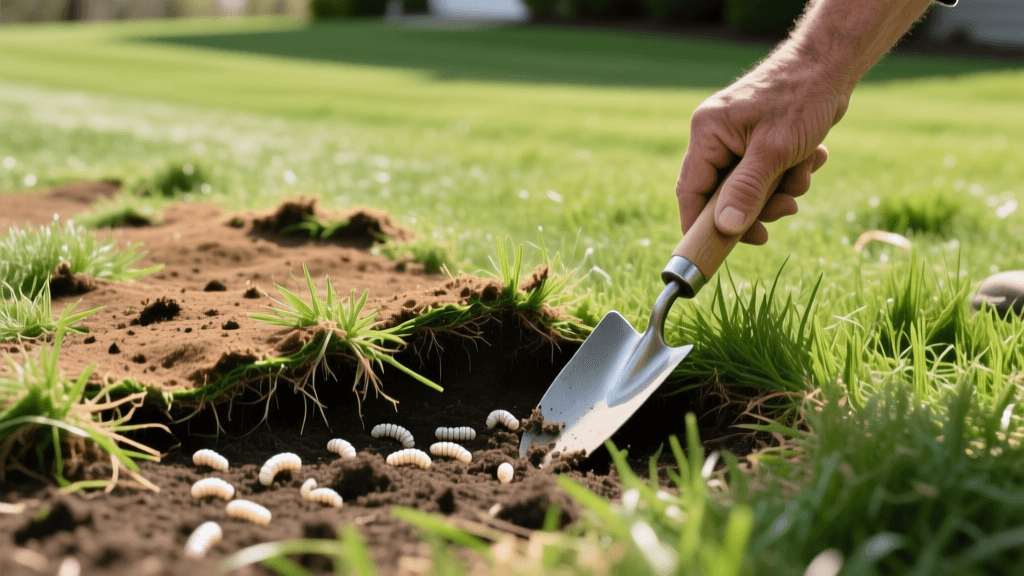
Before initiating any treatment, you must confirm that grubs are the culprits. Damage often mimics drought stress or fungal diseases, but the telltale signs of a grub infestation are distinct. You will notice irregular brown patches that expand rapidly in late summer and early fall. Furthermore, secondary pests such as skunks, raccoons, and crows may tear up your lawn in search of the protein-rich grubs hiding beneath the soil surface.
To confirm the presence of grubs, use a flat-edged shovel to cut a one-foot square section of turf about two inches deep and peel it back. Count the number of C-shaped, milky-white larvae with brown heads. According to turfgrass entomologists at Rutgers University, a healthy lawn can tolerate a few grubs, but treatment is strictly warranted when populations exceed the threshold of eight to ten grubs per square foot. If your before photos reveal a lawn meeting or exceeding this threshold, immediate curative action is required.
Phase 1: Curative Eradication (Weeks 1-2)
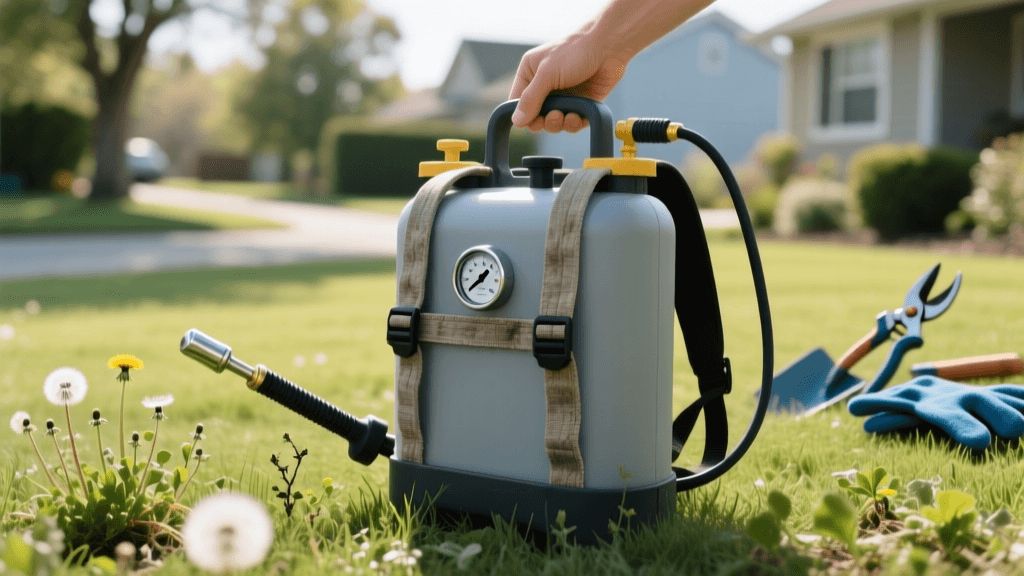
The first step in your lawn's transformation is eliminating the active grub population. Because the grubs are mature and feeding aggressively in the fall, preventative products will no longer work. You need a fast-acting curative insecticide.
Product Selection and Application
The most effective curative active ingredient is Trichlorfon (commonly sold under brand names like Bayer Advanced 24 Hour Grub Killer Plus or Dylox). Trichlorfon penetrates the soil quickly and begins killing grubs within 24 hours.
- Application Rate: Apply 1.5 to 3 pounds of granular Trichlorfon per 1,000 square feet, depending on the severity of the infestation and the specific product label instructions.
- Timing: Apply in the late afternoon or early evening to avoid rapid UV degradation.
- Watering: This step is non-negotiable. You must water the lawn immediately after application with at least 0.5 inches of water to move the chemical into the root zone where the grubs are feeding.
- Cost Estimate: A 30-pound bag typically costs between $60 and $80, sufficient to treat a 10,000-square-foot lawn.
Safety Note: Always wear protective gear, keep pets and children off the lawn until the treatment has been watered in and the surface is completely dry, and follow all EPA Integrated Pest Management guidelines regarding safe pesticide handling.
Phase 2: Soil Preparation and Debris Removal (Weeks 3-4)
Once the grubs have been eradicated, the before stage of your lawn will look its worst. The dead, rootless grass must be removed to make way for new growth.
Dethatching and Raking
Use a heavy-duty metal leaf rake or a power dethatcher to aggressively rake out the dead turf, thatch, and loose soil. This process, known as scarification, opens up the soil surface, ensuring that new grass seed will make direct contact with the dirt—a critical requirement for germination.
Core Aeration
Grub damage and the subsequent animal digging often leave the soil severely compacted. Renting a core aerator (approximately $80 to $100 per day) allows you to pull 2-to-3-inch soil plugs from the ground. This relieves compaction, improves water infiltration, and creates perfect micro-environments for grass seed to settle into. Leave the soil plugs on the lawn; they will break down and act as a natural topdressing over the next few weeks.
Phase 3: The After Reveal - Overseeding (Weeks 4-8)
With the pests gone and the soil prepped, it is time to rebuild the turf. The secret to a dramatic after transformation lies in selecting the right seed and providing optimal germination conditions.
Choosing Pest-Resistant Seed
Opt for Turf-Type Tall Fescue blends that contain endophytes—naturally occurring, beneficial fungi that live within the grass plant. Endophyte-enhanced grasses produce alkaloids that deter surface-feeding insects and improve the plant's overall drought and stress tolerance. Brands like Jonathan Green Black Beauty or Pennington Smart Seed are excellent choices.
- Seeding Rate: Apply 8 to 10 pounds of tall fescue seed per 1,000 square feet for a complete renovation overseeding.
- Starter Fertilizer: Apply a high-phosphorus starter fertilizer (e.g., an NPK ratio of 10-18-10) at the time of seeding to promote rapid root development.
- Watering Schedule: Water lightly 2 to 3 times a day for the first 14 to 21 days to keep the top inch of soil consistently moist. Once the seed germinates and reaches 2 inches, transition to deep, infrequent watering.
Phase 4: Long-Term IPM Prevention (The Following Spring)
To ensure your after lawn remains pristine, you must implement a preventative strategy the following year. Relying solely on chemical curatives year after year is not a sustainable IPM strategy.
Preventative Chemical Control
In late May or early June of the following year, apply a preventative grub control product containing Chlorantraniliprole (e.g., Scotts GrubEx). This active ingredient is highly targeted, has a low toxicity profile for bees and mammals, and provides season-long control by stopping newly hatched grubs before they can damage roots.
Biological Control: Beneficial Nematodes
For an entirely organic approach, incorporate beneficial nematodes into your fall lawn care routine. Specifically, the species Heterorhabditis bacteriophora (Hb) is highly effective at hunting and destroying white grubs in the soil. According to research from Penn State Extension, these microscopic worms actively seek out grub larvae, enter their bodies, and release bacteria that kill the pest within 48 hours. Apply nematodes in the late afternoon when soil temperatures are between 60°F and 85°F, and water them in immediately to protect them from UV light and desiccation.
Before and After Transformation: Timeline and Cost Breakdown
The journey from a grub-destroyed yard to a lush, green oasis requires patience, physical labor, and a modest financial investment. Below is a structured breakdown of what to expect during a 5,000-square-foot lawn renovation.
| Project Phase | Action Items | Estimated Cost (5,000 sq ft) | Visual Result |
|---|---|---|---|
| Phase 1: Eradication | Trichlorfon application, heavy watering | $40 - $50 | Dead brown patches, spongy soil, pest activity halted. |
| Phase 2: Soil Prep | Power raking, core aeration, debris removal | $90 - $120 (Equipment rental) | Bare dirt exposed, soil plugs on surface, highly textured seedbed. |
| Phase 3: Overseeding | Tall fescue seed, starter fertilizer, straw mulch | $150 - $200 | Seed visible on soil, green sprouts emerging by week 3. |
| Phase 4: Maintenance | Frequent light watering, first mow at 3 inches | $20 - $40 (Water bill increase) | Thick, dark green turf, deep root system, uniform canopy. |
| Total Estimated Cost | Complete DIY Renovation | $300 - $410 | Complete Before and After Transformation |
Conclusion: Enjoying the Results
Transforming a grub-damaged lawn is one of the most rewarding projects a homeowner can undertake. By accurately identifying the pest, applying the correct curative treatments, and following up with rigorous soil preparation and endophyte-enhanced overseeding, you can completely erase the initial damage. Embracing an Integrated Pest Management mindset—notably by incorporating preventative treatments and biological controls like beneficial nematodes—ensures that your beautiful new lawn remains resilient, vibrant, and pest-free for years to come.