Pest Control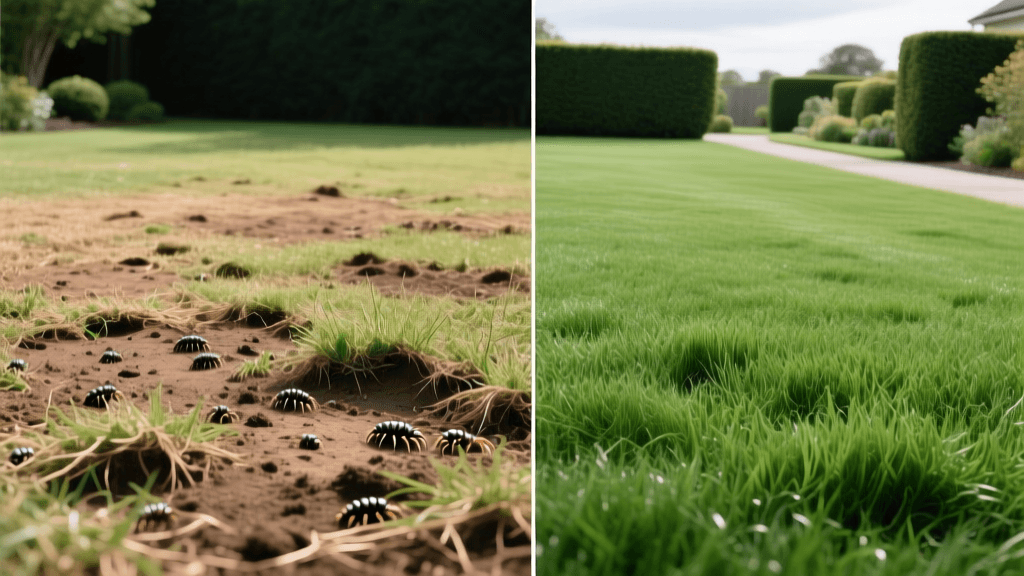
Before and After: Transforming a Grub-Destroyed Lawn
Every homeowner dreads the morning walk across their yard, only to find that their once-pristine turf has been turned into a patchy, brown wasteland. If your lawn feels spongy underfoot, peels back like loose carpet, or has become a late-night buffet for skunks and raccoons, you are likely dealing with a severe white grub infestation. White grubs—the larval stage of Japanese beetles, June bugs, and European chafers—feed voraciously on grassroots, severing the plant from its water and nutrient supply.
But a grub-destroyed lawn is not a lost cause. Through integrated pest management (IPM), targeted curative treatments, and strategic turf renovation, you can achieve a stunning before and after transformation. This guide walks you through the exact steps, products, measurements, and timelines required to eradicate grubs and restore your lawn to thick, vibrant health.
The 'Before' State: Recognizing Grub Devastation
Before you can transform your lawn, you must understand the extent of the damage. In the 'before' stage of a grub infestation, the visual cues are unmistakable yet often misdiagnosed as drought stress or fungal disease by untrained eyes.
- Spongy Turf: Walking on the lawn feels like stepping on a thick sponge or a newly laid rug. The soil structure beneath the grass has been hollowed out by feeding larvae.
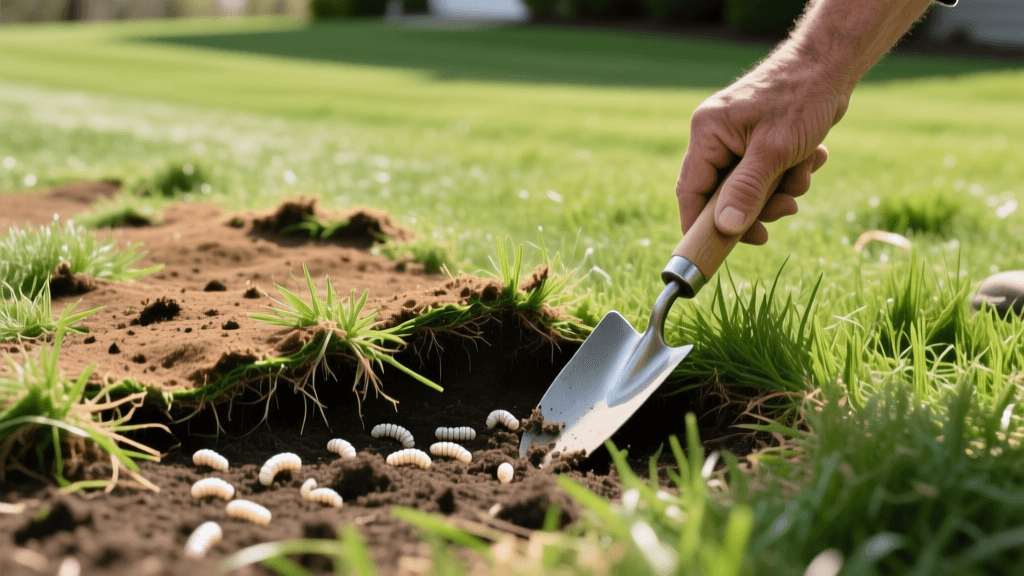
- The Carpet Peel Test: Because grubs sever the roots, the turf loses its anchor to the soil. You can often grab a handful of dead grass and peel it back effortlessly, exposing the bare soil and the C-shaped, white larvae underneath.
- Secondary Pest Damage: The 'before' picture often includes irregular digging. Skunks, raccoons, and armadillos will tear up your yard in shallow craters to feast on the protein-rich grubs, causing more physical damage than the insects themselves.
- Irregular Brown Patches: Unlike the circular rings of brown patch fungus, grub damage appears as irregular, expanding brown areas that merge as the larvae spread outward from their hatching sites.
Diagnosing the Damage: Confirming the Culprit
According to the University of California Integrated Pest Management program, treating for grubs without confirming their presence is a waste of time, money, and environmental resources. You must quantify the population before taking action.
The Soap Flush: Mix 2 tablespoons of liquid dish soap with 1 gallon of water. Drench a 1-square-foot area of the lawn's damaged edge. Wait 10 minutes. The soapy water irritates the grubs, forcing them to the surface for easy counting.
The Spade Test: Use a flat spade to cut three sides of a 1-foot square, about 3 inches deep. Peel back the turf and count the grubs in the soil and on the roots.
The Threshold: If you count fewer than 5 grubs per square foot, your lawn can likely outgrow the damage with proper watering and fertilization. If you find 10 or more grubs per square foot, immediate curative action is required to save the remaining turf.
The Turning Point: Choosing Your Eradication Strategy
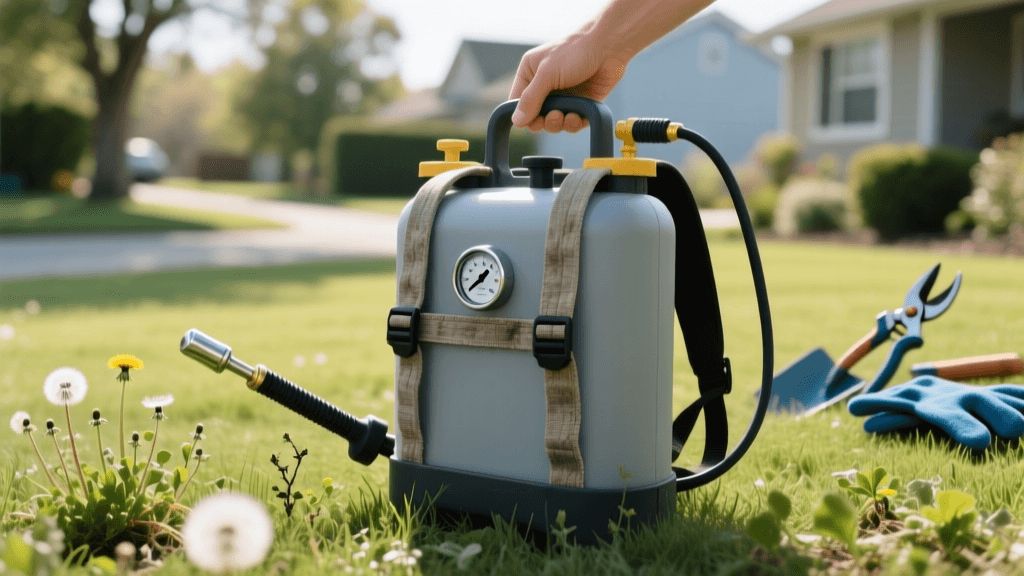
To achieve a true 'after' transformation, you must eliminate the active population. Your choice of treatment depends on the time of year, your budget, and your environmental preferences.
Curative Chemical Treatments (Late Summer to Early Fall)
When grubs are large and actively destroying roots in late summer, you need a fast-acting curative insecticide. The gold standard is Trichlorfon (commonly sold under the brand name Dylox).
- Application Rate: Apply at a rate of 2 to 3 lbs per 1,000 square feet using a broadcast spreader.
- Watering: Trichlorfon degrades rapidly in sunlight and thick thatch. You must water it in immediately with at least 0.5 inches of irrigation to push the chemical into the root zone.
- Speed of Results: Grubs will stop feeding within 24 hours and die within 3 to 5 days.
- Estimated Cost: Approximately $20 for a 10-lb bag, which covers up to 4,000 square feet.
Preventative Chemical Treatments (Spring to Early Summer)
If you are planning ahead for next year's 'after' picture, preventative grubicides are highly effective. Active ingredients like Imidacloprid or Chlorantraniliprole are applied in June or July.
- Mechanism: These systemic chemicals are absorbed by the grassroots. When young, newly hatched grubs bite the roots in August, they ingest the toxin and die before causing visible surface damage.
- Estimated Cost: Around $35 to $50 per 10,000 square feet.
Organic and Biological Controls
For eco-conscious homeowners, beneficial nematodes (Heterorhabditis bacteriophora) offer a powerful organic transformation. As detailed by University of Kentucky Entomology, these microscopic worms seek out grubs, enter their bodies, and release bacteria that kill the host within 48 hours.
- Application Rate: Apply roughly 1 billion nematodes per acre (about 23,000 per square foot) using a hose-end sprayer.
- Crucial Step: Nematodes are living organisms. The soil must remain consistently moist for two weeks post-application, or they will desiccate and die.
- Estimated Cost: $30 to $45 per million nematodes (enough for roughly 3,000 square feet).
Another organic option is Milky Spore (Paenibacillus popilliae). While it specifically targets Japanese beetle grubs, it takes 2 to 5 years to fully establish in the soil. It is a long-term investment rather than a quick curative fix, costing about $40 to treat 1,000 square feet.
Treatment Comparison Chart
| Treatment Type | Active Ingredient | Application Timing | Speed of Kill | Cost per 1,000 sq ft |
|---|---|---|---|---|
| Curative Chemical | Trichlorfon (Dylox) | Late Summer / Early Fall | 3 to 5 Days | $0.05 - $0.08 |
| Preventative Chemical | Imidacloprid (Merit) | Late Spring / Early Summer | Preventative (Weeks) | $0.03 - $0.05 |
| Biological Control | Hb Nematodes | Late Summer / Early Fall | 2 to 4 Days | $0.10 - $0.15 |
| Long-Term Organic | Milky Spore | Spring or Fall | 1 to 3 Years | $0.40 - $0.60 |
Safety and Environmental Considerations
When applying any chemical curative or preventative, always follow the Environmental Protection Agency guidelines for safe pest control. Wear appropriate personal protective equipment (PPE) such as gloves and long sleeves. Avoid application before heavy rainstorms to prevent watershed runoff, and keep pets and children off the lawn until the treatment has fully dried or been watered into the soil profile.
The 'After' Transformation: Rebuilding the Turf
Killing the grubs is only half the battle. The 'after' picture requires active turf renovation to fill in the scars left behind by the insects and the animals that hunted them.
Step 1: Core Aeration. Grub-damaged soil is often compacted from animal traffic and heavy footfall during treatment. Rent a core aerator and make two passes over the lawn in perpendicular directions. This pulls 3-inch soil plugs, creating pockets for seed, water, and oxygen.
Step 2: Overseeding. Choose a grass seed that matches your existing lawn and regional climate. For cool-season lawns (Tall Fescue or Kentucky Bluegrass), apply seed at a rate of 5 to 8 lbs per 1,000 square feet. Rake the seed lightly into the aeration holes to ensure soil contact.
Step 3: Starter Fertilizer. New seedlings need phosphorus for rapid root development. Apply a starter fertilizer (e.g., a 10-18-10 NPK ratio) at a rate of 4 lbs per 1,000 square feet immediately after seeding.
Step 4: Moisture Management. Water the newly seeded areas lightly 2 to 3 times a day for the first 14 days. The top inch of soil must never dry out, or the germination process will halt and the seed will die.
Timeline of a Grub Lawn Transformation
- Day 1: Confirm grub threshold (>10 per sq ft). Apply curative Trichlorfon or nematodes. Water in heavily with 0.5 inches of water.
- Day 5: Grub population is eradicated. Animal digging ceases as the food source is gone.
- Day 7: Rake out dead, detached turf. Bag and remove the debris to expose the soil for renovation.
- Day 10: Core aerate the entire lawn. Overseed and apply starter fertilizer.
- Day 14-21: Grass seed germinates. The 'after' picture begins to show a vibrant green fuzz over the bare soil.
- Day 45: New grass reaches 3 inches. Mow for the first time at a height of 2.5 to 3 inches to encourage lateral spreading.
- Month 6: The lawn is fully knit together, thick, and resilient, completely erasing the memory of the 'before' state.
Conclusion
A grub-destroyed lawn is a temporary setback, not a permanent disaster. By accurately diagnosing the infestation, deploying the right curative or organic treatment, and committing to a rigorous overseeding and aeration protocol, your lawn's 'after' state will be thicker and more resilient than it was before the invasion. Patience, precise measurements, and proper timing are the keys to a flawless turf transformation.