
Gardening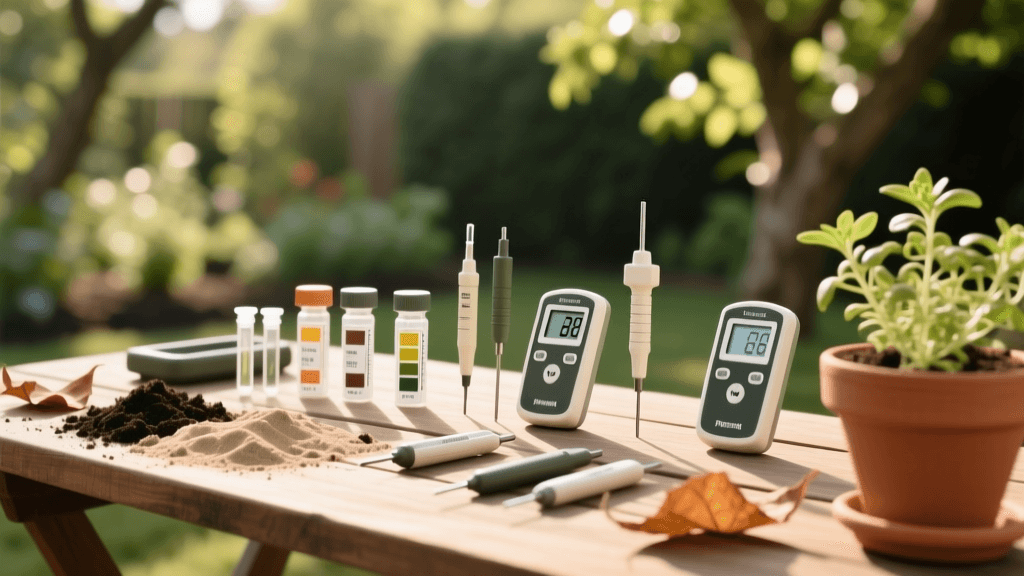
Best Soil Test Kits and pH Meters for Home Gardens
The Foundation of a Thriving Garden: Why Soil Testing Matters
Every thriving vegetable patch, vibrant flower bed, and productive orchard shares a common, often overlooked foundation: healthy, nutrient-rich soil. Yet, countless home gardeners spend hundreds of dollars each season on premium fertilizers, organic composts, and synthetic amendments without ever testing their soil first. The modern tools and equipment approach to gardening dictates that precision must always beat guesswork. Just as a master carpenter relies on a laser level and a calibrated tape measure, a serious gardener must rely on accurate soil testing equipment to make informed, data-driven decisions.
Blindly applying fertilizers can lead to nutrient lockout, environmental runoff, and stunted plant growth. By investing in reliable soil test kits and digital pH meters, you can uncover the exact chemical makeup of your garden beds. This allows you to tailor your amendment strategy, save money on unnecessary products, and create the optimal environment for your specific crops. Whether you are preparing a new raised bed for tomatoes or trying to diagnose yellowing leaves on your hydrangeas, understanding your soil chemistry is the critical first step.
The Hidden Chemistry: Understanding Soil pH and Nutrient Uptake
Soil pH is widely considered the master variable in garden ecology. It is a logarithmic scale that measures the acidity or alkalinity of your soil, ranging from 0 to 14, with 7 being neutral. Most common garden vegetables and annual flowers thrive in a slightly acidic to neutral range, typically between 6.0 and 7.0. When soil falls outside of this Goldilocks zone, essential macronutrients like nitrogen, phosphorus, and potassium, as well as crucial micronutrients like iron and manganese, become chemically bound to soil particles and unavailable to plant roots.
For example, in highly alkaline soils (pH above 7.5), iron becomes locked up, leading to severe interveinal chlorosis (yellowing leaves with green veins) in acid-loving plants like blueberries and azaleas. Conversely, in highly acidic soils (pH below 5.5), toxic levels of aluminum and manganese can be released, poisoning plant root systems. According to the University of Minnesota Extension, testing your soil every two to three years is critical for maintaining optimal fertility and preventing these invisible chemical imbalances before they manifest as physical plant damage.
Comparing Soil Testing Equipment: Kits, Meters, and Labs
When shopping for soil testing tools, you will generally encounter three distinct categories. Each serves a different purpose depending on your budget, required accuracy, and gardening scale. Below is a structured comparison to help you choose the right equipment for your needs.
| Tool Type | Accuracy Level | Average Cost | Best Use Case |
|---|---|---|---|
| Chemical Dye Kits | Moderate | $15 - $35 | Quick seasonal N-P-K and pH checks |
| Digital pH Meters | High (pH only) | $40 - $150 | Frequent monitoring, container gardening |
| Mail-in Lab Tests | Very High | $20 - $50 | Comprehensive baseline testing and CEC |
Top Soil Testing Tools for Home Gardeners Reviewed
1. Luster Leaf Rapitest Soil Test Kit (Best Chemical Kit)
For decades, the Luster Leaf Rapitest has been a staple in garden sheds across the country. This analog, chemical-based kit uses color-coded capsules and a simple water-extraction method to test for Nitrogen (N), Phosphorus (P), Potassium (K), and pH. To use it, you mix a soil sample with water, add the powder from a color-coded capsule, and compare the resulting liquid color against a built-in chart.
While it will not give you exact parts-per-million (PPM) readings, it provides a highly reliable general overview of your soil's nutrient status. It is an excellent, cost-effective tool for mid-season checks to see if your heavy-feeding crops like corn or squash are depleting the soil. The kit includes 40 individual tests, making it incredibly economical for gardeners managing multiple raised beds or container gardens.
2. Bluelab pH Pen (Best Digital Meter)
If you require precise, on-the-spot pH readings, the Bluelab pH Pen is the gold standard for both commercial growers and dedicated home gardeners. Unlike cheap, probe-style meters that degrade quickly and offer questionable accuracy, the Bluelab features a high-quality, replaceable double-junction glass probe. It also includes automatic temperature compensation (ATC), ensuring your readings remain accurate regardless of the soil or water temperature.
Owning a digital pH pen requires a commitment to maintenance. You must store the probe in a specific KCl (potassium chloride) storage solution and calibrate it regularly using pH 4.0 and 7.0 buffer fluids. However, for gardeners managing hydroponic systems, crafting custom potting mixes, or carefully adjusting the acidity of a blueberry patch, the precision and repeatability of the Bluelab pen are unmatched in the consumer market.
3. Mail-In Laboratory Testing (Best for Comprehensive Data)
While at-home tools are fantastic for monitoring, nothing replaces the analytical power of a professional soil laboratory. Mail-in kits from university extensions or private agronomic labs utilize advanced extraction methods (such as Mehlich-3 or SMP buffer testing) to measure exact nutrient levels, organic matter percentages, and Cation Exchange Capacity (CEC). The UMass Amherst Extension Soil and Plant Nutrient Testing Laboratory is a premier example, offering detailed reports that include customized lime and fertilizer recommendations based on the specific crops you intend to grow.
Every serious gardener should utilize a mail-in lab test at least once when establishing a new garden space, and then every three years thereafter. The data provided forms a comprehensive baseline that your at-home chemical kits and digital meters can help you monitor between professional analyses.
How to Collect a Proper Soil Sample
The most expensive laboratory test or the most advanced digital meter is entirely useless if your initial soil sample is flawed. Soil composition can vary wildly within just a few feet, so collecting a representative composite sample is crucial. Follow this step-by-step protocol to ensure accurate results:
- Use the Right Tools: Use a clean stainless steel trowel or a dedicated soil probe. Avoid galvanized steel or brass tools, as they can leach zinc or copper into the sample and skew micronutrient results.
- Determine Sampling Depth: For lawns, sample to a depth of 3 to 4 inches. For vegetable gardens and flower beds, sample to a depth of 6 to 8 inches, which represents the primary root zone of most annual crops.
- Use a Zig-Zag Pattern: Walk your garden bed in a zig-zag or W pattern. Take 5 to 10 individual core samples from different areas of the bed to account for natural micro-variations in the soil.
- Mix in a Plastic Bucket: Place all the cores into a clean plastic bucket. Break up the clods and mix the soil thoroughly. Never use a galvanized metal bucket, as it can contaminate the sample.
- Avoid Anomalies: Do not sample right next to compost piles, freshly limed pathways, or areas where fertilizer was recently spilled, as these will create false hot-spots in your data.
- Air Dry the Soil: Spread the mixed soil on a piece of newspaper or a paper towel in a shaded, well-ventilated area to air dry before mailing it to a lab or testing it with your home kit. Never bake the soil in an oven, as high heat will destroy organic matter and alter nitrogen readings.
Interpreting Results and Amending Your Soil
Once you have your test results, the real work begins. If your pH is too low (acidic), you will need to apply agricultural lime. Pelletized lime is easier to spread and less dusty than powdered lime, but both will effectively raise the pH over the course of several months. If your pH is too high (alkaline), elemental sulfur or acidifying fertilizers like ammonium sulfate are required to bring the numbers down.
Pro Tip: Always apply pH-altering amendments in the fall. It takes time for lime and sulfur to react with the soil matrix and alter the chemical profile. By applying them in autumn, you ensure the soil is perfectly balanced and ready for spring planting.
For nutrient deficiencies, rely on targeted organic amendments. Blood meal or feather meal provides a slow-release source of nitrogen; bone meal or rock phosphate addresses phosphorus shortages; and greensand or kelp meal can replenish potassium and trace minerals. By combining the precision of modern soil testing equipment with the power of organic amendments, you transition from a passive observer to an active manager of your garden's ecosystem, guaranteeing healthier plants, higher yields, and a more resilient landscape for years to come.

