Lawn Care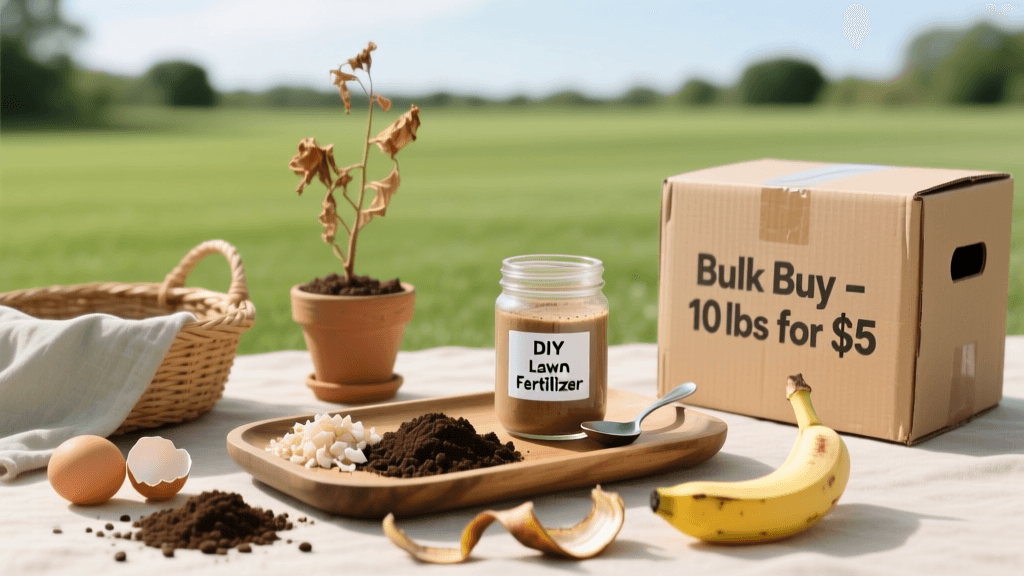
Budget DIY Lawn Fertilizer: Organic Recipes and Hacks
The True Cost of Commercial Lawn Fertilizers
Maintaining a lush, vibrant lawn often feels like a bottomless financial pit. Between hiring professional lawn care services and purchasing premium, branded bags of synthetic fertilizers, homeowners can easily spend hundreds of dollars every single growing season. However, achieving a thick, emerald-green lawn does not require an enormous budget. By shifting your perspective toward budget-friendly DIY solutions, you can leverage household items, bulk organic materials, and natural lawn care practices to nourish your soil for pennies on the dollar.
Commercial fertilizers are heavily marked up for packaging, marketing, and distribution. When you break down the actual chemical compounds—nitrogen, phosphorus, potassium, and essential micronutrients—you will find that many of these elements are readily available in your pantry, garden shed, or local farm supply store. In this comprehensive guide, we will explore actionable, low-cost DIY lawn fertilizer recipes, compare their true costs against store-bought alternatives, and reveal the ultimate free fertilizer hiding right under your feet.
Step One: Test Before You Invest
Before you mix a single batch of DIY fertilizer or buy bulk amendments, you must understand what your soil actually needs. Applying nitrogen to a lawn that is already saturated but deficient in potassium is a waste of time and money. While professional lab tests can cost upwards of $30 to $50, you can perform basic DIY soil tests at home or utilize low-cost university extension services.
For a virtually free DIY pH test, take a handful of soil from your lawn and split it into two containers. Add half a cup of white vinegar to one container; if it fizzes, your soil is alkaline (high pH). Mix the other container with water and half a cup of baking soda; if it fizzes, your soil is acidic (low pH). If neither fizzes, you likely have a neutral pH, which is ideal for most turfgrasses. For precise N-P-K (Nitrogen-Phosphorus-Potassium) readings, look into your local university cooperative extension office, which often offers mail-in soil testing for under $15.
Top 3 Budget-Friendly DIY Lawn Fertilizer Recipes
Once you know your soil's baseline, it is time to feed it. Here are three highly effective, ultra-cheap DIY fertilizer recipes that target different aspects of turf health.
1. The Epsom Salt and Household Ammonia Green-Up
If your lawn is looking pale or yellowish in the middle of the growing season, it likely needs a quick hit of nitrogen and magnesium. Household ammonia (ammonium hydroxide) is an incredibly cheap, fast-acting source of nitrogen, while Epsom salt (magnesium sulfate) provides magnesium, which is vital for chlorophyll production and photosynthesis.
- Ingredients: 1 cup of Epsom salt, 1 cup of standard household ammonia (not sudsy or scented), and 1 gallon of warm water.
- Instructions: Dissolve the Epsom salt in the warm water first, then stir in the ammonia. Pour this mixture into a hose-end sprayer.
- Application: Spray evenly over 1,000 square feet of lawn. The warm water helps dissolve the salts, and the hose-end sprayer ensures even distribution without burning the grass blades. Apply in the early morning or late evening to prevent rapid evaporation.
2. Aerated Compost Tea for Soil Biology
Synthetic fertilizers feed the plant directly, but they often ignore the complex web of soil microbes required for long-term health. Compost tea inoculates your soil with beneficial bacteria and fungi while providing a gentle, slow-release dose of nutrients.
- Ingredients: 5 gallons of rainwater or dechlorinated tap water (let tap water sit for 24 hours to off-gas chlorine), 2 cups of high-quality organic compost, and 1 tablespoon of unsulfured blackstrap molasses.
- Instructions: Place the compost in a porous bag (like an old cotton t-shirt or pantyhose) and suspend it in the water. Add the molasses, which serves as a food source for the microbes. Use a cheap aquarium air pump to aerate the mixture for 24 to 48 hours.
- Application: Dilute the finished tea at a 1:3 ratio with plain water and apply it to your lawn using a watering can or pump sprayer. This recipe covers approximately 500 to 1,000 square feet and costs less than $2 to brew.
3. Coffee Grounds and Wood Ash Booster
Don't throw away your morning coffee grounds or the ashes from your winter fireplace. Coffee grounds are rich in slow-release nitrogen, while untreated wood ash is an excellent source of potassium and calcium.
- Ingredients: Dried, used coffee grounds and sifted hardwood ash.
- Instructions: Mix two parts coffee grounds with one part wood ash. Ensure the ashes are completely cold and from untreated, unpainted wood only.
- Application: Broadcast the mixture thinly across your lawn and water it in deeply. Warning: Wood ash raises soil pH. Only use this recipe if your DIY soil test indicated an acidic lawn. Avoid using ash on lawns with a neutral or alkaline pH, as it can lock up essential nutrients.
Cost Comparison: DIY vs. Store-Bought Fertilizers
To truly understand the financial benefits of DIY lawn care, we must compare the cost per 1,000 square feet of our homemade solutions against standard commercial products. The table below outlines the estimated costs based on average national retail prices.
| Fertilizer Method | Est. Cost per 1,000 Sq Ft | Primary Nutrients | Pros | Cons |
|---|---|---|---|---|
| Commercial Synthetic (e.g., Scotts) | $12.00 - $18.00 | High N-P-K | Fast results, easy to apply | Expensive, salt buildup, runoff risk |
| DIY Ammonia & Epsom Salt | $1.50 - $2.50 | Nitrogen, Magnesium | Extremely cheap, rapid green-up | Short-lived, requires frequent reapplication |
| DIY Aerated Compost Tea | $0.50 - $1.50 | Microbes, Trace Minerals | Builds long-term soil health, organic | Requires 24hr brewing, bulky to apply |
| Bulk Milorganite (Organic) | $4.00 - $6.00 | Nitrogen, Iron | Slow-release, won't burn lawn | Strong odor, heavier to transport |
As the data clearly shows, transitioning to DIY and bulk organic methods can reduce your annual fertilization budget by up to 80 percent, allowing you to reallocate those funds toward other vital lawn care tasks like aeration or overseeding.
The Ultimate Free Fertilizer: Grasscycling
The most budget-friendly fertilizer in the world is completely free and requires zero mixing or brewing. 'Grasscycling' is the practice of leaving your grass clippings on the lawn after mowing rather than bagging them. According to the University of Minnesota Extension, grass clippings are composed of roughly 80 percent water and contain valuable nitrogen, phosphorus, and potassium. By leaving them on the lawn, you can naturally supply up to 25 percent of your turf's annual nitrogen requirements.
To grasscycle effectively, you must follow the 'one-third rule': never cut more than the top third of the grass blade in a single mowing session. This ensures the clippings are short enough to fall between the blades and decompose rapidly without forming a suffocating thatch layer. If you are mowing a tall, overgrown lawn, use a mulching mower blade to chop the clippings into fine particles, accelerating the decomposition process and returning those precious nutrients directly to the soil matrix.
Application Best Practices for Maximum ROI
Even the cheapest fertilizer is a waste of money if applied incorrectly. To maximize your return on investment, timing and technique are everything. Always apply DIY liquid fertilizers like the ammonia and Epsom salt mixture when temperatures are below 80°F (26°C). High heat combined with nitrogen salts can cause severe foliar burn, turning your grass brown and crispy.
Furthermore, always water your lawn deeply immediately after applying granular amendments like coffee grounds or bulk organic fertilizers. Watering helps wash the nutrients off the grass blades and down into the root zone where soil microbes can begin breaking them down into a plant-available form. If you are using a hose-end sprayer for liquid recipes, calibrate the dial to ensure you are not over-applying. A light, consistent application every three to four weeks is far superior to a single, heavy drenching that will simply wash away into the groundwater.
Common DIY Mistakes to Avoid
While DIY lawn care is highly rewarding, it requires a bit more attention to detail than tossing a pre-measured bag of commercial pellets. The Environmental Protection Agency (EPA) strongly advocates for natural lawn care practices to reduce chemical runoff, but warns homeowners to be mindful of nutrient loading. One of the most common DIY mistakes is over-applying household ammonia or vinegar-based weed killers, which can drastically alter your soil's pH and harm beneficial earthworm populations.
Another frequent error is using fresh, uncomposted kitchen scraps directly on the lawn. While compost tea is excellent, throwing raw banana peels or unbrewed coffee grounds directly onto the turf can attract pests, rodents, and harmful fungal diseases. Always ensure organic matter is properly composted, brewed, or dried before application. Finally, never use wood ash from charcoal briquettes, pressure-treated lumber, or painted wood, as these contain toxic heavy metals and chemical accelerants that will permanently damage your soil ecology.
By embracing these budget-friendly DIY solutions, you are not just saving money; you are actively building a more resilient, biologically diverse, and self-sustaining lawn ecosystem. With a little patience and the right household ingredients, your turf will thrive season after season without draining your wallet.