Lawn Care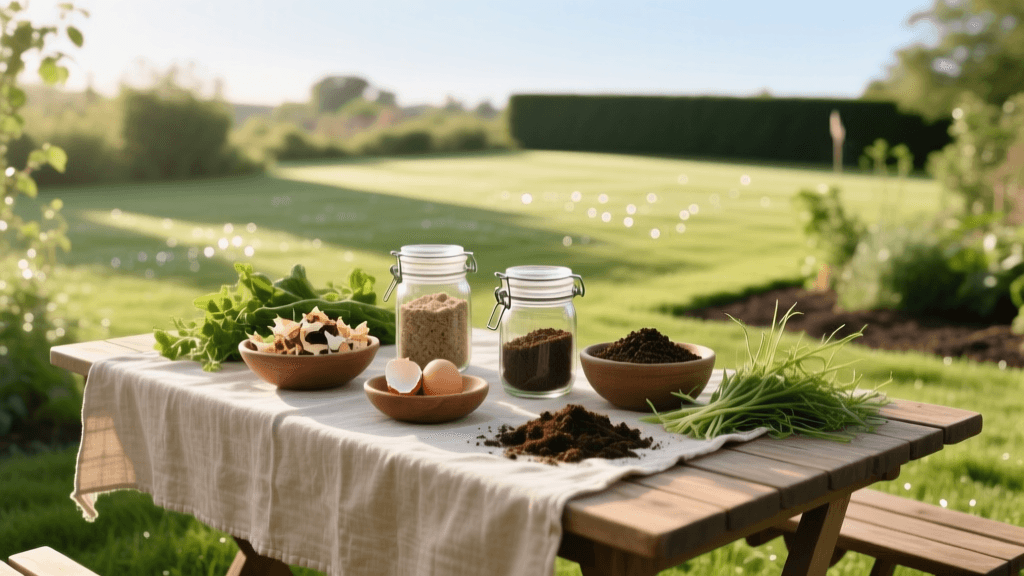
The Ultimate Budget-Friendly DIY Lawn Fertilizer Guide
Everyone wants a lush, carpet-like lawn, but the costs of professional lawn care services and premium synthetic fertilizers can quickly drain your wallet. Fortunately, maintaining a vibrant, healthy yard does not require a massive budget or a degree in agronomy. By embracing budget-friendly DIY lawn fertilization techniques, you can nurture your soil, outcompete weeds, and achieve that coveted deep green color for a fraction of the cost. In this comprehensive guide, we will explore highly effective, low-cost organic and DIY fertilizer solutions that leverage household waste, affordable natural amendments, and smart lawn care practices.
The Hidden Costs of Synthetic Lawn Care
When you rely solely on synthetic, salt-based fertilizers, you are essentially feeding the grass plant directly while starving the soil microbiome. Over time, this creates a dependency cycle where your lawn requires increasingly frequent chemical applications to maintain its color and vigor. Furthermore, synthetic fertilizers can lead to soil compaction, reduced water retention, and harmful chemical runoff into local waterways. According to the Natural Resources Defense Council (NRDC), transitioning to organic and DIY lawn care methods builds long-term soil health, promotes deep root growth, and naturally suppresses turf diseases without the recurring expense of commercial chemical treatments.
Start with a Budget-Friendly Soil Test
Before spending a single dime on amendments, you must understand your soil's baseline. Guessing what your lawn needs is the most expensive mistake a homeowner can make. A local university extension soil test usually costs between $15 and $25 and provides a precise breakdown of your soil's pH, phosphorus, potassium, and organic matter levels. The University of Minnesota Extension emphasizes that soil testing prevents the wasteful over-application of nutrients, saving homeowners hundreds of dollars over a single season while protecting the environment from nutrient leaching. Once you have your results, you can target your DIY amendments exactly where they are needed.
5 Powerful DIY and Low-Cost Lawn Fertilizers
You do not need to visit an expensive garden center to feed your lawn. Many of the best fertilizers are either free byproducts of your household or available in bulk for pennies on the dollar.
1. Grasscycling (The Free Nitrogen Boost)
The simplest and most cost-effective fertilization method is grasscycling—the practice of leaving grass clippings on the lawn after mowing. Grass clippings are composed of roughly 80% water and contain up to 5% nitrogen by dry weight. As they decompose, they return essential nutrients directly to the soil. According to turfgrass researchers, grasscycling can supply up to 25% of your lawn's total annual nitrogen requirement. To do this correctly, ensure your mower blade is sharp and never remove more than one-third of the grass blade height at a single time to prevent clumping and thatch buildup.
2. Compost Topdressing
Compost is the ultimate soil builder. It improves drainage in clay soils, increases water retention in sandy soils, and introduces billions of beneficial microbes. You can create your own compost for free using kitchen scraps and yard waste. The Environmental Protection Agency (EPA) notes that proper composting reduces household waste while creating a nutrient-rich humus. For lawn application, spread a thin layer (about 1/4 inch) of finely screened compost over your turf in the early fall. Use a push broom to work it down to the soil level. This single application can replace an entire season of expensive commercial soil conditioners.
3. Used Coffee Grounds
If you brew coffee at home, you have a free source of slow-release nitrogen. Used coffee grounds contain approximately 2% nitrogen, along with trace amounts of phosphorus and potassium. Unlike fresh grounds, which are highly acidic, used grounds are close to pH neutral. To use them on your lawn, scatter them lightly over bare patches or mix them into your compost pile before topdressing. Avoid dumping thick clumps directly on the grass, as they can mold and block sunlight. A light dusting every few weeks provides a gentle, budget-friendly nutrient boost.
4. Wood Ash for Potassium and pH Balancing
If you have a wood-burning fireplace or fire pit, hardwood ash is a fantastic, free source of potassium (potash) and calcium. Potassium is vital for drought tolerance and disease resistance. Wood ash also acts similarly to agricultural lime, raising the pH of acidic soils. Apply wood ash sparingly—no more than 10 to 15 pounds per 1,000 square feet annually—and only if your soil test confirms your pH is below 6.5. Never use ash from treated wood, charcoal briquettes, or trash, as these contain toxic chemicals that will harm your turf.
5. Epsom Salt for Magnesium Deficiencies
Magnesium is the central atom in the chlorophyll molecule, meaning it is strictly required for photosynthesis and the deep green color of your grass. If your soil test indicates a magnesium deficiency, Epsom salt (magnesium sulfate) is an incredibly cheap and effective remedy. Dissolve 2 tablespoons of Epsom salt per gallon of water and apply it as a foliar spray using a pump sprayer. This DIY liquid fertilizer is rapidly absorbed through the grass blades and can green up a yellowing lawn in a matter of days for less than a dollar per application.
DIY Fertilizer Nutrient Comparison Chart
Understanding the primary nutrient profile of your household amendments helps you apply them strategically throughout the growing season.
| DIY Ingredient | Primary Nutrient(s) | Estimated Cost | Best Application Timing |
|---|---|---|---|
| Grass Clippings | Nitrogen (N) | Free | Every mow (Spring/Fall) |
| Screened Compost | N-P-K + Microbes | Free to Low | Early Fall (Topdressing) |
| Coffee Grounds | Nitrogen (N) | Free | Spring and Early Summer |
| Hardwood Ash | Potassium (K), Calcium | Free | Late Fall (If pH is low) |
| Epsom Salt | Magnesium, Sulfur | Very Low | As needed for yellowing |
How to Brew Budget-Friendly Compost Tea
Compost tea is a liquid extract that delivers a concentrated dose of beneficial microbes and soluble nutrients directly to the soil and grass blades. Brewing it at home costs almost nothing if you already have compost.
- Step 1: Fill a 5-gallon bucket halfway with finished, high-quality compost.
- Step 2: Fill the rest of the bucket with rainwater or dechlorinated tap water (let tap water sit uncovered for 24 hours to allow chlorine to evaporate).
- Step 3: Add one tablespoon of unsulfured blackstrap molasses. This feeds the microbes and encourages rapid multiplication.
- Step 4: Stir the mixture vigorously twice a day for 3 to 4 days, or use a cheap aquarium air pump to aerate it continuously.
- Step 5:Strain the liquid through an old t-shirt or burlap sack into a pump sprayer. Apply immediately to your lawn in the early morning or late evening.
A Frugal Seasonal Feeding Schedule
Timing is everything when it comes to lawn care. Cool-season grasses (like Kentucky Bluegrass and Fescue) thrive with fall feedings, while warm-season grasses (like Bermuda and Zoysia) need nutrients in the late spring and summer. By aligning your DIY treatments with the natural growth cycles of your turf, you maximize efficiency and minimize waste.
Pro Tip: Always water your lawn deeply the day before applying any DIY dry amendments or compost topdressing. Moist soil allows nutrients to break down and penetrate the root zone much faster, ensuring your grass gets the full benefit of your budget-friendly treatments.
For cool-season lawns, focus your compost topdressing and heavy grasscycling in September and October. This builds root reserves for the winter. In the spring, rely on coffee grounds and Epsom salt sprays to gently wake up the turf without forcing excessive, disease-prone blade growth. For warm-season lawns, shift this schedule to May and June, utilizing compost tea and grasscycling to support the rapid summer growth phase.
Conclusion
Achieving a magazine-worthy lawn does not require an endless supply of expensive synthetic chemicals. By utilizing free resources like grass clippings, wood ash, and coffee grounds, and by investing a small amount of time into brewing compost tea and topdressing, you can build a resilient, deeply rooted turf. Budget-friendly DIY lawn fertilization is not just about saving money; it is about fostering a living, breathing soil ecosystem that will sustain your lawn for years to come. Start with a soil test, leverage the power of organic matter, and watch your lawn thrive on a frugal diet.