
Landscaping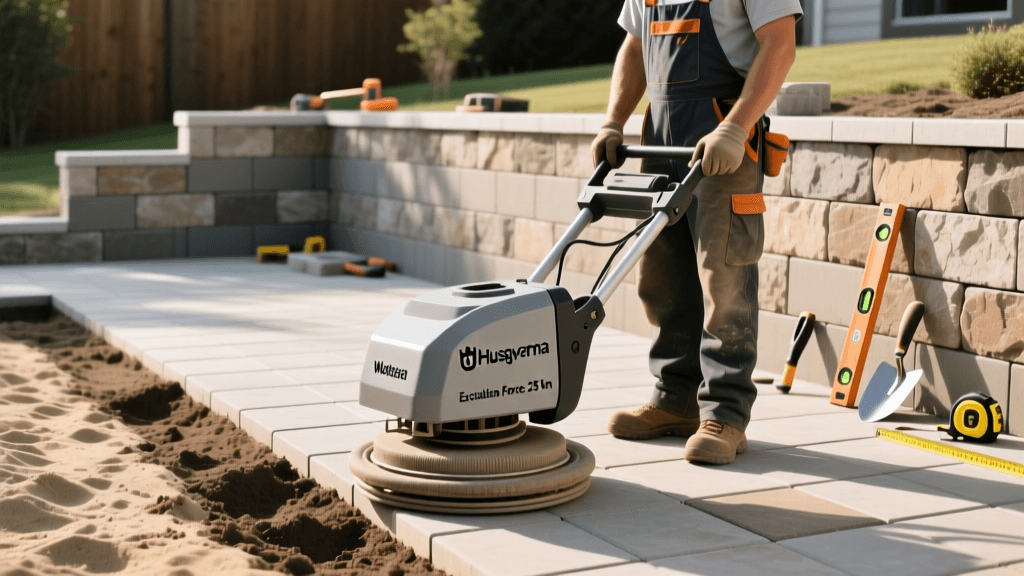
How to Choose the Right Plate Compactor for Paver Patios
Building a paver patio, walkway, or retaining wall is a rewarding landscaping project that instantly elevates your outdoor living space. However, the longevity and structural integrity of your hardscape rely entirely on what lies beneath the surface. While selecting beautiful pavers and designing intricate patterns often gets the most attention, the true secret to a durable, frost-heave-resistant patio is proper base preparation and mechanical compaction. This is where the plate compactor becomes the most vital tool in your landscaping arsenal.
Whether you are a weekend DIYer tackling a small backyard fire pit pad or a professional landscaper installing a sprawling driveway, choosing the right plate compactor is non-negotiable. In this comprehensive equipment guide, we will break down the technical specifications, sizing requirements, and safety protocols you need to know to select the perfect plate compactor for your next hardscaping project.
Why Compaction is the Backbone of Hardscaping
Before diving into machine specifications, it is crucial to understand why compaction matters. A paver patio is essentially a flexible pavement system. It relies on the interlocking friction of the pavers, the bedding sand, and a heavily compacted aggregate base to distribute loads evenly. If the subgrade soil or the crushed stone base is left loose, water infiltration and freeze-thaw cycles will cause the base to shift, leading to sunken pavers, puddling, and weed growth in the joints.
The National Concrete Masonry Association (NCMA) emphasizes that proper base preparation and mechanical compaction are the most critical steps in segmental retaining wall and paver installations. Hand tamping is entirely insufficient for achieving the required soil density; only a motorized plate compactor can generate the necessary centrifugal force to eliminate voids in the aggregate base and lock the final pavers into the bedding sand.
Key Specifications to Look For
When shopping for or renting a plate compactor, you will encounter several technical terms. Understanding these metrics will help you match the machine to your specific hardscaping needs.
1. Centrifugal Force (Excitation Force)
Measured in pounds (lbs) or kilonewtons (kN), centrifugal force is the actual compaction power delivered to the ground. This is the most important metric to look at. A higher centrifugal force means the machine can compact thicker layers of aggregate and handle heavier, deeper bases required for driveways and retaining walls.
2. Plate Size and Material
Plate size is measured in square inches or by width and length (e.g., 16 x 24 inches). A larger plate covers more ground quickly, which is ideal for expansive patios and driveways. However, larger plates distribute the centrifugal force over a wider area, meaning a large plate with a low-force engine will perform poorly. Conversely, a smaller plate is better for tight spaces, garden paths, and working close to retaining walls or house foundations.
3. Frequency (Vibrations Per Minute - VPM)
Frequency refers to how fast the eccentric weight inside the machine spins. Higher VPM (typically between 4,000 and 6,000 VPM) is excellent for compacting granular soils, crushed stone, and bedding sand. Lower VPM is generally reserved for cohesive soils like clay, though most hardscaping bases utilize granular materials.
Sizing Guide: Matching the Machine to the Project
Using an undersized compactor on a driveway base will result in structural failure, while using a massive 5,000-lb force machine on a delicate garden walkway can shatter your pavers. Use the comparison chart below to select the right class of equipment for your project.
| Project Type | Recommended Centrifugal Force | Ideal Plate Width | Best Use Case |
|---|---|---|---|
| Small DIY Patios & Walkways | 2,000 - 3,000 lbs (9 - 13 kN) | 12 - 16 inches | Paver patios under 200 sq ft, garden paths, tight corners. |
| Standard Patios & Pool Decks | 3,000 - 4,500 lbs (13 - 20 kN) | 16 - 20 inches | Residential patios, pool surrounds, standard retaining wall bases. |
| Driveways & Commercial Hardscapes | 4,500 - 6,000+ lbs (20 - 27+ kN) | 20 - 28 inches | Vehicular traffic areas, deep aggregate bases, large commercial plazas. |
Steel Plates vs. Polyurethane Pads
One of the most common mistakes DIYers make is running a bare steel compactor plate directly over their newly laid pavers. This will almost certainly scuff, chip, or completely shatter the concrete or natural stone pavers.
To compact the pavers into the bedding sand and vibrate the jointing sand down into the seams, you must use a polyurethane pad (often called a vulcanized rubber pad or poly pad). This thick, durable mat attaches to the bottom of the steel plate, providing a cushion that protects the paver surface while still transferring the necessary vibrational force downward. Many premium compactors include a poly pad in the box, but if you are renting, ensure the rental yard includes one, or be prepared to purchase one separately (typically $50 to $120 depending on size).
Top Brands and Rental vs. Buying Costs
The landscaping equipment market is dominated by a few highly reliable brands known for their durability and dealer support networks:
- Wacker Neuson: The gold standard in compaction equipment. Known for their BP series, these machines feature heavy-duty shock mounts that protect the operator and the machine's engine.
- Multiquip (Mikasa): Highly respected in the professional hardscaping community for excellent maneuverability and robust centrifugal force.
- Husqvarna: Offers excellent ergonomics, low vibration handles, and reliable Honda or Kohler engines.
- Tomahawk Power / Harbor Freight (Budget): Suitable for one-off DIY projects where purchasing a professional machine is not cost-effective.
Rental vs. Buying: For most homeowners, renting is the most economical choice. A standard 3,000-lb force compactor typically rents for $75 to $120 per day. If you are a landscaping contractor, purchasing a professional-grade Wacker Neuson or Multiquip machine will cost between $1,200 and $2,500, but it will pay for itself after just a few large jobs and ensures you always have the right tool on hand.
Safety First: Managing Vibration and Noise
Plate compactors are loud, heavy, and generate immense vibration. Prolonged exposure to these conditions can lead to serious health issues. The Occupational Safety and Health Administration (OSHA) warns that prolonged use of high-vibration hand-held and walk-behind equipment can lead to Hand-Arm Vibration Syndrome (HAVS). HAVS causes nerve damage, reduced blood flow, and a condition known as 'white finger,' which can result in permanent numbness and loss of dexterity.
To protect yourself and your crew, always adhere to the following safety protocols:
- Anti-Vibration Gloves: Invest in high-quality, padded anti-vibration gloves (look for ANSI S2.73 / ISO 10819 certification) to dampen the high-frequency shocks transferred through the handle.
- Hearing Protection: Compactors routinely operate between 95 and 105 decibels. Double up with foam earplugs and over-ear muffs to prevent long-term hearing loss.
- Steel-Toe Boots: The machine can easily 'run away' from you on a slope or if it catches on a paver edge. Steel-toe or composite-toe boots protect your feet from crushing injuries.
- Take Breaks: Limit continuous operation to 30-45 minute intervals to allow your hands and arms to recover from the micro-traumas of vibration.
Best Practices for Base and Sand Compaction
Understanding soil mechanics is just as important as understanding your machine. The USDA Natural Resources Conservation Service notes that soil moisture content plays a massive role in how well a base material compacts. If your crushed stone base is bone dry, the particles will slide past one another rather than locking together. Lightly misting your aggregate base with a garden hose before compacting creates surface tension that helps the stones lock into a dense, concrete-like matrix.
The Step-by-Step Compaction Strategy
- Subgrade Compaction: After excavating your patio area, run the plate compactor directly over the native soil (subgrade) to ensure you aren't building on top of soft, disturbed earth.
- Base Material in Lifts: Add your crushed angular gravel (usually 3/4-inch minus or crushed concrete) in layers, or 'lifts,' no thicker than 4 to 6 inches. Compact each lift thoroughly before adding the next. Attempting to compact an 8-inch layer of gravel all at once will result in a loose, uncompacted bottom layer.
- Bedding Sand (Do Not Compact): Screed your 1-inch layer of coarse, sharp concrete sand over the compacted base. Never compact the bedding sand before laying the pavers, or you will destroy your perfectly level screed lines.
- Final Paver Compaction: Once all pavers are laid and edge restraints are installed, attach your polyurethane pad to the compactor. Run the machine over the entire patio in two perpendicular directions (e.g., North-South, then East-West). This vibrates the pavers down into the sand and forces the polymeric jointing sand deep into the seams, creating a watertight, interlocking surface.
Conclusion
A plate compactor is the bridge between a beautiful hardscape design and a lasting outdoor structure. By carefully selecting a machine with the appropriate centrifugal force, utilizing a polyurethane pad for surface protection, and adhering to strict safety and base-preparation guidelines, you ensure your paver patio, walkway, or retaining wall will withstand the elements—and heavy foot traffic—for decades to come.

