
Lawn Care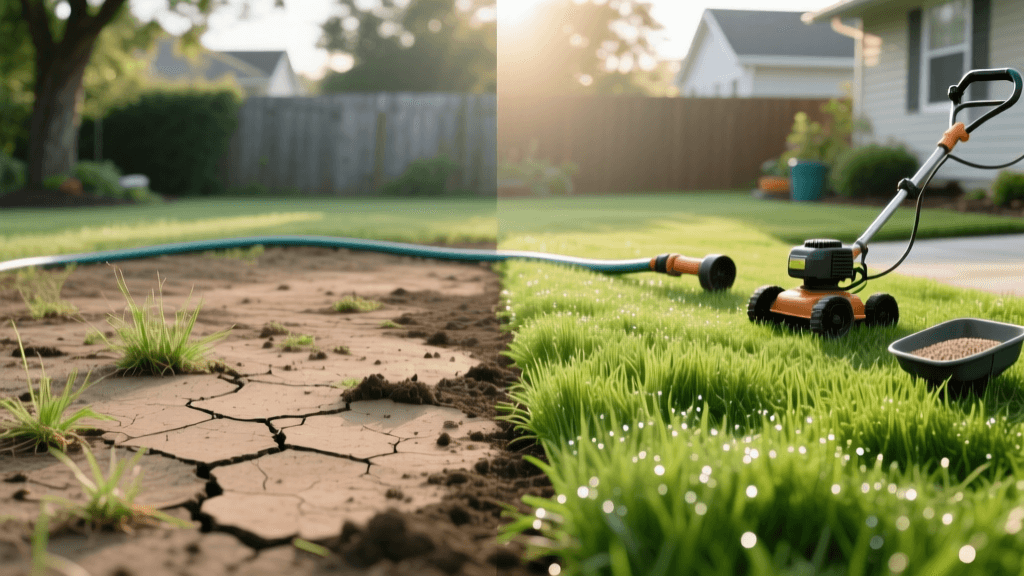
Transforming Compacted Clay Lawns: Aeration And Overseeding
The 'Before' State: Diagnosing a Compacted Clay Lawn
If you are reading this, you likely have a lawn that looks tired, thin, and perpetually unhealthy despite your best efforts with watering and fertilizing. The 'before' picture of a compacted clay lawn is a common but frustrating sight for homeowners. You might notice water pooling on the surface after a light rain, rather than soaking into the soil. The grass may be sparse, overrun with opportunistic weeds like crabgrass and plantain, and the soil beneath your feet feels as hard as concrete by mid-summer. When you try to push a standard flat-head screwdriver into the ground to check for moisture, it barely penetrates the top half-inch before hitting an impenetrable barrier.
This is the classic profile of a severely compacted clay lawn. Over years of foot traffic, mowing, and natural settling, the soil particles are pressed tightly together, squeezing out the vital pore spaces that roots need for oxygen, water, and nutrient uptake. In this comprehensive transformation guide, we will walk through the exact, step-by-step process of taking a suffocating, hard-packed clay yard and turning it into a thick, vibrant, and deeply rooted cool-season turf paradise using core aeration and strategic overseeding.
The Science of Soil Compaction and Thatch
Before we break ground, it is crucial to understand why your lawn is failing. According to the University of Minnesota Extension, soil compaction reduces the macro-pores in the soil profile, which are responsible for drainage and aeration. When these pores collapse, grass roots become shallow and stressed, making them highly susceptible to drought and disease. Furthermore, compacted soils often develop a thick layer of thatch—a mat of dead and living organic matter that sits between the soil surface and the green grass blades. Because the soil lacks the microbial activity required to break down organic matter naturally, thatch builds up, further blocking water and fertilizer from reaching the root zone.
To achieve a true 'after' transformation, we cannot simply throw more seed and fertilizer on top of this barrier. We must physically alter the soil structure. This is where core aeration becomes the most critical intervention in your lawn care arsenal.
Phase 1: Preparation and Timing
The ideal time to perform this transformation on a cool-season lawn (such as Tall Fescue or Kentucky Bluegrass) is in the early fall, typically between late August and early October. The soil is still warm enough to encourage rapid seed germination, but the cooling air temperatures reduce heat stress on young seedlings and minimize weed competition.
Two Weeks Before Aeration
- Weed Control: If your lawn is heavily infested with broadleaf weeds, apply a selective herbicide at least two weeks prior to aeration. This gives the chemicals time to work and ensures you aren't planting new grass seed into a chemically active environment that could inhibit germination.
- Mowing: Gradually lower your mowing height. Two days before aeration, mow the lawn down to about 1.5 to 2 inches. This prevents the existing grass from tangling in the aeration tines and ensures the new seed makes direct contact with the soil.
- Flagging Hazards: Walk the yard with bright orange landscaping flags. Mark all sprinkler heads, shallow utility lines, cable lines, and invisible dog fences to prevent catastrophic damage during the aeration process.
Phase 2: Core Aeration Execution
Do not use a spike aerator or aerator shoes for a clay lawn. Spikes merely poke holes into the ground, which actually increases compaction along the sides of the hole by pushing the dense clay outward. You must use a core aerator, a heavy, gas-powered machine that extracts actual plugs of soil from the ground.
Rent a commercial-grade core aerator (such as a Billy Goat or Classen model) from your local equipment rental center. These machines are heavy, which is exactly what you need to force the hollow tines deep into hard clay.
The Aeration Process
- Water Deeply: The day before aerating, water your lawn thoroughly with about 1 inch of water. The soil needs to be moist, but not muddy, to allow the tines to pull out clean, 2-to-3-inch cores.
- Double Pass: Run the aerator over the entire lawn in one direction, then make a second pass perpendicular to the first (in a crisscross pattern). For severely compacted clay, a third pass diagonally is highly recommended. You want to pull out enough cores so that there is a hole every 2 to 3 inches across the entire surface.
- Leave the Cores: Do not rake up the soil plugs. Leave them on the lawn. Over the next few weeks, rain and mowing will break them apart, returning valuable soil microbes back to the thatch layer to aid in decomposition.
Phase 3: Overseeding and Starter Fertilizer
With the soil now open and receptive, it is time to introduce new life. For a durable, deep-rooted transformation, we recommend a high-quality, turf-type Tall Fescue blend. According to research highlighted by Penn State Extension, turf-type tall fescues possess deep root systems that excel at breaking up clay soils and exhibit excellent drought tolerance once established.
Seed and Fertilizer Application
- Seed Selection: Choose a blend containing at least three different cultivars of Tall Fescue to ensure genetic diversity and disease resistance. Avoid cheap 'contractor' mixes that contain annual ryegrass or excessive weed seed.
- Seeding Rate: When overseeding an existing lawn, apply seed at a rate of 5 to 6 pounds per 1,000 square feet. Use a broadcast spreader, splitting the seed in half and applying it in two perpendicular passes to ensure even coverage.
- Starter Fertilizer: New seedlings require high levels of phosphorus for rapid root development. Apply a dedicated starter fertilizer (such as a 10-18-10 or 18-24-6 NPK ratio) immediately after seeding. Apply at a rate of roughly 1 pound of nitrogen per 1,000 square feet.
- Topdressing (Optional but Recommended): For the ultimate 'after' result, spread a thin layer (about 1/4 inch) of screened compost over the seeded area. This holds moisture, protects the seed from birds, and introduces organic matter to the clay.
Phase 4: The Critical Watering Schedule
The success or failure of your transformation hinges entirely on the next 21 days. Grass seed must remain consistently moist to germinate. If the seed dries out even once during the germination process, the sprout will die.
Pro Tip: Set your irrigation system or hose timers to water the lawn lightly 3 to 4 times a day for 5 to 10 minutes per session. The goal is not to soak the soil deeply, but to keep the top inch of soil and the seed constantly damp.
Once the new grass reaches about 2 inches in height, gradually reduce the frequency of watering but increase the duration. Transition to deep, infrequent watering (about 1 inch per week) to force those new roots to dive deep into the freshly aerated clay soil.
Cost and Equipment Breakdown
Transforming a lawn is an investment, but it is significantly cheaper than a full tear-out and sod replacement. Below is a realistic cost breakdown for a standard 5,000 square foot lawn.
| Item / Service | Specifications | Estimated Cost |
|---|---|---|
| Core Aerator Rental | Half-day rental (Commercial Grade) | $75.00 - $95.00 |
| Premium Tall Fescue Seed | 25 lbs (5-6 lbs per 1,000 sq ft) | $90.00 - $120.00 |
| Starter Fertilizer | High Phosphorus blend (covers 5k sq ft) | $35.00 - $50.00 |
| Screened Compost | 1 cubic yard (for light topdressing) | $40.00 - $60.00 |
| Landscaping Flags & Misc | Safety markers, spreader calibration | $15.00 |
| Total DIY Cost | For 5,000 sq ft lawn | $255.00 - $340.00 |
Note: Hiring a professional lawn care service to perform aeration and overseeding typically costs between $350 and $600 for the same square footage, depending on your region and the accessibility of your yard.
The 'After' State: Tracking the 90-Day Transformation
Patience is required to witness the full 'after' transformation. Here is what you can expect as your lawn recovers from the aggressive renovation process.
Days 7 to 14: Germination
The bare and thin areas of your lawn will begin to show a faint green haze. The Tall Fescue seeds, nestled safely in the aeration holes and compost, will sprout. The existing soil cores will begin to break apart and melt back into the lawn canopy.
Days 21 to 30: The First Mow
Once the new grass reaches 3.5 inches, it is time for the first mow. Ensure your mower blade is razor-sharp to avoid tearing the tender young seedlings. Mow down to 2.5 inches. At this stage, the lawn will look noticeably thicker, and the bare patches will be filled with vibrant, light-green new growth.
Days 60 to 90: Deep Root Establishment
By the 90-day mark, the transformation is complete. The new grass will have darkened in color, blending seamlessly with the established turf. Because the roots have utilized the aeration channels to bypass the hardpan clay, the lawn will feel spongier underfoot, indicating a healthy, oxygen-rich root zone. Water runoff will be a thing of the past, as the improved soil structure now absorbs and retains moisture efficiently.
For further reading on maintaining your newly established turf and transitioning into winter dormancy, consult the seasonal guidelines provided by the University of Minnesota Extension. By addressing the root cause of soil compaction rather than just treating the symptoms, you have successfully transformed a failing clay lawn into a resilient, lush, and envy-inducing landscape that will thrive for years to come.

