
Gardening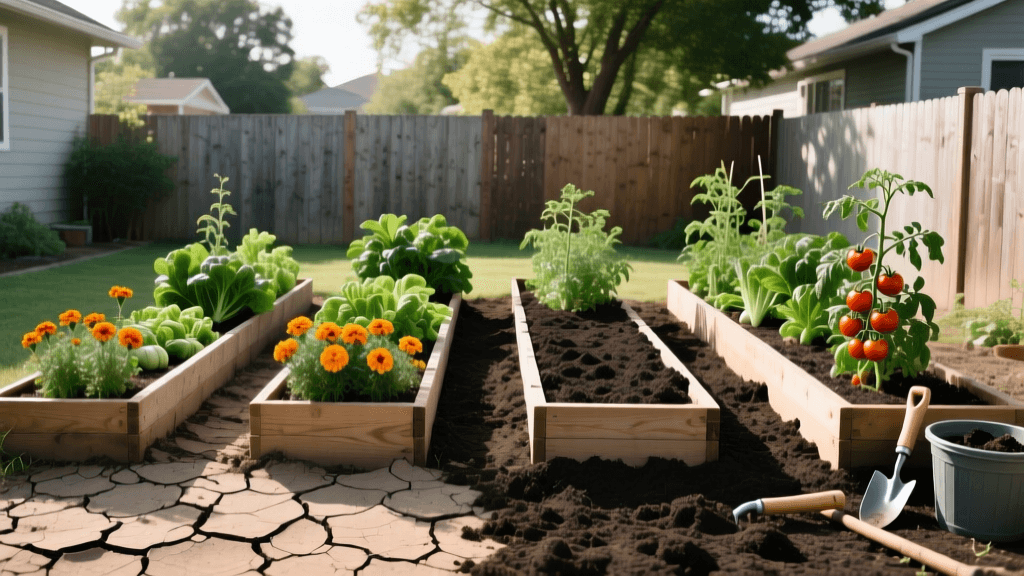
Backyard Garden Transformation: Clay Soil to Raised Beds
The Before State: A Compacted Clay Nightmare
When we first purchased our property, the backyard was a gardener's worst nightmare. The soil was heavy, alkaline clay that baked into concrete during the summer and turned into a sticky, waterlogged mess during the spring rains. Previous owners had attempted to grow a traditional in-ground vegetable garden, but the results were dismal. Tomato roots rotted from poor drainage, carrots grew stunted and deformed, and aggressive weeds like field bindweed and crabgrass easily outcompeted any struggling vegetables. A preliminary soil test revealed a pH of 7.8 and an organic matter content of less than 1%, indicating a severely depleted growing environment. According to the USDA Natural Resources Conservation Service, compacted soils lack the pore space necessary for water infiltration, root penetration, and microbial activity. We knew that simply tilling the existing dirt and adding a thin layer of topsoil would not solve the underlying structural issues. We needed a complete transformation.
The Vision: Bypassing Clay with Raised Beds
Instead of spending years trying to amend the entire backyard, we decided to build above the problem. Raised bed gardening offers an immediate solution to poor native soil by allowing you to control the exact texture, drainage, and fertility of the growing medium. Our goal was to construct four large raised beds, each measuring 4 feet wide by 8 feet long and 18 inches deep. This specific depth was chosen to provide ample room for deep-rooting crops like tomatoes and parsnips, while also ensuring that the roots would never sit in the waterlogged clay layer below. Furthermore, the 4-foot width ensures that the center of the bed can be easily reached from either side without stepping on and compacting the fresh soil.
Step-by-Step Transformation Process
Step 1: Sheet Mulching the Base
Before building the beds, we had to deal with the existing weeds. Rather than using chemical herbicides or back-breaking manual removal, we employed a technique known as sheet mulching. We mowed the existing weeds as short as possible and covered the entire footprint of the future garden with overlapping layers of plain, uncoated corrugated cardboard. After wetting the cardboard thoroughly with a hose, we let it sit for two weeks. This method blocks sunlight, effectively smothering the weeds while simultaneously creating a welcoming environment for earthworms, which will eventually break down the cardboard and create channels between the native clay and the new raised bed soil.
Step 2: Constructing the Cedar Beds
For the bed frames, we selected untreated, rough-sawn western red cedar. Cedar is naturally resistant to rot and insects, making it an ideal, chemical-free choice for edible gardens. We used 2x10 inch planks, stacking two high to achieve our 18-inch depth. The corners were reinforced with heavy-duty aluminum corner brackets and exterior-grade timber screws to prevent the beds from bowing outward under the immense weight of wet soil. We also lined the very bottom of the beds with a layer of hardware cloth (galvanized wire mesh) to prevent burrowing pests like gophers and voles from invading from below.
Step 3: Filling with the Ultimate Soil Mix
The most critical part of any raised bed transformation is the soil. We strictly avoided bagged or bulk topsoil, which is often little more than screened native dirt filled with weed seeds. Instead, we formulated a premium, well-draining mix inspired by Mel Bartholomew's famous Square Foot Gardening method, but adapted for sustainability. Our mix consisted of 30% coarse vermiculite for moisture retention and aeration, 30% coconut coir (a sustainable alternative to peat moss), and 40% high-quality blended organic compost. As highlighted by Penn State Extension, incorporating generous amounts of organic matter is the single most effective way to improve soil structure, nutrient holding capacity, and microbial diversity. We sourced our compost from a local municipal facility that follows strict hot-composting protocols to ensure weed seeds and pathogens are destroyed, a process well-documented by the Environmental Protection Agency.
Strategic Planting and Companion Gardening
Once the beds were filled, we didn't just plant randomly; we utilized companion planting to maximize our yields and deter pests naturally. In the front beds, we planted indeterminate cherry tomatoes supported by heavy-duty cattle panels. At the base of the tomatoes, we planted sweet basil and marigolds. The basil is believed to improve the flavor of the tomatoes, while the marigolds release alpha-terthienyl from their roots, which suppresses harmful root-knot nematodes. We also interplanted nasturtiums along the borders to act as a trap crop for aphids, keeping them away from our primary vegetables. In the rear beds, we grew a Three Sisters variation: sweet corn, bush beans, and butternut squash. The corn provided a trellis for the beans, the beans fixed atmospheric nitrogen into the soil, and the broad leaves of the squash acted as a living mulch, shading the soil and retaining moisture. Borage was scattered throughout to attract native pollinators and predatory wasps.
Upgrading the Irrigation System
Overhead watering is highly inefficient and promotes fungal diseases like powdery mildew and early blight. To complete our transformation, we installed a drip irrigation system using 1/2-inch mainline tubing and 1/4-inch drip tape with emitters spaced every 6 inches. We connected the system to a smart Wi-Fi irrigation controller that adjusts watering schedules based on local weather data and evapotranspiration rates. After laying the drip lines, we covered the soil surface with a 2-inch layer of clean straw mulch. This mulch hides the tubing from UV degradation, prevents water evaporation, and slowly breaks down to add more organic matter to the beds. This upgrade reduced our water usage by nearly 40% compared to the previous sprinkler system while ensuring that water was delivered directly to the root zones, keeping the foliage completely dry.
Material and Cost Breakdown
Transforming a backyard requires a financial investment, but the return on investment in the form of fresh, organic produce is substantial. Below is a detailed breakdown of the costs associated with our four 4x8 raised bed transformation.
| Item | Quantity | Unit Cost | Total Cost |
|---|---|---|---|
| Untreated Cedar Planks (2x10x8) | 16 | $28.00 | $448.00 |
| Aluminum Corner Brackets | 8 | $15.00 | $120.00 |
| Hardware Cloth (1/2 inch mesh) | 2 rolls | $45.00 | $90.00 |
| Corrugated Cardboard | Free (recycled) | $0.00 | $0.00 |
| Bulk Organic Compost (cubic yards) | 6 | $45.00 | $270.00 |
| Coconut Coir Bricks (expanded) | 10 | $18.00 | $180.00 |
| Coarse Vermiculite (bags) | 12 | $35.00 | $420.00 |
| Drip Irrigation Kit & Controller | 1 | $185.00 | $185.00 |
| Total Estimated Cost | $1,713.00 |
While the upfront cost of approximately $1,700 may seem steep, these cedar beds are rated to last 15 to 20 years. When amortized over a decade, the cost is roughly $170 per year for a highly productive, low-maintenance vegetable garden that easily yields over $1,000 worth of organic produce annually.
The After State: A Bountiful Harvest
Fast forward eight months, and the transformation is nothing short of miraculous. The heavy, waterlogged clay is entirely hidden beneath the thriving, aromatic cedar beds. During a heavy spring downpour, we watched as the rainwater instantly percolated through the raised bed mix, leaving the surface perfectly workable just hours later—a stark contrast to the week-long puddles of the past. The tomato plants grew over seven feet tall, producing hundreds of sweet, crack-free fruits. The deep soil volume allowed root vegetables like daikon radishes and carrots to grow perfectly straight and massive. Furthermore, the cardboard base completely decomposed, and we noticed a massive influx of native earthworms migrating up into the lower layers of our raised beds, naturally integrating the new organic matter with the old clay below.
Key Takeaways for Your Own Transformation
- Test Your Soil Early: Even if you are building raised beds, understanding your native soil pH and drainage can help you decide if you need a physical barrier or if you can encourage deep root penetration.
- Never Skimp on Soil Quality: The soil is the engine of your garden. Investing in high-quality compost and aeration materials like vermiculite will pay dividends in plant health and yield.
- Embrace Sheet Mulching: Save your back and avoid chemicals by using cardboard to smother existing weeds before building your beds.
- Automate Your Watering: Drip irrigation combined with a smart controller removes the guesswork, prevents fungal diseases, and conserves water.
Transforming a barren, clay-heavy backyard into a lush, productive garden is a deeply rewarding project. By utilizing raised beds, premium soil amendments, and smart irrigation, you can bypass poor native soil conditions entirely and enjoy a bountiful harvest in your very first season.

