
Gardening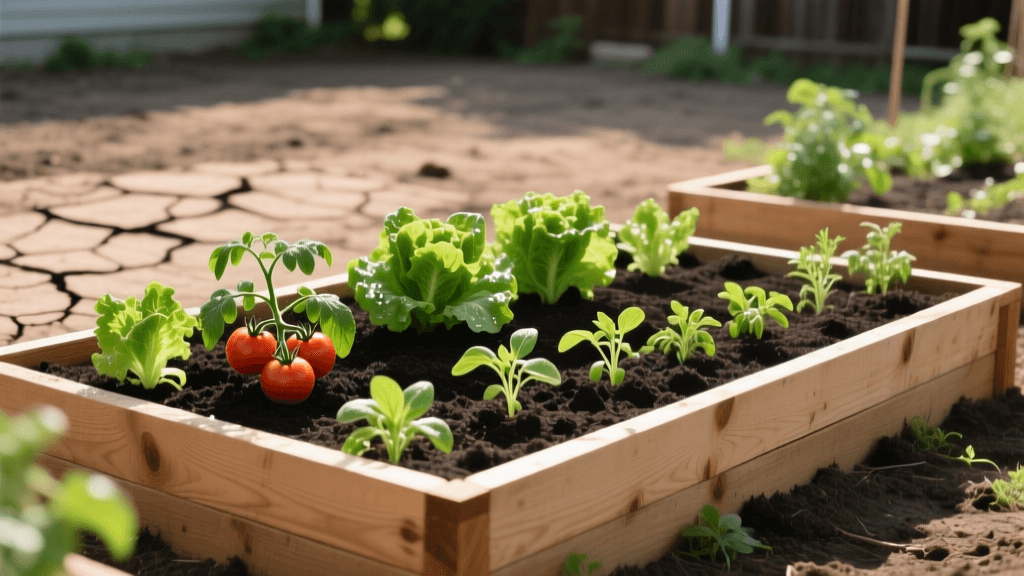
Backyard Transformation: Compacted Clay to Raised Bed Garden
The 'Before' State: Assessing a Barren, Compacted Backyard
Every gardening transformation begins with an honest assessment of the 'before' state. Our project site was a 20-by-30-foot patch of backyard situated beneath the dappled canopy of a mature oak tree. At first glance, it was merely an unused, muddy expanse. However, a closer inspection and a comprehensive soil test revealed a host of challenges that made traditional in-ground gardening nearly impossible. The soil was heavy, poorly drained clay with a pH of 5.2. After even a light rain, water would pool on the surface for hours, creating an anaerobic environment hostile to most vegetable roots. Furthermore, the oak tree's extensive surface root system competed aggressively for moisture and nutrients, while its canopy restricted direct sunlight to just four to five hours of partial shade during the peak of summer. Attempting to rototill this compacted clay would only create a 'clay bowl' effect, further exacerbating the drainage issues. A complete landscape intervention was required.
Planning the Transformation: Strategy and Design
To bypass the native clay soil and the competing tree roots, we decided to pivot to a raised bed vegetable garden. Raised beds offer several distinct advantages for challenging sites: they provide immediate control over soil texture and drainage, warm up faster in the spring, and can be positioned strategically to capture the most available sunlight. We designed a layout featuring two 4-foot by 8-foot beds, oriented north-to-south to maximize sun exposure on both sides throughout the day. The 4-foot width is a crucial ergonomic measurement, ensuring that the center of the bed can be easily reached from either side without stepping on and compacting the soil.
Step 1: Site Preparation and Sheet Mulching
Rather than using chemical herbicides or back-breaking manual sod removal, we utilized a permaculture technique known as sheet mulching. We mowed the existing sparse weeds as low as possible and covered the entire 20-by-30-foot footprint with overlapping layers of heavy-duty, uncoated corrugated cardboard. This layer acts as a biodegradable weed barrier that smothers existing vegetation while allowing earthworms and beneficial microbes to migrate upward. We thoroughly soaked the cardboard with a garden hose to initiate the decomposition process and anchor it against the wind. Over the next few months, the cardboard will break down, adding organic carbon to the subsoil while the raised beds sit cleanly above it.
Step 2: Constructing the Cedar Raised Beds
For the bed walls, we selected rough-sawn, untreated cedar. While pressure-treated lumber is cheaper and resistant to rot, many gardeners prefer to avoid the chemicals used in the treatment process when growing edible crops. Cedar contains natural oils that resist decay and insect damage, offering a lifespan of 10 to 15 years. We cut the cedar planks to create boxes measuring 4 feet wide, 8 feet long, and 11 inches deep. The corners were reinforced with 4x4 cedar posts, secured using exterior-grade stainless steel wood screws to prevent rust and structural failure over time. The beds were placed directly over the pre-soaked cardboard, leaving a 3-foot pathway between them for wheelbarrow access and comfortable kneeling.
Step 3: Engineering the Perfect Soil Mix
The success of a raised bed garden hinges entirely on the soil inside it. According to the University of Wisconsin-Madison Extension, raised bed soils must be lightweight, well-draining, and rich in organic matter to support intensive planting. Filling the beds with native topsoil or heavy garden soil would defeat the purpose of the structure, as it would quickly compact. Instead, we engineered a custom loam mix. We ordered a bulk delivery of a 50/50 blend of high-quality screened topsoil and municipal leaf compost. To this, we added coconut coir for moisture retention and coarse perlite to ensure permanent aeration and drainage. The USDA Natural Resources Conservation Service emphasizes that maintaining high levels of organic matter is the cornerstone of soil health, improving both water infiltration and nutrient cycling. Our final mix consisted of 50% topsoil, 30% compost, 10% coconut coir, and 10% perlite. We filled the beds to the brim, knowing the mixture would settle by about 15% after the first few deep waterings.
Project Cost and Materials Breakdown
Budgeting is a critical component of any landscape transformation. Below is the exact cost breakdown for constructing and filling two 4x8-foot cedar raised beds. Sourcing materials locally and buying soil in bulk rather than in bags saved significant money.
| Item | Quantity | Unit Cost | Total Cost |
|---|---|---|---|
| Rough-Sawn Cedar Lumber (2x11x8) | 8 boards | $28.00 | $224.00 |
| Cedar 4x4 Corner Posts (4 ft length) | 4 posts | $18.00 | $72.00 |
| Exterior Stainless Steel Screws | 1 box | $22.00 | $22.00 |
| Heavy-Duty Corrugated Cardboard | Sourced locally | $0.00 | $0.00 |
| Bulk Topsoil & Compost Mix (delivered) | 1.5 cubic yards | $95.00 | $142.50 |
| Coconut Coir Bricks (hydrated) | 3 bricks | $15.00 | $45.00 |
| Coarse Perlite (4 cu ft bags) | 2 bags | $35.00 | $70.00 |
| Total Project Cost | $575.50 |
Step 4: Planting for Partial Shade
With the infrastructure complete, it was time to plant. Because the oak tree limits the garden to roughly four to five hours of direct, dappled sunlight, heat-loving crops like tomatoes, peppers, and eggplants were ruled out. Instead, we focused on cool-season crops and leafy greens that thrive in partial shade. The 'After' planting layout was meticulously planned using intensive square-foot gardening principles. We planted 'Winterbor' kale and 'Bright Lights' Swiss chard along the northern edge, where they would not cast shadows on shorter plants. The center was sown with 'Napoli' carrots and 'Cherry Belle' radishes, which tolerate lower light levels while developing sweet, crisp roots. Along the southern edge, we planted 'Provider' bush beans and a variety of loose-leaf lettuces. To maximize vertical space without blocking the sun, we installed a low trellis on the eastern side for 'Sugar Snap' peas, which happily climbed and produced a heavy yield in the cool spring weather.
The 'After' Results: A Thriving Ecosystem
Fast forward three months, and the transformation was nothing short of spectacular. The barren, muddy patch of clay was entirely obscured by a lush, vibrant canopy of edible greens and vibrant root vegetables. The raised beds completely eliminated the drainage issues; even during heavy summer downpours, the custom soil mix absorbed and wicked away excess moisture, preventing root rot. The sheet mulching strategy proved highly effective, as virtually zero weeds penetrated the cardboard barrier, reducing weekly maintenance to a mere 15 minutes of harvesting and light pruning. The aesthetic shift was equally profound. What was once a neglected, unusable corner of the yard became a structured, inviting focal point, complete with clean, wood-chipped pathways that tied the entire landscape together.
Long-Term Maintenance and Soil Health
A successful transformation is not just about the initial build; it requires a sustainable maintenance plan. As the United States Environmental Protection Agency notes, continuous addition of organic compost is vital for recycling nutrients back into the earth and maintaining soil structure. Each fall, after the final harvest, we top-dress the beds with a 2-inch layer of homemade compost and plant a winter cover crop of crimson clover to fix nitrogen and prevent erosion. In the spring, we simply turn the clover into the top few inches of soil. By avoiding foot traffic inside the beds and replenishing the organic matter annually, this raised bed garden will continue to produce high yields for years to come, proving that even the most challenging, compacted, and shaded backyards can be transformed into highly productive agricultural spaces.

