
Gardening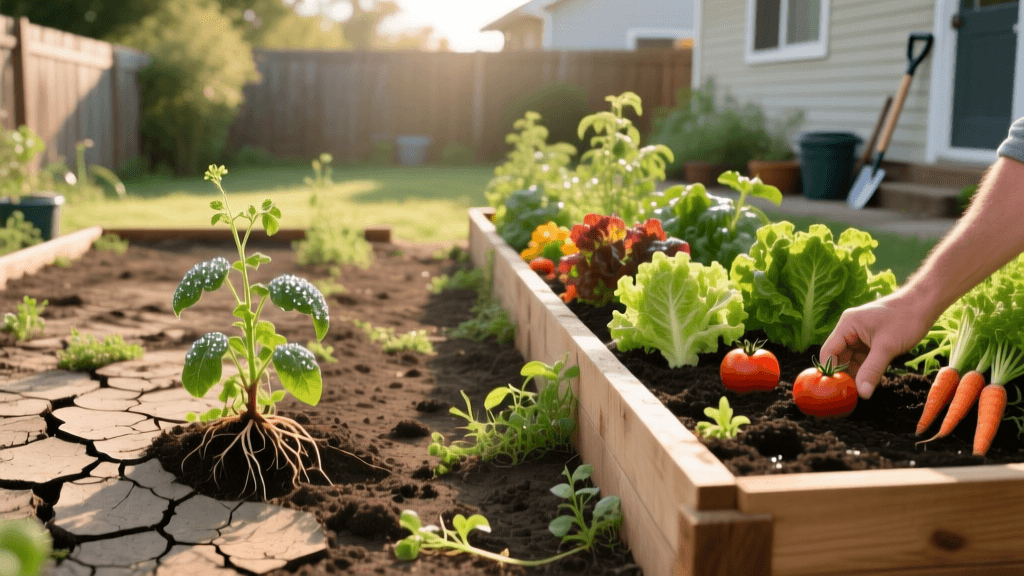
Transform Dead Dirt Into A Thriving Raised Bed Garden
The "Before": Assessing the Compacted, Weed-Choked Canvas
Every gardener has faced the dreaded "dead dirt" patch. You know the one: a sun-baked, heavily compacted area of the backyard where grass refuses to grow, water pools after a light rain, and invasive weeds like bindweed and crabgrass seem to thrive effortlessly. Attempting to till this native clay soil often results in a backbreaking weekend and a harvest of nothing but rocks and weed roots. This was the exact "before" state of our 10x10 foot backyard test plot. The soil was heavily compacted, lacked organic matter, and had a pH that locked up essential nutrients. Rather than fighting a losing battle against native soil conditions, we decided to execute a complete before-and-after transformation using the raised bed and sheet mulching method.
Phase 1: Site Preparation and the Sheet Mulching Method
The biggest mistake gardeners make when starting a new bed is reaching for the rototiller. Tilling brings dormant weed seeds to the surface and destroys the existing soil structure. Instead, we utilized the sheet mulching method to smother weeds and build a biological bridge between the native soil and our new raised beds.
Step-by-Step Sheet Mulching
- Mow and Flatten: We mowed the existing weeds as short as possible and flattened any large mounds of dirt.
- Apply Cardboard: We laid down overlapping layers of plain, uncoated corrugated cardboard (removing all tape and staples). The cardboard was overlapped by at least six inches to prevent weeds from finding a gap.
- Hydrate Thoroughly: Using a garden hose, we soaked the cardboard until it was completely saturated. This accelerates decomposition and attracts earthworms to the surface.
According to the Environmental Protection Agency (EPA), adding carbon-rich materials like cardboard to the soil surface not only suppresses weeds but also provides essential organic matter that feeds soil microbes as it breaks down. By the time our raised beds were ready to be placed on top, the cardboard had already begun to soften, creating a hospitable environment for deep-rooting plants and beneficial insects.
Phase 2: Constructing the Raised Beds
For the physical structure, we chose untreated, rough-sawn cedar due to its natural rot resistance and longevity. While galvanized steel beds are also an excellent option, cedar offers a classic aesthetic and warms up faster in the early spring.
Optimal Dimensions for Ergonomics and Yield
We constructed a single 4-foot by 8-foot bed with a depth of 18 inches. The University of Minnesota Extension recommends keeping raised beds no wider than 4 feet so that the center can be easily reached from either side without stepping on and compacting the soil. The 18-inch depth is the sweet spot for root vegetables; it provides enough loose soil for carrots and parsnips to grow straight and deep, while allowing ample room for the extensive root systems of indeterminate tomatoes.
To assemble the bed, we used exterior-grade deck screws and reinforced the corners with 4x4 cedar posts. We placed the finished wooden frame directly over the wet cardboard, ensuring the bottom was completely open to allow for drainage and earthworm migration.
Phase 3: Mixing the Ultimate Raised Bed Soil
The secret to a dramatic "after" transformation lies entirely in the soil. Never fill a raised bed with native topsoil or garden soil; it will compact heavily in a confined space and restrict drainage. Instead, we mixed a custom, lightweight, and nutrient-dense growing medium inspired by Mel Bartholomew's famous Square Foot Gardening mix, with a few modern organic amendments.
The Transformation Soil Recipe
- 40% High-Quality Organic Compost: We used a blend of mushroom compost and composted cow manure to provide a broad spectrum of micronutrients and beneficial bacteria.
- 40% Coco Coir: A sustainable alternative to peat moss, coco coir retains moisture beautifully while keeping the soil structure light and fluffy.
- 20% Coarse Vermiculite: This volcanic mineral permanently improves aeration and drainage while holding onto essential water-soluble nutrients.
- Organic Fertilizer Amendment: We mixed in 4 cups of a balanced 4-4-4 organic granular fertilizer and 2 cups of worm castings per 8 square feet of bed space to give transplants an immediate nitrogen boost.
The Transformation Blueprint: Cost and Material Breakdown
Budgeting is a critical part of any garden transformation. Below is the exact cost breakdown for constructing and filling one 4x8 foot, 18-inch deep cedar raised bed. Prices are approximate and based on national averages at major home improvement stores.
| Material | Quantity Needed | Estimated Cost |
|---|---|---|
| Untreated Cedar Boards (2x10x8 ft) | 4 boards | $52.00 |
| Cedar Corner Posts (4x4x18 in) | 4 pieces | $16.00 |
| Exterior Deck Screws (2.5 inch) | 1 box | $12.00 |
| Corrugated Cardboard | Recycled (Free) | $0.00 |
| Bulk Organic Compost Blend | 1 cubic yard | $45.00 |
| Compressed Coco Coir Bricks | 3 large bricks | $35.00 |
| Coarse Vermiculite | 4 cubic feet | $30.00 |
| Organic Granular Fertilizer (4-4-4) | 1 bag (4 lbs) | $15.00 |
| Total Estimated Investment | One 4x8 Bed | $205.00 |
While the upfront cost of $205 might seem steep compared to buying cheap bags of topsoil, this custom mix will last for years with only minor seasonal top-offs of compost required, making it highly cost-effective over time.
Phase 4: Strategic Planting for Immediate Impact
To maximize the visual and culinary impact of our "after" transformation in the very first season, we focused on high-yield, fast-growing crops combined with strategic companion planting. As noted by Penn State Extension, intensive planting in raised beds maximizes yield per square foot while naturally suppressing late-season weeds.
Our Year-One Planting Layout
- North End (Trellised): Two indeterminate Cherry Tomato plants trained on heavy-duty cattle panels, underplanted with sweet basil to deter hornworms and improve flavor.
- Center Grid: Bush beans succession-planted every three weeks, intercropped with nasturtiums to act as a trap crop for aphids.
- South End (Border): A dense row of French breakfast radishes and loose-leaf lettuce, which thrive in the partial shade cast by the towering tomatoes to the north.
By utilizing vertical space and companion planting, the bed looked lush and full within just four weeks of planting, completely erasing the memory of the barren dirt patch that existed just a month prior.
The "After": Month-by-Month Milestones
The true test of any garden transformation is how it holds up over time. Here is what the timeline looked like for our raised bed oasis:
Month 1: Establishment
The cardboard beneath the bed has started to decompose. Earthworms are visibly active in the bottom layers of the soil. The tomato transplants have doubled in size, and the radishes are ready for their first harvest. The soil retains moisture perfectly, requiring watering only every three days despite high summer heat.
Month 3: Peak Production
The bed is a jungle of productivity. The cherry tomatoes are producing clusters of fruit daily, and the bush beans are yielding enough for weekly family meals. The weed pressure is practically zero; the few weeds that blew in are easily pulled from the loose, fluffy soil structure without disturbing neighboring plant roots.
Month 6: Seasonal Transition and Soil Health
As summer crops fade, the soil structure remains intact. Because we avoided stepping in the bed, there is no compaction. We simply clip the spent summer crops at the soil line (leaving the roots to decompose and feed the soil food web) and transplant cool-season crops like kale, garlic, and overwintering spinach directly into the same nutrient-rich medium.
Common Mistakes to Avoid During Your Transformation
If you are planning your own before-and-after garden project, avoid these common pitfalls that can derail your success:
- Skipping the Cardboard Layer: Without a proper weed barrier at the base, aggressive perennial weeds like bermudagrass will eventually invade your expensive raised bed soil from below.
- Over-Watering Early On: Coco coir holds moisture incredibly well. Always use the "finger test" to check soil moisture two inches down before watering to prevent root rot in young transplants.
- Using Pressure-Treated Wood: While modern pressure-treated wood is safer than older CCA-treated lumber, many organic gardeners still prefer untreated cedar, redwood, or galvanized steel to ensure zero risk of chemical leaching into the food supply.
Conclusion: Enjoying Your New Garden Oasis
Transforming a patch of dead, compacted dirt into a thriving raised bed vegetable garden is one of the most rewarding weekend projects a homeowner can undertake. By investing in proper site preparation, building durable structures, and crafting a biologically active soil mix, you bypass the limitations of your native yard entirely. The "before" photo of our weed-choked clay patch is now just a distant memory, replaced by the "after" reality of a highly productive, visually stunning, and deeply satisfying garden oasis that will feed your family for years to come.

