
DIY Indoor Vermicomposting: Build a Worm Bin for Rich Soil
Bridging the Gap: Indoor Composting for Outdoor Results
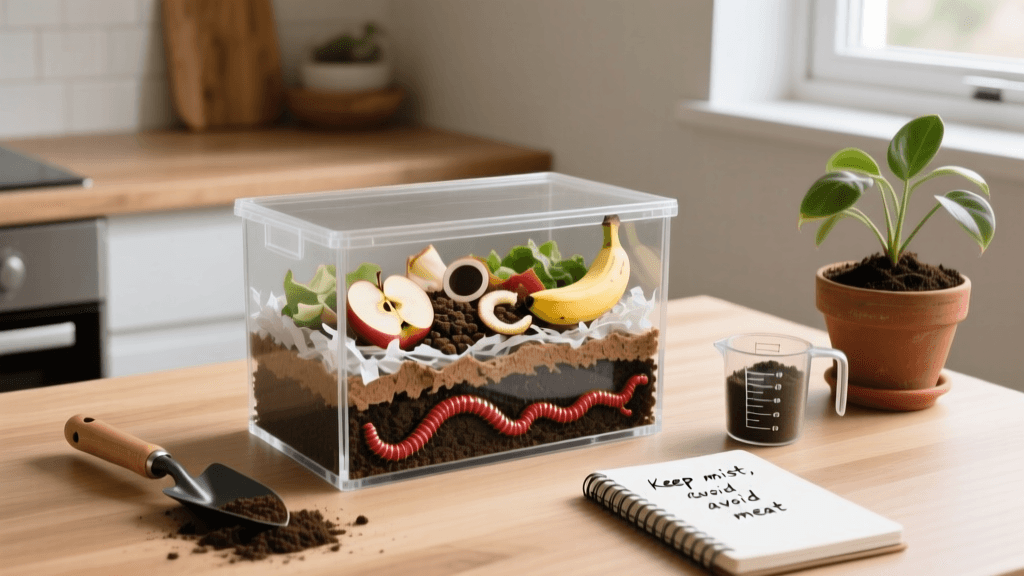
For many home gardeners and eco-conscious homeowners, the transition between indoor living and outdoor landscaping is a seamless flow of design and sustainability. However, one critical element often gets left outside: composting. Traditional backyard compost piles require significant space, physical turning, and favorable weather conditions. But what if you could bridge the gap between your kitchen and your garden by composting indoors? Enter vermicomposting—the art of using worms to transform daily kitchen scraps into 'black gold' right under your sink or in a closet.
Vermicomposting is a highly efficient, odor-free DIY garden project that perfectly suits small spaces, apartments, and modern smart homes. By integrating a worm bin into your indoor routine, you create a closed-loop system that nourishes your garden-to-table patio herbs, outdoor landscaping, and indoor houseplants year-round. In this comprehensive guide, we will explore the science of soil health, provide a step-by-step tutorial on building a DIY worm bin, and detail exactly how to harvest and apply worm castings for ultimate plant vitality.
The Science of Soil Health and Worm Castings
Before grabbing your power drill, it is essential to understand why worm castings (vermicast) are so highly prized in the gardening community. According to the United States Department of Agriculture (USDA), soil health is defined as the continued capacity of soil to function as a vital living ecosystem that sustains plants, animals, and humans. Worm castings are a cornerstone of this ecosystem.
As red wiggler worms consume organic matter, their digestive tract inoculates the material with beneficial microbes, bacteria, and enzymes. The resulting castings are not just a fertilizer; they are a potent soil amendment. Castings improve soil structure, increase water retention in sandy soils, and enhance drainage in heavy clay soils. Furthermore, they contain plant growth hormones and humic acids that make nutrients more bioavailable to plant roots. Unlike synthetic fertilizers that can burn delicate root systems, vermicompost is gentle, slow-release, and teeming with biological life that suppresses soil-borne plant diseases.
Why Choose Red Wigglers?
Not all earthworms are created equal. The common nightcrawler you find in your outdoor garden bed will not survive in a concentrated indoor bin. For vermicomposting, you need Eisenia fetida, commonly known as the Red Wiggler. These epigeic worms thrive in the top layers of decomposing organic matter rather than burrowing deep into mineral soil. They are voracious eaters, capable of consuming up to half their body weight in organic scraps daily, and they reproduce rapidly in captivity.
Step-by-Step: Building Your DIY Worm Bin
While you can purchase expensive, multi-tiered commercial worm towers, a highly effective DIY bin can be constructed for under $50 using supplies from your local hardware store. This single-tier system is perfect for beginners and fits easily into a kitchen cabinet, laundry room, or shaded patio corner.
Materials and Cost Breakdown
- Two opaque plastic storage totes (18-gallon): $15 - $20. (Opaque is crucial; worms are photophobic and light will stress them.)
- Power drill with a 1/8-inch drill bit: $0 (assuming you own one).
- 1 lb of Red Wiggler worms (approx. 1,000 worms): $30 - $45 from a reputable online vermicomposting supplier or local garden center.
- Bedding materials: Free (shredded newspaper, corrugated cardboard, or coconut coir).
- A small trowel and spray bottle: For maintenance and harvesting.
Construction Instructions
- Drill Drainage Holes: Take one of the 18-gallon totes and drill 1/8-inch holes across the entire bottom surface, spacing them about 2 inches apart. This allows excess liquid (leachate) to drain out, preventing the bin from becoming an anaerobic, swampy mess.
- Drill Ventilation Holes: Drill a row of 1/8-inch holes around the upper rim of the same tote, about 2 inches below the lid. This ensures adequate oxygen flow, which is vital for the aerobic decomposition process and odor control.
- Prepare the Catch Basin: The second, undrilled tote will serve as your base or catch basin. Place a few small wooden blocks or inverted plastic cups inside this bottom tote to elevate the drilled tote. This creates an air gap and space for the leachate to pool, which you can later drain and dilute to water your outdoor plants.
- Nest the Bins: Place the drilled tote inside the undrilled catch basin. Your physical bin structure is now complete.
Setting Up the Bedding
Worms do not live in food; they live in their bedding, which also serves as a carbon-rich food source. To prepare the bedding, shred unbleached newspaper, plain brown corrugated cardboard, or use a block of hydrated coconut coir. The bedding should fill the bin to a depth of about 4 to 6 inches.
Moisten the bedding thoroughly with a spray bottle or by soaking it in a bucket and wringing it out. The ideal moisture level is often described as a 'wrung-out sponge'—damp to the touch, but not dripping wet. Sprinkle a handful of outdoor garden soil or sand over the bedding. This provides the necessary grit that worms need in their gizzards to digest food, as they lack teeth.
Feeding Your Worms: The Diet Plan
A successful vermicomposting system relies on a balanced diet of nitrogen-rich 'greens' (your kitchen scraps) and carbon-rich 'browns' (your bedding). Overfeeding is the most common mistake beginners make. Start by feeding your 1 lb of worms about 1/2 lb of scraps per week, burying the food in a different corner of the bin each time to distribute the microbial activity and prevent localized rot.
| Category | Safe to Feed (Nitrogen/Greens) | Avoid (Pests, Toxins, and Odors) |
|---|---|---|
| Fruit Scraps | Apple cores, banana peels, melon rinds, berries | Citrus peels (too acidic in large quantities) |
| Vegetable Scraps | Carrot tops, lettuce, celery ends, squash | Onions, garlic, spicy peppers, potatoes |
| Grains and Pantry | Stale bread, plain cooked pasta, oatmeal | Oily foods, dairy, meat, bones, salty snacks |
| Beverages and Extras | Coffee grounds, tea leaves (remove staples) | Alcohol, highly acidic juices, pet waste |
Always chop or freeze your scraps before feeding. Freezing breaks down the cell walls of the plant matter, making it softer and easier for the worms to consume once it thaws, while also killing any potential fruit fly eggs that may be hiding on the fruit skins.
Harvesting and Applying 'Black Gold'
After 3 to 6 months, your bedding will be largely consumed, and the bin will be filled with dark, earthy-smelling vermicompost. According to the Environmental Protection Agency (EPA), utilizing finished compost reduces the need for chemical fertilizers and helps soil retain moisture, making it a vital practice for sustainable home landscaping.
The Migration Harvesting Method
To separate the worms from the finished castings without picking them out by hand, use the horizontal migration method. Push all the finished compost to one half of the bin. In the empty half, place fresh, moist bedding and a generous pile of tempting food scraps (like a mashed banana or melon rind). Leave the lid off under a bright light for an hour. The worms will naturally migrate away from the light and toward the fresh food in the new bedding. Scoop out the finished castings from the empty side, add fresh bedding, and repeat until only a small cluster of worms remains to be transferred to the new side.
Application for Indoor and Outdoor Plants
- Indoor Houseplants: Top-dress your potted plants with a 1/2-inch layer of castings. Every time you water, the nutrients will steep down into the root zone.
- Garden-to-Table Herbs: When potting up a patio herb garden (basil, rosemary, thyme), mix vermicompost into your potting soil at a ratio of 1 part castings to 4 parts potting mix. This provides a gentle, continuous nutrient supply that enhances the essential oils and flavor profiles of culinary herbs.
- Compost Tea: Steep a cup of castings in a gallon of dechlorinated water for 24 hours, aerating it with an aquarium pump if possible. Use this liquid 'compost tea' as a foliar spray or soil drench to inoculate your outdoor landscaping with beneficial microbes.
Troubleshooting Common Bin Issues
Even well-maintained bins can experience hiccups. Here is how to troubleshoot the most common vermicomposting problems:
- Foul Odors (Rotten Egg Smell): This indicates anaerobic conditions. You have likely overfed the worms or the bin is too wet. Stop feeding immediately, gently fluff the bedding with a hand fork to introduce oxygen, and add a thick layer of dry, shredded cardboard to absorb excess moisture.
- Fruit Flies: Fruit flies are attracted to exposed, rotting food. Always bury your food scraps at least 2 inches deep beneath the bedding. If an infestation occurs, create a trap using a small jar filled with apple cider vinegar and a drop of dish soap, placing it near the bin.
- Worms Escaping the Bin: Worms will try to escape if their environment is hostile. Ensure the bin is not sitting in direct sunlight or near a heating vent. Check the pH (adding a sprinkle of pulverized eggshells helps buffer acidity) and ensure the moisture level is correct.
Pro-Tip for Smart Home Integration: Place a small, smart temperature and humidity sensor inside the lid of your worm bin. By connecting it to your home automation hub, you can receive smartphone alerts if the bin's internal temperature drops below 55°F (12°C) or rises above 80°F (26°C), ensuring your worm colony remains in its optimal biological range year-round.
Conclusion
Vermicomposting is more than just a waste-reduction strategy; it is a profound way to connect your indoor daily habits with your outdoor environmental impact. By investing an afternoon in building a DIY worm bin, you are setting up a microscopic livestock operation that works tirelessly to close the nutrient loop. As the Natural Resources Defense Council (NRDC) highlights, diverting organic waste from landfills significantly reduces methane emissions, making your indoor worm bin a powerful tool in the fight against climate change. Whether you are fertilizing a sprawling backyard vegetable garden or simply keeping a kitchen windowsill basil plant thriving, the rich, microbe-dense castings produced by your worms will elevate your soil health and your gardening success.

