
Landscaping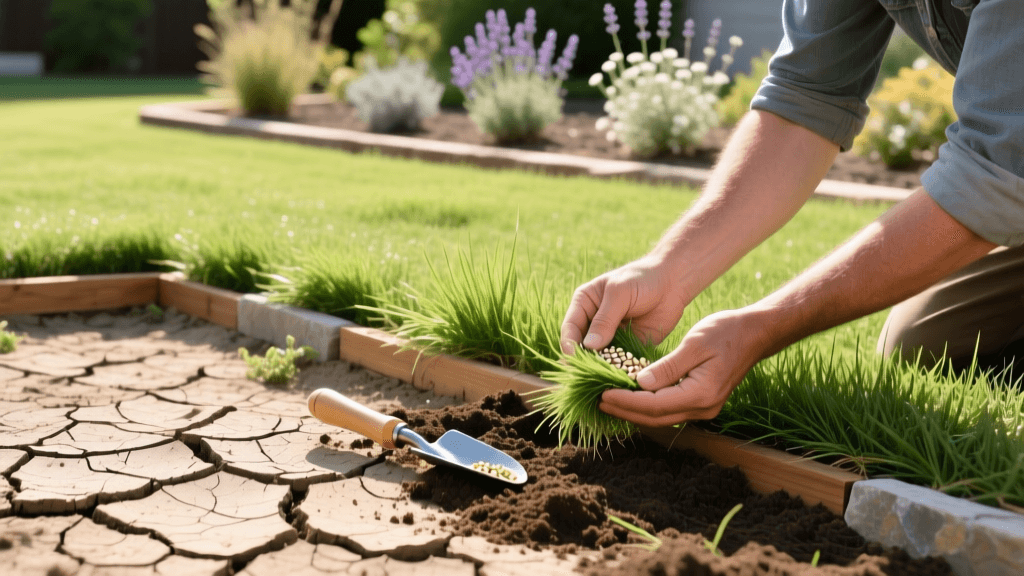
Revive Your Lawn: Drought Recovery and Landscape Repair
Introduction to Post-Drought Landscape Recovery
Severe drought conditions can devastate a meticulously maintained landscape, leaving behind brittle turf, cracked soil, and fading garden beds. When the rains finally return or irrigation restrictions are lifted, homeowners often rush to dump water and seed onto the damaged ground. However, true lawn renovation and landscape recovery require a systematic approach that addresses soil biology, turfgrass selection, and the structural integrity of landscape bed edges. This comprehensive guide will walk you through the exact steps, measurements, and products needed to revive a drought-stricken lawn and seamlessly integrate it with your surrounding hardscaping and garden beds.
Step 1: Diagnosing Turf Dormancy vs. Death and Hardscape Shifts
Before investing in expensive seed and fertilizer, you must accurately diagnose the state of your lawn and surrounding landscape. Grass that is brown and crunchy may not be dead; cool-season grasses like Tall Fescue and Kentucky Bluegrass often enter a state of protective dormancy during prolonged dry spells. To test for viability, perform a tug test. If the grass pulls up easily with no root resistance, the crown is dead, and complete renovation is required. If it holds firm, the lawn is likely dormant and will recover with deep, infrequent watering. Additionally, inspect your hardscaping and landscape bed borders. Prolonged soil desiccation causes clay-heavy soils to shrink and pull away from concrete foundations, retaining walls, and stone edging, creating gaps that can lead to water intrusion and structural shifting.
Step 2: Overcoming Hydrophobic Soil Syndrome
One of the most overlooked hurdles in post-drought lawn recovery is hydrophobic soil syndrome. When soil bakes under intense heat and lacks organic moisture, the organic matter can develop a waxy coating that actively repels water. If you water a hydrophobic lawn, the moisture will simply bead up and run off into the street or storm drains rather than penetrating the root zone. To combat this, apply a liquid soil surfactant or wetting agent. Professional-grade products like Lesco Wetting Agent or a simple DIY solution of two ounces of clear baby shampoo mixed with a gallon of water can break the surface tension of the soil. Apply this mixture across the entire lawn 24 hours before your first deep watering cycle to ensure the soil profile is receptive to moisture and subsequent fertilizer applications. Before applying any amendments, it is highly recommended to conduct a soil test through your local university extension office to determine exact pH and nutrient deficiencies. Drought-stressed soils often become highly acidic or alkaline, which locks up essential nutrients.
Step 3: Core Aeration and Strategic Seed Selection
According to turfgrass specialists at Penn State Extension, core aeration is a non-negotiable step for renovating compacted, drought-stressed soils. Rent a walk-behind core aerator (typically $70 to $100 per day) and make two passes over the lawn in perpendicular directions. The machine should pull 3-inch deep soil plugs, leaving them on the surface to break down naturally. This process relieves compaction and creates direct channels for seed-to-soil contact. For cool-season lawns, overseed immediately after aeration in early September. Choose drought-tolerant, endophyte-enhanced seed blends. Pennington Smart Seed or Scotts Turf Builder Tall Fescue Mix are excellent choices, requiring up to 30% less water than traditional seed varieties.
Cool-Season Grass Recovery Metrics
| Grass Type | Seeding Rate (lbs/1000 sq ft) | Germination Time | Drought Tolerance | Best Planting Window |
|---|---|---|---|---|
| Tall Fescue (RTF) | 6 - 8 lbs | 7 - 14 days | Excellent | Aug 15 - Sep 30 |
| Kentucky Bluegrass | 2 - 3 lbs | 14 - 28 days | Moderate | Aug 15 - Sep 15 |
| Bermudagrass | 1 - 2 lbs | 10 - 15 days | Exceptional | May 15 - Jun 30 |
| Zoysiagrass | 1 - 2 lbs | 14 - 21 days | Excellent | May 1 - Jun 15 |
Step 4: Restoring Landscape Bed Edges and Hardscape Transitions
Lawn renovation is incomplete without addressing the transition zones where turf meets garden beds and hardscaping. Drought conditions often cause mulch to decompose rapidly or blow away, leaving landscape beds looking barren and allowing weeds to invade the weakened turf edges. To restore crisp, professional lines, use a trenching spade to recreate a Bates edge. Dig a 4-inch deep, 45-degree angled trench between the lawn and the garden bed. This physical barrier prevents aggressive grass rhizomes from invading the beds and stops mulch from spilling onto the turf. After edging, replenish the garden beds with 2 to 3 inches of double-shredded hardwood or cedar mulch. Keep the mulch at least two inches away from the base of shrubs and tree trunks to prevent rot and rodent damage. Consider integrating drought-tolerant border plants like Liriope, Sedum, or ornamental grasses to stabilize the bed edges and reduce future water demands.
If your landscape features paver patios or walkways, the drought-induced soil shrinkage likely caused the polymeric sand in the joints to crack or wash out. Use a leaf blower to remove debris from the joints and refill them with fresh polymeric sand, misting lightly to activate the binding polymers. This prevents weed growth between pavers and stabilizes the hardscape surface.
Step 5: Watering, Fertilization, and Sustainable Practices
Proper hydration and nutrition are critical during the first 30 days of renovation. New seed requires constant moisture; water the lawn lightly two to three times a day for 10 minutes per zone to keep the top inch of soil consistently damp until germination occurs. Once the new grass reaches 2 inches in height, transition to deep, infrequent watering—approximately 1 inch per week—to encourage deep root growth. The EPA WaterSense program highly recommends installing a smart irrigation controller or soil moisture sensor to prevent overwatering and reduce outdoor water waste. Simultaneously, apply a high-phosphorus starter fertilizer, such as Scotts Turf Builder Starter Food for New Grass (24-25-4), on the day of seeding to fuel rapid root development. Avoid broadleaf weed herbicides until the new turf has been mowed at least three times.
Estimated Renovation Costs for a 5,000 Sq Ft Property
- Core Aerator Rental (1 Day): $85.00
- Premium Tall Fescue Seed (40 lbs): $110.00
- Starter Fertilizer (1 Bag): $35.00
- Soil Surfactant / Wetting Agent: $25.00
- Hardwood Mulch (3 Cubic Yards, Delivered): $120.00
- Polymeric Sand for Hardscapes: $45.00
- Total Estimated Material & Rental Cost: $420.00
Long-Term Landscape Resilience
As noted by the UC Agriculture and Natural Resources sustainable landscaping initiative, recovering from drought is an opportunity to redesign your landscape for long-term resilience. By combining proper soil preparation, elite drought-tolerant genetics, and sharp hardscape edging, you can transform a damaged yard into a robust, water-efficient outdoor living space. Furthermore, top-dressing your lawn with a quarter-inch of organic compost every other year will drastically improve the soil's water retention capabilities, acting as a natural sponge during dry spells. Consistent fall maintenance, including annual aeration and proper mowing heights (keeping Tall Fescue at 3.5 inches), will ensure your landscape remains vibrant and resistant to future climate stressors.

