
Gardening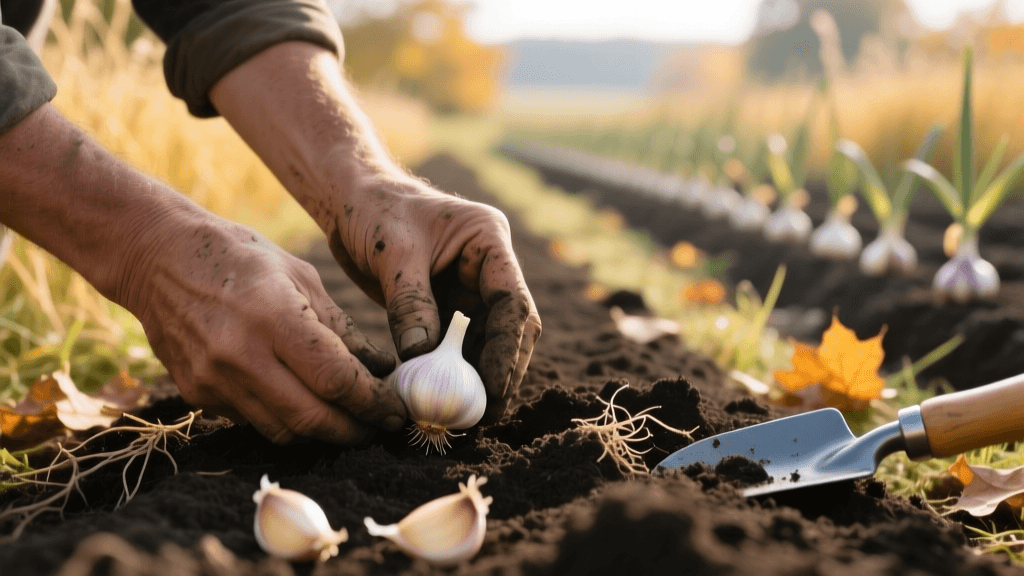
The Ultimate Fall Garlic Planting Schedule and Care Guide
Why Fall is the Best Time to Plant Garlic
Gardening is often associated with the vibrant blooms of spring and the heavy harvests of late summer, but some of the most rewarding crops actually begin their journey in the crisp, cooling days of autumn. Garlic is the quintessential fall-planted crop. Unlike tomatoes or peppers that demand constant summer attention, garlic thrives on a long, slow seasonal cycle. By planting garlic in the fall, you are working with the plant's natural biological clock, setting the stage for a massive, flavorful harvest the following summer.
To understand the fall garlic planting schedule, you must first understand a biological process called vernalization. Garlic requires a prolonged period of cold temperatures—typically between 40°F and 50°F—to trigger the differentiation of the bulb. Without this cold period, the garlic plant will not divide into individual cloves; instead, it will produce a single, solid, onion-like bulb known as a 'round.' By planting in the fall, the cloves establish a robust root system before the ground freezes, survive the winter chill to satisfy their vernalization requirements, and explode with top growth the moment the spring soil warms.
Hardneck vs. Softneck: Selecting Your Seed Garlic
Before you can finalize your planting schedule, you need to choose the right type of garlic for your climate. Grocery store garlic is almost exclusively softneck, but home gardeners have the luxury of choosing between two primary subspecies: Hardneck (Allium sativum var. ophioscorodon) and Softneck (Allium sativum var. sativum). Seed garlic typically costs between $15 and $25 per pound from reputable nurseries, so choosing the right variety is a vital investment.
| Feature | Hardneck Garlic | Softneck Garlic |
|---|---|---|
| Climate Preference | Northern climates, harsh winters (Zones 3-6) | Milder climates, warmer winters (Zones 7-9) |
| Cold Hardiness | Extremely cold-hardy | Moderately cold-hardy |
| Flavor Profile | Complex, robust, spicy, and diverse | Milder, classic 'grocery store' garlic flavor |
| Storage Life | Shorter (4-6 months) | Longer (9-12 months) |
| Scape Production | Produces edible flower stalks (scapes) | Rarely produces scapes |
| Peeling Ease | Easy to peel (thick, stiff skin) | Harder to peel (tight, papery layers) |
According to the University of Minnesota Extension, hardneck varieties like 'Music', 'German Extra Hardy', and 'Chesnok Red' are vastly superior for gardeners in regions that experience deep winter freezes. Conversely, softneck varieties like 'Inchelium Red' or 'California Early' are better suited for areas with mild winters where the ground rarely freezes solid.
The Ideal Fall Garlic Planting Schedule
Timing is the most critical factor in fall garlic planting. Plant too early, and the cloves will send up tender green shoots that will be killed by hard frosts, depleting the clove's energy reserves. Plant too late, and the cloves won't have time to establish a sufficient root system to anchor themselves against winter frost heaving.
The golden rule of thumb is to plant garlic two to four weeks before the ground freezes solid, or roughly two weeks after the first light frost of autumn. The ideal soil temperature for planting is around 50°F at a depth of two inches. Here is a general seasonal timing guide based on USDA Hardiness Zones:
- Zones 3-5 (Northern US & Canada): Late September to Mid-October. The goal is to get cloves in the ground before heavy snows arrive.
- Zones 6-7 (Mid-Atlantic & Transition Zones): Mid-October to Early November. Wait until the autumn chill has firmly settled.
- Zones 8-9 (Southern US & Coastal Regions): Late November through December. Because these regions lack sufficient winter chill, gardeners must artificially vernalize their seed garlic by storing it in the refrigerator (around 40°F) for 8 to 10 weeks prior to planting.
Pro-Tip: Do not crack your garlic bulbs into individual cloves until 1 to 2 days before your scheduled planting date. Leaving the protective husk intact on the bulb prevents the basal plate (the root-growing end) from drying out or succumbing to fungal pathogens while in storage.
Soil Preparation and Bed Construction
Garlic is a heavy feeder with a shallow root system, making soil preparation just as important as seasonal timing. Garlic despises 'wet feet'; sitting in waterlogged soil will quickly lead to bulb rot and fungal diseases like Fusarium. For this reason, planting in raised beds that are at least 10 to 12 inches high is highly recommended to ensure optimal drainage.
The ideal soil pH for garlic ranges from 6.0 to 7.0. If your soil is too acidic, incorporate garden lime according to a professional soil test. To prepare your beds in early fall, follow this amendment recipe per 10 square feet of garden space:
- Compost: Add 2 to 3 inches of well-rotted, screened compost to improve soil structure and microbial life.
- Phosphorus: Mix in 1 cup of organic bone meal or rock phosphate to stimulate strong, early root development.
- Potassium: Add 1/2 cup of greensand or kelp meal to support overall plant vigor and disease resistance.
- Nitrogen: Avoid high-nitrogen fertilizers in the fall. Excess nitrogen will push unwanted top growth before winter. Save nitrogen for the spring.
Till or fork these amendments into the top 8 inches of soil, then rake the bed smooth and allow it to settle for a week before planting.
Step-by-Step Planting Instructions
When your scheduled planting day arrives, carefully break the bulbs apart, leaving the papery skin on each individual clove. Discard any cloves that are soft, moldy, or significantly smaller than the rest, as these will produce stunted plants.
- Create a Trench or Grid: Use a hoe or dibber to create planting holes. Garlic requires ample airflow to prevent fungal issues, so space your holes 6 inches apart in all directions. If planting in rows, space the rows 12 inches apart.
- Check Orientation: This is a common beginner mistake. The clove must be planted with the pointy end facing up and the flat, rough basal plate facing down. Planting a clove upside down will result in a deformed bulb and a significantly reduced yield.
- Set the Depth: Place the clove into the hole so that the tip of the clove is exactly 2 inches below the soil surface. In extremely cold zones (Zone 3 or 4), you can plant slightly deeper, up to 3 inches, for added insulation.
- Backfill and Water: Cover the cloves with soil, gently firming it down with your hands to eliminate large air pockets. Water the bed deeply immediately after planting to initiate root growth and settle the soil around the cloves.
Winter Mulching and Cold Protection
Once the garlic is in the ground, your focus shifts to winter protection. The The Old Farmer's Almanac heavily emphasizes the importance of mulching fall-planted garlic, but the timing of the mulch application is just as critical as the material used.
Do not apply winter mulch immediately after planting. If you mulch too early while the soil is still warm, you risk trapping excess moisture and creating a hospitable environment for rodents and fungal diseases. Instead, wait until the ground has experienced a few hard freezes and the top layer of soil has begun to crust over. This usually occurs in late November or early December in northern zones.
Apply a thick layer—4 to 6 inches—of seed-free straw, shredded autumn leaves, or marsh hay over the entire bed. This mulch layer serves two vital purposes: it insulates the soil to protect the young roots from extreme temperature drops, and more importantly, it prevents 'frost heaving.' Frost heaving occurs when the soil repeatedly freezes and thaws, which can push the shallow-rooted garlic cloves entirely out of the ground, exposing them to lethal winter winds.
Spring Awakening and Summer Harvest Timeline
As the seasonal cycle turns and spring arrives, your garlic will be one of the first crops to show signs of life. In early spring, once the threat of severe, hard freezes has passed, gently pull back the winter mulch to allow the soil to warm up and the green shoots to emerge unimpeded. You can leave the mulch in the pathways to suppress weeds.
Spring Fertilization: Garlic is a heavy nitrogen feeder in the spring. As soon as the plants are 6 to 8 inches tall, side-dress them with a high-nitrogen organic fertilizer, such as blood meal, feather meal, or a liquid fish emulsion. Repeat this application one month later. According to the University of Wisconsin-Madison Extension, stopping all fertilization by late May is crucial, as late-season nitrogen can delay bulb formation and reduce storage quality.
Scape Removal (Hardneck Only): In early to mid-June, hardneck garlic varieties will send up a curled, central flower stalk known as a scape. You must snap or cut these scapes off as soon as they form a single loop. Removing the scape redirects the plant's energy away from seed production and forces it back down into swelling the underground bulb. Plus, garlic scapes are a culinary delicacy, perfect for making pesto or stir-fries.
Watering and Harvest: Keep the garlic consistently watered (about 1 inch per week) through the spring. However, cease all watering entirely during the last two weeks of June or when the lower leaves begin to yellow. This allows the bulbs to dry down and begin forming their protective papery wrappers.
Harvest time typically arrives in mid-to-late July. The ideal time to pull garlic is when the bottom three or four leaves have turned brown and died back, but the top five or six leaves are still partially green. Each green leaf corresponds to one intact wrapper layer on the bulb; harvesting too late results in bulbs that have burst their wrappers, making them impossible to store long-term.
Curing for Long-Term Storage
The seasonal journey of garlic does not end at harvest; proper curing is mandatory. Gently brush off excess soil (never wash the bulbs with water) and bundle 5 to 10 plants together. Hang them upside down or lay them flat on a wire rack in a warm, dry, well-ventilated area out of direct sunlight. An open garage, a covered porch, or a well-ventilated barn is ideal. Allow the garlic to cure for 4 to 6 weeks until the necks are completely tight and dry, and the outer skin is papery. Once cured, trim the roots and stalks, and store your hard-earned harvest in a cool, dark place to enjoy through the winter months.

