
Lawn Care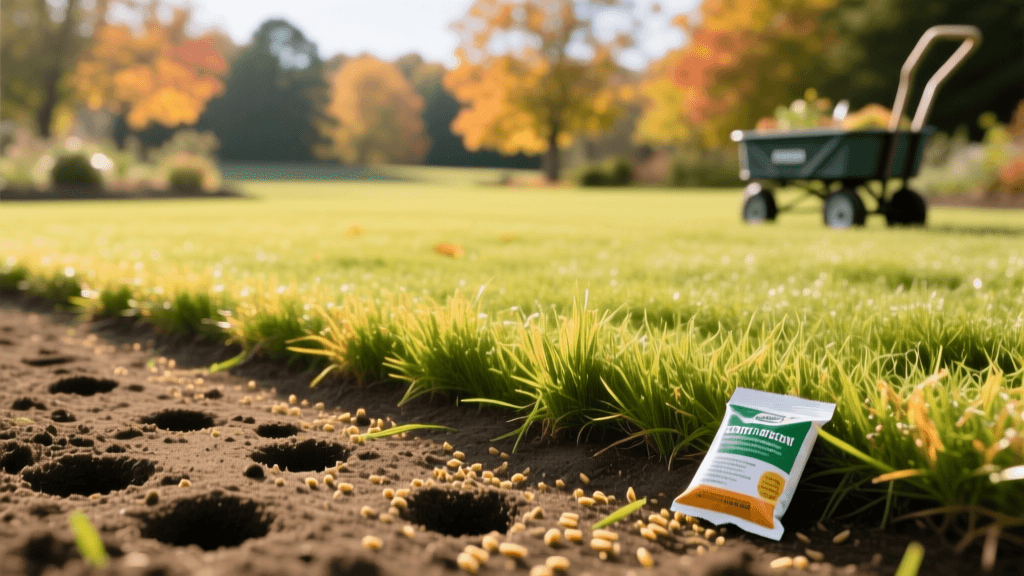
The Complete Guide to Fall Lawn Renovation and Overseeding
Assessing Lawn Damage: Renovation vs. Repair
Before you invest time and money into your yard, it is crucial to determine whether your lawn needs a simple repair or a complete renovation. Repairing a lawn typically involves overseeding thin areas and adjusting your fertilization schedule. However, if your lawn consists of more than 50% bare spots, compacted soil, or aggressive weeds, a full renovation is necessary. According to the University of Minnesota Extension, total lawn renovation is the process of completely killing the existing turf and weeds, preparing the seedbed, and planting new grass seed. This aggressive approach resets your lawn's ecosystem, allowing you to introduce modern, drought-tolerant, and disease-resistant grass cultivars that will thrive for years to come.
The Ideal Timing for Cool-Season Grass Renovation
Timing is the single most critical factor in lawn renovation success. For cool-season grasses like Tall Fescue, Kentucky Bluegrass, and Perennial Ryegrass, the optimal window for renovation is late summer to early fall—specifically between August 15 and September 15. As noted by Penn State Extension, seeding during this window allows the grass to establish a deep root system before the onset of winter dormancy. Furthermore, fall seeding minimizes competition from summer annual weeds like crabgrass, and the cooler air temperatures combined with warm soil create the perfect environment for rapid germination.
Expert Tip: Soil temperature is more critical than air temperature for seed germination. Aim for a consistent soil temperature between 50°F and 65°F at a 2-inch depth before dropping seed. Use a simple soil probe thermometer to verify conditions.
Step-by-Step Fall Lawn Renovation Process
Step 1: Weed Control and Mowing
Begin the renovation process by mowing your existing lawn as short as possible, ideally down to 1.5 inches. Bag and remove all clippings to expose the soil surface. If your lawn is heavily infested with weeds, you may need to apply a non-selective herbicide like glyphosate to kill the existing vegetation. When handling herbicides, always follow the EPA's safe pest control guidelines and wear appropriate personal protective equipment. After applying a non-selective herbicide, wait at least 7 to 14 days for the vegetation to completely brown and die before proceeding to the next step.
Step 2: Core Aeration and Dethatching
Compacted soil prevents seed-to-soil contact and restricts root growth. Rent a walk-behind core aerator from your local home improvement store (typically costing $80 to $120 for a four-hour rental). Make two to three passes over the lawn in perpendicular directions to pull thousands of 3-inch soil plugs. Leave the plugs on the lawn; they will break down and return valuable microbes to the surface. If your lawn has a thatch layer thicker than 0.5 inches, use a power dethatcher (vertical mower) to rip out the dead organic matter before aerating.
Step 3: Soil Testing and Amendment
Never guess your soil's needs. Purchase a mail-in soil test kit from your local university extension office or a reputable private lab. Cool-season grasses prefer a soil pH between 6.0 and 7.0. If your soil is too acidic (below 6.0), apply pelletized limestone based on the test's recommendations. If your soil lacks organic matter, top-dress the lawn with a 1/4-inch layer of screened compost after aeration. This compost will work its way into the aeration holes, improving moisture retention and soil structure.
Step 4: Overseeding and Slit-Seeding
For a full renovation, broadcasting seed by hand or with a rotary spreader is inefficient. Instead, rent a slit-seeder (also known as a slice seeder). A slit-seeder cuts shallow grooves into the soil and drops the seed directly into the furrows, ensuring near-perfect seed-to-soil contact. Set the blade depth to 1/4 to 1/2 inch. Make two passes over the lawn in a crisscross pattern to ensure even distribution. If you are only overseeding thin patches, a broadcast spreader will suffice, but you must drag the lawn with a piece of chain-link fence or a mat afterward to work the seed into the aeration holes.
Step 5: Starter Fertilizer Application
Newly germinated grass seedlings require high levels of phosphorus to develop strong root systems. Apply a high-quality starter fertilizer immediately after seeding. Look for an N-P-K ratio similar to 10-18-10 or 12-24-12. Products like Scotts Turf Builder Starter Food for New Grass or Lesco Professional Starter Fertilizer are excellent choices. Apply the fertilizer using a drop spreader to ensure precise, even coverage without burning the delicate new seedlings.
Step 6: Irrigation and Germination
Watering is the make-or-break phase of lawn renovation. The top inch of soil must remain consistently moist—but not waterlogged—until the seeds germinate. This typically requires light watering 2 to 3 times a day for 10 to 15 minutes per zone. If the seed dries out even once during the germination window, it will die. Once the grass reaches a height of 1.5 inches, gradually reduce the frequency of watering while increasing the duration to encourage deep root growth.
Seed Selection and Application Rates
Choosing the right seed blend is vital for long-term lawn health. Avoid cheap, generic seed mixes found in hardware stores, as they often contain high percentages of annual ryegrass and weed seeds. Invest in premium, certified seed blends. Below is a comparison chart to help you select the right grass type and application rate for your specific needs.
| Grass Type | Seeding Rate (lbs/1000 sq ft) | Germination Time (Days) | Best Use Case |
|---|---|---|---|
| Tall Fescue | 6 - 9 lbs | 7 - 12 days | High traffic areas, drought-prone zones, and full sun to partial shade. |
| Kentucky Bluegrass | 2 - 3 lbs | 14 - 30 days | Lush, high-maintenance lawns with excellent cold tolerance and spreading rhizomes. |
| Perennial Ryegrass | 5 - 7 lbs | 5 - 10 days | Quick cover, erosion control, and overseeding warm-season grasses in winter. |
| Fine Fescue | 4 - 6 lbs | 7 - 14 days | Deeply shaded areas and low-fertility soils where other grasses struggle. |
Estimated Cost Breakdown for a 5,000 Sq Ft Lawn
Budgeting for a DIY lawn renovation helps you prepare for the project. Here is a realistic cost breakdown for renovating a standard 5,000 square foot suburban lawn using rental equipment and premium materials:
- Core Aerator Rental (4 hours): $85.00
- Slit-Seeder Rental (4 hours): $90.00
- Premium Tall Fescue Seed (50 lbs): $160.00
- Starter Fertilizer (40 lb bag): $65.00
- Soil Test Kit: $20.00
- Total Estimated DIY Cost: ~$420.00
While hiring a professional landscaping company to perform a full slit-seeding renovation can cost between $800 and $1,500 for the same square footage, the DIY route offers significant savings if you are willing to put in the physical labor.
Post-Renovation Maintenance and Recovery
Once your new grass has germinated and reached a height of 3 to 3.5 inches, it is time for the first mow. Ensure your mower blades are razor-sharp to prevent tearing the delicate new grass blades. Never remove more than one-third of the grass blade in a single mowing. Continue to mow regularly throughout the fall to prevent fallen leaves from smothering the new seedlings.
In late October or early November, apply a winterizer fertilizer (high in nitrogen, such as a 32-0-10 ratio) to help the young grass store carbohydrates for the winter. Avoid heavy foot traffic on the renovated lawn for the first eight weeks, and hold off on applying any broadleaf weed herbicides until the new grass has been mowed at least three times. By following this comprehensive renovation protocol, you will transform a tired, weed-infested yard into a thick, vibrant, and resilient carpet of green.

