Pest Control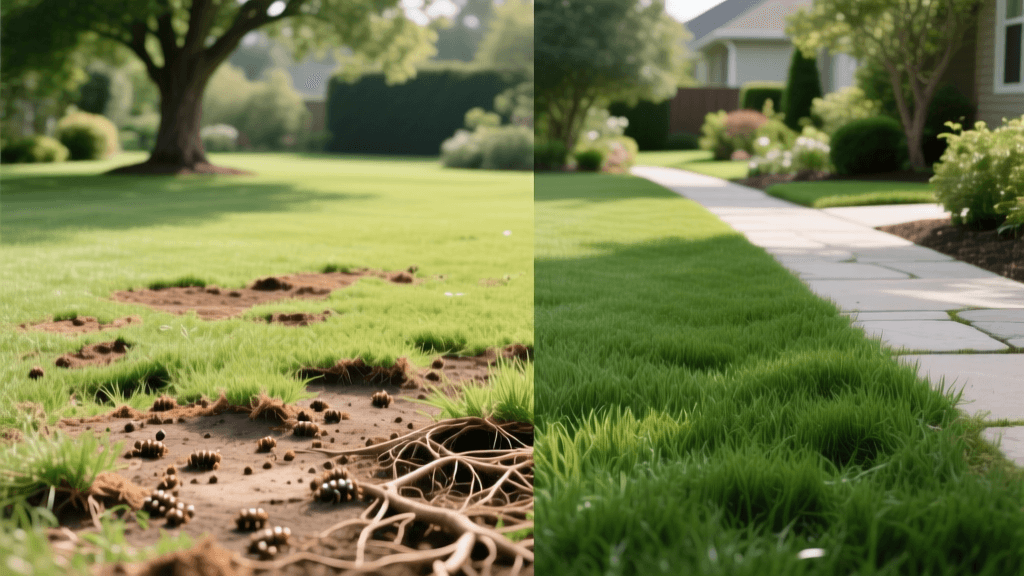
Transforming a Grub-Destroyed Lawn: Before & After Recovery
The 'Before' State: Assessing the Grub Apocalypse
Waking up to a lawn that looks like it has been aggressively tilled by a rototiller is a homeowner's worst nightmare. When you step outside and see large, irregular brown patches of dead grass, spongy turf that rolls back like a loose carpet, and deep divots scattered across the yard, you are likely looking at the devastating aftermath of a white grub infestation. White grubs—the larval stage of scarab beetles such as Japanese beetles, June bugs, and European chafers—feed voraciously on grassroots, severing the plant from its water and nutrient supply.
However, the 'Before' picture often includes secondary damage that is just as unsightly as the dead grass. According to Penn State Extension, the presence of a high grub population acts as a beacon for local wildlife. Skunks, raccoons, armadillos, and flocks of crows will tear through your topsoil, flipping over chunks of sod to feast on the protein-rich larvae. This leaves the lawn in a state of absolute ruin, requiring a comprehensive, multi-step transformation to bring it back to life.
The Tug Test and Damage Thresholds
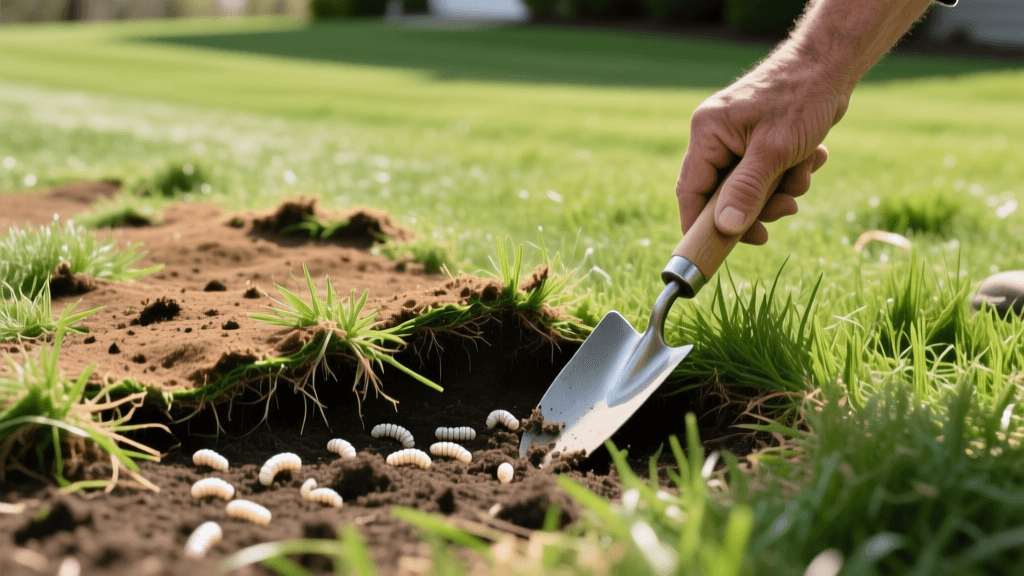
Before initiating any transformation, you must confirm the culprit and assess the severity of the infestation. Perform the 'Tug Test': grab a handful of the brown, dying grass and pull. If the turf lifts away from the soil with zero resistance and no roots attached, grubs have eaten the root system. Next, use a flat-edged spade to cut a one-foot by one-foot square of turf, about two inches deep, and peel it back. Count the C-shaped, white larvae in the top three inches of soil. The University of Kentucky Entomology department notes that a threshold of 5 to 10 grubs per square foot warrants immediate curative intervention, while anything above 10 per square foot indicates a severe outbreak that will rapidly destroy the entire lawn if left untreated.
The Turning Point: Eradicating the Infestation
You cannot lay new seed or sod over an active grub infestation; the new roots will simply become their next meal. The first phase of your lawn's transformation is total eradication. Depending on your environmental preferences and the time of year, you have two primary routes for curative control.
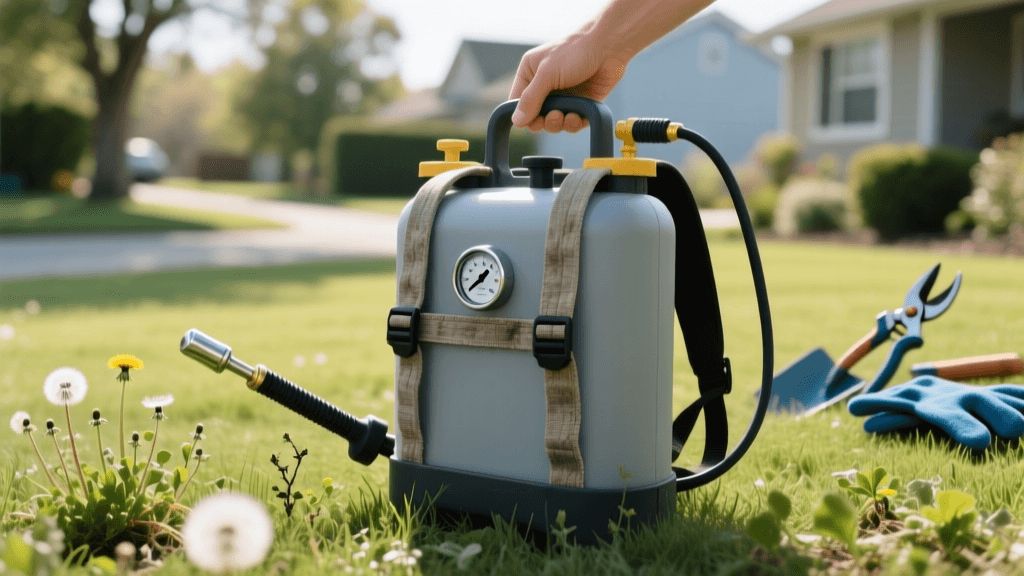
Chemical Curative Options
If you discover an active infestation in late summer or early fall, a fast-acting chemical curative is your best option. The industry standard for rapid grub knockdown is Trichlorfon, commonly sold under the brand name Dylox 6.2. Unlike preventative chemicals, Trichlorfon moves quickly through the soil profile and kills grubs within 24 to 48 hours.
Actionable Application Steps:
1. Mow the lawn as short as possible to allow the granules to reach the soil.
2. Apply Dylox at a rate of 3 pounds per 1,000 square feet using a broadcast spreader.
3. Immediately water the lawn with 0.5 inches of water. Trichlorfon degrades rapidly in sunlight and high pH soils, so watering it in immediately is non-negotiable.
4. Cost: Approximately $45 to $55 for a bag covering 5,000 square feet.
The Organic Route: Beneficial Nematodes
For homeowners seeking an organic transformation, beneficial nematodes are a highly effective, biological control method. Specifically, you must seek out the species Heterorhabditis bacteriophora (often labeled as Hb nematodes), which actively hunts and infects white grubs. The University of California IPM program highlights that nematodes are an excellent alternative to broad-spectrum insecticides, as they pose zero threat to earthworms, pets, or humans.
Actionable Application Steps:
1. Purchase live nematodes from a reputable supplier and store them in the refrigerator until use.
2. Apply in the late afternoon or on a cloudy day, as UV light kills nematodes instantly.
3. Mix the nematode sponge or powder into a hose-end sprayer and apply at a rate of 25 million nematodes per 1,000 square feet.
4. Keep the soil consistently moist for 10 to 14 days post-application to allow the nematodes to swim through the soil pores and locate the grubs.
5. Cost: Approximately $35 to $45 per 25 million count.
The Transformation: Soil Prep and Reseeding
Once the grubs and the foraging wildlife have moved on, the true 'After' transformation begins. The lawn is currently a patchwork of bare soil, dead thatch, and animal divots. Proper soil preparation is the bridge between a dead yard and a lush, green carpet.
Step-by-Step Recovery Plan
1. Debris Removal and Raking: Use a heavy metal thatch rake to aggressively pull out all the dead, rootless grass and loose soil clods left behind by foraging animals. This ensures that new seed will make direct contact with the soil, which is mandatory for germination.
2. Core Aeration: Rent a gas-powered core aerator and make two passes over the damaged areas (one horizontally, one vertically). Aeration relieves soil compaction caused by heavy foot traffic and animal digging, while also pulling up soil plugs that help break down remaining thatch.
3. Topdressing: Spread a 1/4-inch layer of high-quality, screened compost over the bare patches. This introduces beneficial microbes to the soil, improves moisture retention, and creates a perfect seedbed.
4. Seeding and Fertilizing: Choose a seed blend suited to your climate. For cool-season lawns, a mix of Turf-Type Tall Fescue (for deep drought resistance) and Kentucky Bluegrass (for rhizome spreading and self-repair) is ideal. Apply seed at a rate of 6 to 8 pounds per 1,000 square feet for bare ground renovation. Immediately follow with a starter fertilizer high in phosphorus (such as a 10-18-10 NPK ratio) to stimulate rapid root development.
5. The Watering Regimen: For the first 21 days, the seed must never dry out. Water lightly 3 to 4 times a day for 5 minutes per zone. Once the grass reaches two inches, transition to deep, infrequent watering to encourage deep root growth.
The 'After' State: Long-Term Prevention
A successful transformation is only permanent if you protect your investment from future generations of scarab beetles. The 'After' state of your lawn should focus on thick, healthy turf and proactive, preventative pest management.
The gold standard for preventative grub control is Chlorantraniliprole, widely available under the consumer brand name Scotts GrubEx. Unlike older chemicals like Imidacloprid, Chlorantraniliprole is highly targeted and safe for pollinators and earthworms. However, it requires precise timing. It must be applied in late May or early June. The chemical takes 60 to 90 days to fully activate in the soil, perfectly aligning with the hatching cycle of summer grub larvae in July and August. Apply at the label rate of 2.87 pounds per 1,000 square feet and water it in with 0.25 inches of water.
Grub Control Strategy Comparison
To help you plan your budget and calendar, refer to the comparison chart below detailing the different approaches to grub management.
| Strategy | Active Ingredient / Agent | Application Timing | Target Stage | Est. Cost (per 1k sq ft) |
|---|---|---|---|---|
| Curative (Chemical) | Trichlorfon (Dylox) | late Summer / Early Fall | Active 2nd & 3rd instar larvae | $9.00 - $11.00 |
| Curative (Organic) | Hb Beneficial Nematodes | late Summer (when soil is moist) | Active larvae (all stages) | $35.00 - $45.00 |
| Preventative | Chlorantraniliprole (GrubEx) | late Spring (May / June) | Eggs and newly hatched 1st instar | $6.00 - $8.00 |
Conclusion
The journey from a grub-destroyed, wildlife-torn yard to a pristine, emerald-green lawn is a testament to the power of integrated pest management and dedicated lawn care. By accurately diagnosing the 'Before' state, executing a targeted curative treatment, meticulously preparing the soil, and establishing a robust preventative schedule for the 'After' state, you can completely reverse the apocalypse. Your lawn will not only recover, but with deeper roots and proactive protection, it will emerge thicker, more resilient, and far more beautiful than it was before the invasion.