
Gardening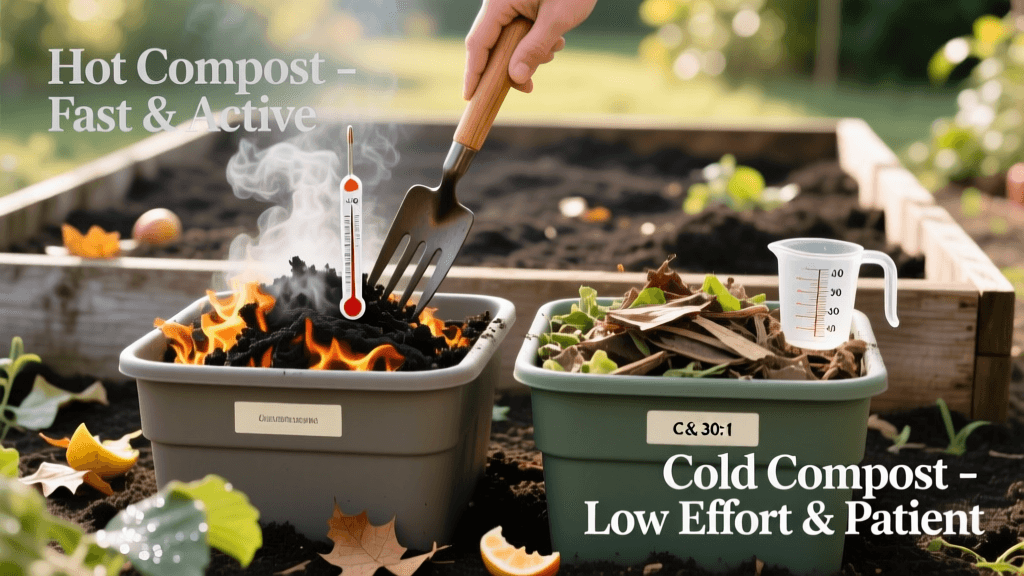
Hot vs Cold Composting: The Ultimate Guide to Rich Garden Soil
The Foundation of Garden Success: Soil Health
Every thriving vegetable patch, lush lawn, and vibrant flower bed starts beneath the surface. Soil health is the undisputed foundation of successful gardening, and nothing builds healthy, living soil quite like compost. Often referred to by gardeners as 'black gold,' compost improves soil structure, increases water retention in sandy soils, enhances drainage in heavy clay, and provides a slow-release buffet of essential micronutrients. However, not all compost is created equal, and the method you choose to break down your organic matter will drastically affect your timeline, the quality of your final product, and the overall health of your garden ecosystem.
When deciding how to manage your yard waste and kitchen scraps, you are generally choosing between two primary methods: hot composting and cold composting. According to the Environmental Protection Agency (EPA), composting is nature's way of recycling, but by managing the process, gardeners can accelerate decomposition and eliminate pathogens. This guide will break down the science, the setup, and the troubleshooting steps for both methods so you can choose the right path for your soil health goals.
The Science of Decomposition: Carbon and Nitrogen
Before diving into the specific methods, it is crucial to understand the biological engine driving the composting process. Composting relies on a diverse community of microorganisms—bacteria, fungi, and actinomycetes—along with macroorganisms like earthworms and nematodes. These organisms require two primary elements to thrive and break down organic matter:
- Carbon (Browns): Provides energy for the microbes. Carbon-rich materials are typically dry, brown, and bulky. Examples include dried autumn leaves, straw, shredded newspaper, cardboard, and wood chips.
- Nitrogen (Greens): Provides the protein necessary for microbial growth and reproduction. Nitrogen-rich materials are usually moist and colorful. Examples include vegetable kitchen scraps, fresh grass clippings, coffee grounds, and manure.
The ideal Carbon-to-Nitrogen (C:N) ratio for a compost pile is roughly 30:1. This means 30 parts carbon to 1 part nitrogen by weight. Research from the Cornell University Waste Management Institute highlights that maintaining this ratio prevents the pile from becoming a smelly, anaerobic mess (too much nitrogen) or a stagnant, slow-to-decompose heap (too much carbon). A good rule of thumb for home gardeners is to use a volume ratio of roughly two to three parts 'browns' for every one part 'greens'.
Hot Composting: The Fast Track to Black Gold
Hot composting is an active, managed process that harnesses the heat generated by thermophilic (heat-loving) bacteria. When a pile reaches temperatures between 130°F and 160°F, it rapidly breaks down organic matter and, crucially, destroys weed seeds, soil-borne pathogens, and harmful fungi. The most famous hot composting technique is the Berkeley Method, which can produce finished compost in as little as 18 to 21 days.
Step-by-Step Hot Compost Setup
- Build to Critical Mass: To retain heat, your pile must be at least 3 feet wide, 3 feet long, and 3 feet high (1 cubic yard). Anything smaller will lose heat too quickly to the surrounding air.
- Batch Your Materials: Unlike cold composting, you need all your materials ready at once. Collect your browns and greens, and chop or shred them into pieces no larger than 2 inches to increase the surface area for microbes.
- Layer and Moisten: Build the pile in alternating layers (e.g., 4 inches of browns, 2 inches of greens). As you build, water each layer thoroughly. The pile should feel like a wrung-out sponge—moist, but not dripping.
- Let it Heat Up: Leave the pile untouched for the first 4 days. The core temperature should spike into the 140°F range.
- Turn Every Other Day: On day 4, use a pitchfork to turn the pile, moving the outer, cooler material to the center and the hot center material to the outside. Continue turning every 2 to 3 days. The temperature will peak and then gradually decline as the easily digestible materials are consumed.
- Cure: Once the pile no longer heats up after turning and the temperature drops to ambient levels (usually around day 18-21), let it 'cure' for a week before applying it to your garden beds.
Cold Composting: The Low-Maintenance Approach
If you do not have the time, physical ability, or space to manage a hot pile, cold composting (also known as passive composting) is an excellent alternative. Cold composting is essentially the 'add and forget' method. You simply pile your yard waste and kitchen scraps into a bin or a designated corner of your yard and let nature take its course.
Because the pile does not reach high temperatures, the decomposition process is driven by mesophilic (moderate-temperature) bacteria and fungi, as well as earthworms and insects. The major drawback of cold composting is time; it can take anywhere from 6 to 12 months to produce finished compost. Furthermore, because the pile never reaches 140°F, weed seeds and certain plant pathogens will survive the process. Therefore, avoid adding diseased plants or weeds that have gone to seed to a cold pile.
Comparison Chart: Hot vs. Cold Composting
| Feature | Hot Composting | Cold Composting |
|---|---|---|
| Time to Finish | 3 to 4 weeks (plus curing) | 6 to 12 months |
| Effort Level | High (requires turning and monitoring) | Low (add materials as you go) |
| Temperature | 130°F - 160°F | Ambient to 100°F |
| Weed Seed Destruction | Yes | No |
| Pathogen Destruction | Yes | No |
| Material Requirements | Requires batch building all at once | Can be built gradually over time |
Essential Tools for the Composter
Whether you choose the hot or cold route, having the right tools makes the process significantly easier and more efficient. Budget roughly $50 to $150 for initial setup.
- Compost Thermometer: For hot composting, a long-probe thermometer is non-negotiable. The REOTEMP Backyard Compost Thermometer (approx. $30) features a 20-inch stainless steel stem that allows you to read the temperature at the very core of the pile without having to turn it first.
- Pitchfork: A D-handle pitchfork with flat tines is vastly superior to a shovel for turning compost. It allows you to aerate the pile and break up clumps without straining your back. Look for brands like Fiskars or Truper for durable, forged steel heads.
- Compost Bin or Tumbler: While a simple pile on the ground works, a bin retains moisture and heat better. A dual-chamber tumbling composter (like the FCMP Outdoor IM4000, approx. $80) is great for small spaces and makes turning effortless, though it may struggle to reach true 'hot' temperatures due to its smaller volume.
- Compost Aerator Tool: Also known as a compost crank, this tool is plunged into the pile and pulled up, expanding the wings to pull air into the center of a cold or hot pile without the need for a full turn.
Troubleshooting Common Compost Problems
Even experienced gardeners run into composting hiccups. Here is how to diagnose and fix the most common issues using your senses.
The Pile Smells Like Ammonia
The Cause: Your pile has too much nitrogen (greens) and not enough carbon (browns). The excess nitrogen is being released as ammonia gas.
The Fix: Immediately mix in a large volume of carbon-rich materials. Shredded dry leaves, straw, or shredded cardboard will absorb the excess moisture and balance the C:N ratio. Turn the pile thoroughly to incorporate the new browns.
The Pile Smells Like Rotten Eggs or Sulfur
The Cause: The pile has gone anaerobic. This happens when the pile is too wet, too compacted, or lacks oxygen, causing anaerobic bacteria to take over. This is common in cold composting if kitchen scraps are buried without aeration.
The Fix: Turn the pile immediately to introduce oxygen. If the pile is soggy, mix in dry, bulky browns like wood chips or dry straw to create air pockets and absorb excess moisture.
The Pile is Not Heating Up (Hot Composting)
The Cause: The pile may be too small, too dry, or lacking nitrogen.
The Fix: First, check the moisture level; add water while turning if it is dry. If it is moist but cold, add a nitrogen boost such as alfalfa meal, fresh grass clippings, or a shovelful of fresh manure. Ensure the pile is at least 3x3x3 feet; if it is smaller, add more bulk material to insulate the core.
Pests and Rodents in the Pile
The Cause: Exposed food scraps, particularly meat, dairy, or oils, will attract rodents and raccoons.
The Fix: Never compost meat, dairy, or greasy foods in a home compost system. Always bury your kitchen 'greens' at least 8 to 10 inches deep within the 'brown' carbon layers. Using a fully enclosed bin with a wire mesh floor will also physically block burrowing rodents.
Conclusion
Improving your soil health through composting is one of the most rewarding practices in gardening. Hot composting offers a rapid, weed-free soil amendment for the dedicated gardener willing to put in the physical labor and monitoring. Cold composting provides a stress-free, long-term recycling solution for those who prefer a hands-off approach. By understanding the biological needs of your compost pile—balancing carbon and nitrogen, managing moisture, and ensuring aeration—you will transform everyday waste into the ultimate fertilizer, ensuring your garden thrives season after season.

