
Gardening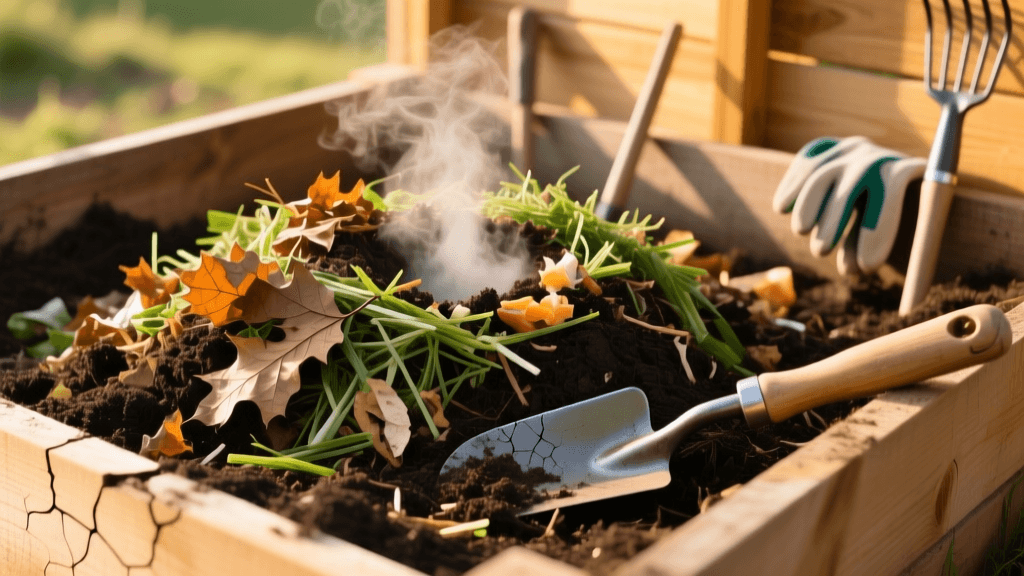
Hot Composting Guide: Build Fast, Nutrient-Rich Soil
Introduction to Soil Health and Composting
Healthy garden soil is the foundation of a thriving landscape, and compost is often referred to as "black gold" by experienced horticulturists. While many gardeners rely on passive, cold composting methods that take a year or more to yield results, hot composting offers a rapid, biologically active alternative. By harnessing the power of thermophilic (heat-loving) bacteria, you can transform raw organic waste into a rich, pathogen-free soil amendment in as little as 30 to 60 days. According to the United States Environmental Protection Agency (EPA), composting not only reduces landfill waste but also fundamentally improves soil structure, enhances moisture retention, and suppresses plant diseases.
The Science of Hot Composting vs. Cold Composting
Cold composting is essentially a "pile it and leave it" approach. It requires minimal effort but takes 6 to 12 months to break down materials, and it rarely reaches temperatures high enough to kill weed seeds or harmful soil pathogens. Hot composting, on the other hand, is an active management process. It creates an optimal environment for thermophilic bacteria, which generate significant heat as they consume organic matter. The Cornell Waste Management Institute notes that maintaining a compost pile between 130°F and 160°F (54°C to 71°C) for several days is critical for sanitizing the compost, effectively destroying weed seeds, nematodes, and common fungal pathogens like fusarium and pythium.
The Magic Ratio: Carbon to Nitrogen (C:N)
The most critical factor in initiating a hot compost pile is achieving the correct Carbon-to-Nitrogen (C:N) ratio. Microbes require carbon for energy and nitrogen for protein synthesis and reproduction. The ideal starting ratio for a hot compost pile is approximately 30 parts carbon to 1 part nitrogen (30:1) by weight. If the pile has too much carbon, decomposition slows to a crawl. If it has too much nitrogen, the pile will become anaerobic, slimy, and emit a strong ammonia odor.
Table: C:N Ratios of Common Organic Materials
| Material Category | Common Examples | Approximate C:N Ratio | Role in the Pile |
|---|---|---|---|
| Browns (Carbon-Rich) | Dry autumn leaves | 60:1 | Provides energy, bulk, and aeration |
| Browns (Carbon-Rich) | Straw or hay | 80:1 | Excellent structure and airflow |
| Browns (Carbon-Rich) | Shredded cardboard/paper | 350:1 | High carbon, must be shredded finely |
| Browns (Carbon-Rich) | Wood chips or sawdust | 400:1 | Slow to break down, use sparingly |
| Greens (Nitrogen-Rich) | Fresh grass clippings | 17:1 | Heats up the pile quickly |
| Greens (Nitrogen-Rich) | Vegetable kitchen scraps | 25:1 | Provides moisture and nitrogen |
| Greens (Nitrogen-Rich) | Coffee grounds | 20:1 | Dense nitrogen source, attracts worms |
| Greens (Nitrogen-Rich) | Herbivore manure (horse/cow) | 25:1 | Powerful microbial inoculant |
Note: A practical rule of thumb for home gardeners is to mix roughly 2 to 3 parts "browns" by volume to 1 part "greens" by volume to approximate the 30:1 weight ratio.
Step-by-Step Guide to Building Your Pile
Step 1: Achieve Critical Mass
For a compost pile to retain the heat generated by microbial activity, it must meet a minimum volume threshold. The universally accepted critical mass for hot composting is a 3x3x3 foot cube (27 cubic feet). Piles smaller than this will lose heat to the surrounding air too rapidly, while piles larger than 5x5x5 feet may restrict oxygen flow to the core, leading to anaerobic conditions. You can build this pile directly on bare soil to allow beneficial organisms and earthworms to migrate upward, or use a manufactured compost bin, which typically costs between $50 and $150.
Step 2: Shred and Chop Materials
Surface area is the enemy of slow decomposition. Bacteria can only attack the outer surfaces of organic matter. By running dry leaves through a lawn mower, chopping kitchen scraps with a spade, or using a wood chipper for brush, you exponentially increase the surface area available for microbial colonization. Aim for pieces no larger than 1 to 2 inches in diameter for the fastest results.
Step 3: Layering and Mixing
While some composters prefer the "lasagna" method of alternating distinct layers of browns and greens, thoroughly mixing the materials as you build the pile yields faster, more uniform heating. Start with a 4-inch base layer of bulky twigs or straw to ensure bottom drainage and airflow. Then, add your mixed greens and browns in 6-inch increments, watering each layer lightly as you go. The Rodale Institute recommends incorporating a few shovelfuls of finished compost or rich garden topsoil into the new pile to act as a microbial "starter" or inoculant.
Step 4: Moisture Management
Microbes require water to survive and transport nutrients. The ideal moisture content for a hot compost pile is between 40% and 60%. Perform the "sponge test": grab a handful of compost (wearing gloves) and squeeze it tightly. It should feel like a wrung-out damp sponge, yielding only one or two drops of water. If it is too dry, the microbial activity will halt. If water streams out, the pile is too wet and risks becoming anaerobic; add dry browns like shredded cardboard immediately.
Monitoring Temperature and Turning the Pile
To confirm your pile is truly "hot," invest in a long-stemmed compost thermometer, which typically costs between $20 and $40. Insert the probe into the center of the pile. Within 48 to 72 hours of building a well-balanced pile, temperatures should spike into the 130°F to 150°F range. Once the core temperature reaches 155°F to 160°F, or if it stays above 140°F for three consecutive days, it is time to turn the pile. Turning introduces fresh oxygen, which is required for aerobic decomposition, and moves the cooler outer materials into the hot center. Use a pitchfork or a specialized compost aerator tool to completely dismantle and rebuild the pile. During the most active phase (the first two weeks), you may need to turn the pile every 3 to 4 days. As the readily available food sources are consumed, the turning frequency will drop to once a week, and the temperatures will gradually decline.
Troubleshooting Common Hot Composting Issues
- The pile smells like ammonia or rotting garbage: This indicates an excess of nitrogen (too many greens) and a lack of oxygen. Solution: Turn the pile immediately and mix in high-carbon bulking agents like dry leaves, straw, or shredded paper to absorb excess moisture and balance the C:N ratio.
- The pile is not heating up: The pile may be too small, too dry, or lacking nitrogen. Solution: Check moisture levels first. If it is dry, add water and nitrogen-rich materials like grass clippings or blood meal. If it is already moist, ensure the pile meets the 3x3x3 foot minimum size requirement.
- The center is white and ashy: This is a sign of actinomycetes, which are beneficial bacteria-like organisms that break down tough woody materials. However, if the pile is excessively dry and dusty, it can become a fire hazard (though rare). Solution: Add water thoroughly while turning to rehydrate the core.
- Pests and rodents are invading the pile: This is almost always caused by adding inappropriate materials. Solution: Never add meat, dairy, oils, or pet waste to a home compost pile. Bury fresh kitchen scraps deep within the center of the hot zone, or cover the pile with a thick layer of browns and a wire mesh lid.
The Curing Phase and Application
Once the pile no longer heats up after turning, and the original materials are unrecognizable, the active hot composting phase is complete. However, the compost is not yet ready for the garden. It must undergo a "curing" phase. During curing, the compost stabilizes, pH levels neutralize, and beneficial fungal networks re-establish themselves. Leave the finished compost in a shaded, covered area for 2 to 4 weeks. Finished hot compost should be dark brown, crumbly, and smell rich and earthy, much like a forest floor after a rainstorm. Apply it as a 1-to-2-inch top dressing over garden beds, mix it into planting holes for transplants, or brew it into compost tea for a potent liquid fertilizer. By mastering the hot composting process, you close the nutrient loop in your garden, drastically reducing your reliance on synthetic fertilizers while building resilient, biologically diverse soil that will sustain your plants for years to come.

