
Landscaping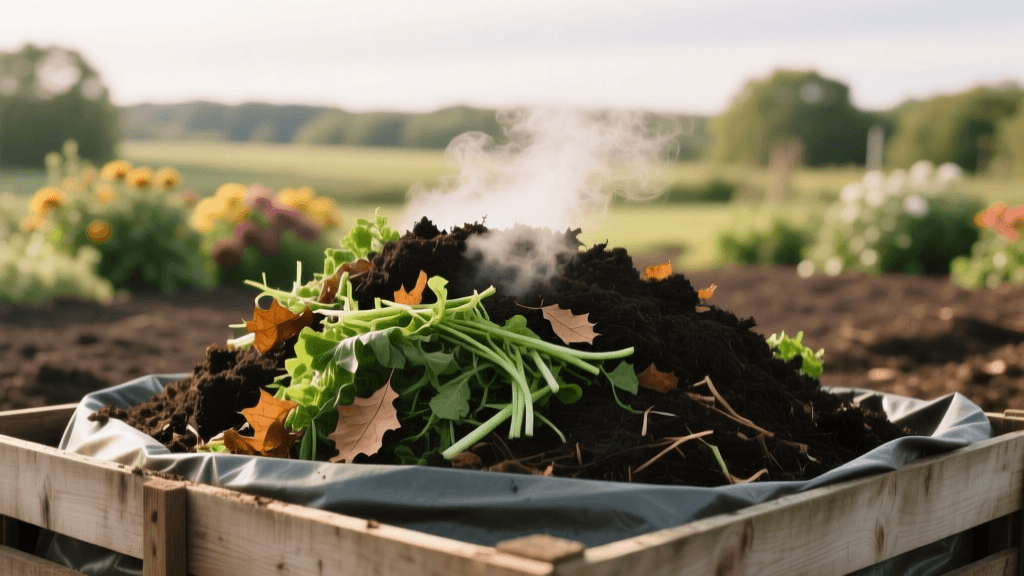
The Ultimate Guide to Hot Composting for Landscape Beds
The Foundation of Landscape Design: Soil Health
When planning a new landscape bed, installing hardscaping, or reviving a tired garden, homeowners often focus on the visual elements: plant selection, mulch color, and stone layouts. However, the true foundation of any thriving outdoor space lies beneath the surface. Soil health dictates nutrient availability, water retention, and root development. One of the most effective, sustainable, and cost-efficient ways to dramatically improve your landscape soil is through hot composting. Unlike passive cold composting, which can take a year or more to break down organic matter, hot composting harnesses the power of thermophilic bacteria to create rich, pathogen-free humus in a matter of weeks.
Why Hot Composting Transforms Landscape Soil
Hot composting is a managed, aerobic process that accelerates the decomposition of organic materials. By carefully balancing moisture, oxygen, and the ratio of carbon to nitrogen, you create an environment where beneficial microorganisms thrive and generate intense heat. According to the United States Environmental Protection Agency (EPA), properly managed composting not only diverts waste from landfills but also produces a soil amendment that suppresses plant diseases, reduces the need for chemical fertilizers, and promotes higher yields of healthier plants.
For landscape beds, the benefits of hot compost are unparalleled. The high temperatures achieved during the process—typically between 130°F and 160°F—serve a critical function: they sterilize the mixture. This means that any weed seeds, soil-borne pathogens, or harmful fungi present in your yard waste are effectively destroyed. When you incorporate this finished compost into your garden beds, you are introducing a biologically active, weed-free amendment that improves soil structure, increases cation exchange capacity (CEC), and encourages the development of vital mycorrhizal fungal networks.
The Science of the Hot Compost Pile
To achieve the necessary heat, your compost pile must reach a 'critical mass.' This generally requires a minimum volume of one cubic yard (a pile measuring 3 feet wide by 3 feet long by 3 feet high). Smaller piles lose heat too quickly to sustain the thermophilic (heat-loving) bacteria required for rapid breakdown. The Cornell Waste Management Institute emphasizes that oxygen is equally critical; without adequate aeration, the pile will go anaerobic, resulting in foul odors and a slow, slimy decomposition process rather than a hot, crumbly finish.
Understanding the Carbon-to-Nitrogen (C:N) Ratio
The fuel for your compost fire is the balance of 'browns' (carbon-rich materials) and 'greens' (nitrogen-rich materials). Microorganisms use carbon for energy and nitrogen for protein synthesis and reproduction. The ideal starting C:N ratio for a hot compost pile is approximately 30:1. If the pile has too much carbon, decomposition slows to a crawl. If it has too much nitrogen, the excess is released as ammonia gas, creating a strong, unpleasant odor and robbing the pile of essential nutrients.
| Material | Approximate C:N Ratio | Category |
|---|---|---|
| Wood Chips / Sawdust | 400:1 | Brown (Carbon) |
| Dry Autumn Leaves | 60:1 | Brown (Carbon) |
| Straw / Hay | 80:1 | Brown (Carbon) |
| Fresh Grass Clippings | 20:1 | Green (Nitrogen) |
| Coffee Grounds | 20:1 | Green (Nitrogen) |
| Vegetable Kitchen Scraps | 15:1 | Green (Nitrogen) |
Step-by-Step Guide to Building Your Hot Pile
Building a hot compost pile is much like baking; it requires precise measurements and proper mixing. While some gardeners prefer layering, mixing your browns and greens thoroughly before building the pile ensures a more uniform heat distribution.
Step 1: Gather and Measure Your Materials
Collect your landscape debris, such as shredded leaves, small twigs, and grass clippings. Shredding your brown materials with a lawn mower or leaf shredder is highly recommended. Smaller particle sizes increase the surface area available for microbes to attack, significantly speeding up the heating process. Aim to gather roughly three parts brown materials to one part green materials by volume. This visual approximation generally lands you close to the ideal 30:1 C:N ratio.
Step 2: Build the Pile to the Critical Mass
Choose a well-draining, level site for your pile, ideally in partial shade to prevent it from drying out too quickly in the summer sun. You can build the pile directly on the ground to allow earthworms and native microbes to migrate upward, or use a slatted wooden or wire compost bin. As you add your mixed materials, water the pile thoroughly. The ideal moisture content is roughly 50%—the materials should feel like a wrung-out sponge. If you squeeze a handful, only a drop or two of water should escape. If it is too dry, the microbes will go dormant; if it is too wet, water will fill the air pockets and suffocate the aerobic bacteria.
Step 3: Monitor Temperature and Moisture
Invest in a high-quality, long-stem compost thermometer, such as the REOTEMP backyard compost thermometer (typically costing between $30 and $50). Insert the probe into the center of the pile. Within 48 to 72 hours, you should see the temperature spike into the thermophilic range of 130°F to 160°F. Monitor the temperature daily. Check the moisture levels every few days, especially during hot or windy weather, and use a watering can to gently rehydrate the outer layers if they begin to dry out.
Pro Tip: Never let your hot compost pile exceed 165°F. Temperatures above this threshold can kill off the beneficial thermophilic bacteria and, in extreme cases with very dry materials, pose a rare but real risk of spontaneous combustion. If the pile gets too hot, turn it immediately to release heat and introduce oxygen.
Turning and Curing the Compost
Oxygen is consumed rapidly as the bacteria work. When the temperature in the center of the pile drops below 110°F, it is a signal that the oxygen has been depleted or the readily available food source in that specific zone has been consumed. This is your cue to turn the pile. Using a pitchfork or a specialized tool like the Fiskars compost aerator, move the outer, cooler materials into the center, and push the hot, decomposed center materials to the outside. This ensures that all materials are exposed to the high-heat phase, guaranteeing that all weed seeds and pathogens are destroyed.
You may need to turn the pile three to five times over the course of three to six weeks. Once the pile no longer heats up after turning, and the materials have broken down into a dark, crumbly, earthy-smelling substance, the active composting phase is complete. However, the compost is not yet ready for your landscape beds. It must 'cure' for an additional two to four weeks. Curing allows the pH to stabilize and gives slower-acting mesophilic organisms time to finish breaking down complex lignins, resulting in a mature, plant-safe humus.
Applying Hot Compost to Landscape Beds
Once your compost is fully cured, it is time to integrate it into your landscape design. The application method depends on whether you are establishing a new bed or maintaining an existing one.
- For New Landscape Beds: Before planting, spread a 2-to-3-inch layer of finished hot compost over the entire bed area. Use a garden fork or a broadfork to incorporate the compost into the top 6 to 8 inches of the native soil. This dramatically improves drainage in heavy clay soils and increases water retention in sandy soils.
- For Existing Plantings and Shrubs: Apply a 1-to-2-inch layer of compost as a top-dressing around the base of your plants, extending out to the drip line. Keep the compost a few inches away from the direct trunks or stems of woody shrubs and trees to prevent rot and rodent damage. Earthworms and natural rainfall will gradually incorporate the nutrients into the root zone without the need for disruptive digging.
- For Lawn Establishment or Repair: When seeding a new lawn or overseeding an existing one, screen your compost through a 1/2-inch mesh to remove any large, unfinished chunks. Rake a 1/4-inch layer over the soil surface before broadcasting your grass seed. This provides a perfect, moisture-retentive seedbed that protects the seeds from birds and drying winds while providing a gentle, slow-release fertilizer.
By mastering the art of hot composting, you close the loop on your landscape's organic waste, reduce your reliance on synthetic fertilizers, and build a resilient, biologically diverse soil ecosystem. The result is a landscape that is not only visually stunning but fundamentally healthy from the ground up.

