
Landscaping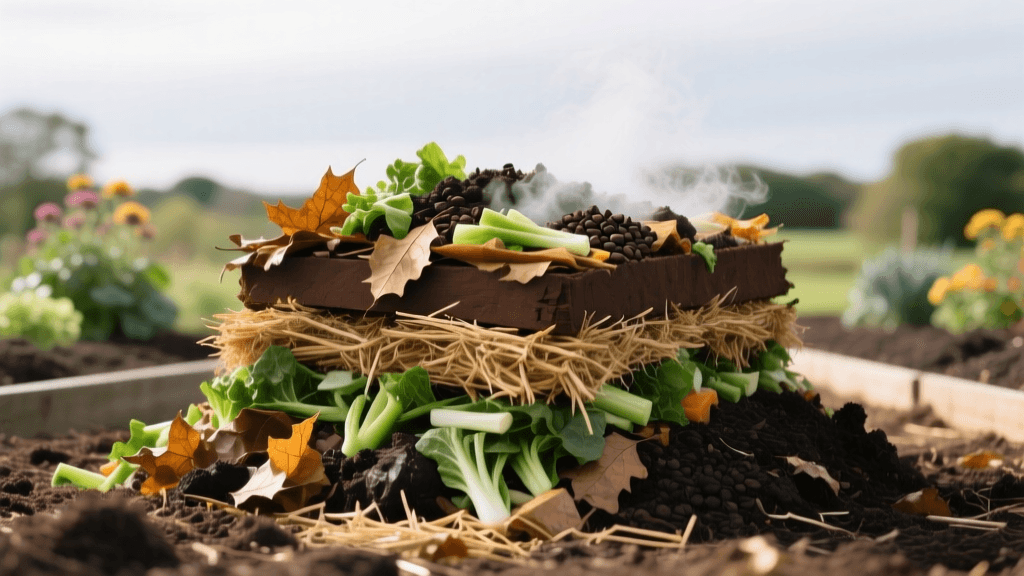
Hot Composting for Landscape Beds: A Step-by-Step Guide
The Foundation of Thriving Landscape Beds
The foundation of any thriving landscape bed is its soil. While many homeowners and landscaping enthusiasts rely on bagged soils or synthetic fertilizers to boost their garden beds, the most sustainable and effective method for long-term soil health is creating your own compost. Specifically, hot composting offers a rapid, biologically active process that transforms yard waste and kitchen scraps into a dark, crumbly, and nutrient-dense soil amendment. This guide will walk you through the science, setup, and maintenance of a hot compost pile designed specifically to supercharge your landscape beds.
Why Hot Composting is the Gold Standard for Landscaping
Cold composting is the passive approach where you simply pile up leaves and grass clippings and wait a year or more for them to break down. While easy, cold composting has significant drawbacks for landscaping. It does not reach temperatures high enough to kill weed seeds, plant pathogens, or harmful fungi. If you use cold compost in your landscape beds, you may inadvertently introduce invasive weeds or soil-borne diseases to your prized plants.
Hot composting, on the other hand, is an active, managed process. By optimizing the carbon-to-nitrogen ratio, moisture, and oxygen levels, you encourage thermophilic (heat-loving) bacteria to rapidly break down organic matter. This process generates internal temperatures between 130°F and 160°F. According to the Environmental Protection Agency (EPA), these elevated temperatures are crucial because they effectively sanitize the compost, destroying weed seeds and pathogens while breaking down materials in just 3 to 8 weeks. The result is a biologically diverse, sterile, and nutrient-rich humus that improves soil structure, increases water retention, and feeds the soil food web in your landscape beds.
The Biology of the Pile: Balancing Carbon and Nitrogen
To achieve the high temperatures required for hot composting, you must feed the microorganisms a balanced diet. This is measured by the Carbon-to-Nitrogen (C:N) ratio. The ideal target for a hot compost pile is a C:N ratio of roughly 30:1. In practical landscaping terms, this translates to mixing "browns" (carbon-rich materials) and "greens" (nitrogen-rich materials) by volume.
A good rule of thumb for home landscapers is to use 3 parts browns to 1 part greens by volume. Browns provide the energy (carbohydrates) for the microbes and add bulk to allow air flow, while greens provide the protein necessary for rapid microbial reproduction and heat generation.
Common Composting Materials and Their Ratios
| Material | Category | Approximate C:N Ratio |
|---|---|---|
| Dry Autumn Leaves | Brown (Carbon) | 60:1 |
| Straw or Hay | Brown (Carbon) | 80:1 |
| Pine Needles | Brown (Carbon) | 80:1 |
| Shredded Cardboard | Brown (Carbon) | 350:1 |
| Fresh Grass Clippings | Green (Nitrogen) | 15:1 |
| Coffee Grounds | Green (Nitrogen) | 20:1 |
| Vegetable Scraps | Green (Nitrogen) | 15:1 |
| Manure (Herbivore) | Green (Nitrogen) | 10:1 |
Pro Tip: Never use meat, dairy, oils, or pet waste in your home hot compost pile. These materials can harbor dangerous pathogens that require commercial-scale, sustained temperatures to neutralize, and they will attract unwanted pests to your landscape area.
Step-by-Step Construction of a Hot Compost Pile
Step 1: Bin Selection and Sizing
Volume is critical for retaining heat. A hot compost pile must be at least 3 feet wide, 3 feet long, and 3 feet high (1 cubic yard) to insulate the core and maintain thermophilic temperatures. You can build a simple bin using four wooden shipping pallets lashed together with bungee cords, or construct a cylinder using heavy-duty welded wire fencing (14-gauge or thicker). Avoid enclosed plastic tumblers for true hot composting, as they often lack the necessary volume and airflow to sustain high heat.
Step 2: Material Preparation
Microbes work on the surface area of organic matter. The smaller the pieces, the faster they will decompose. Use a lawnmower to shred dry autumn leaves into 1-inch pieces. Run twigs and small branches through a wood chipper to create woodchips no larger than half an inch in diameter. Chop kitchen scraps and garden waste with a spade before adding them to the pile.
Step 3: The Layering Method
Build your pile all at once rather than adding materials slowly over time. Start with a 6-inch base layer of coarse twigs or woodchips to ensure drainage and bottom airflow. Next, add a 4-to-6-inch layer of browns (like shredded leaves or straw), followed by a 2-to-3-inch layer of greens (like grass clippings or manure). Sprinkle a thin layer of native garden soil or finished compost over each green layer; this acts as an inoculant, introducing native bacteria and fungi to the new pile. Repeat this layering process until you reach the 3-foot mark, finishing with a thick layer of browns on top to insulate the pile and deter flies.
Step 4: Moisture Management
Water is the medium in which microbes live and transport nutrients. As you build the pile, water each layer with a garden hose. The ideal moisture content is between 40% and 60%. Use the "wrung-out sponge" test: grab a handful of compost (wearing gloves) and squeeze it tightly. It should feel as damp as a wrung-out sponge, yielding only one or two drops of water. If it is too dry, the microbial activity will stall; if it is too wet, the pile will become anaerobic and smell like rotten eggs.
Monitoring Temperature and Turning the Pile
To ensure your pile is truly "hot," you need a long-stemmed compost thermometer (available at most garden centers for around $20 to $30). Insert the probe into the center of the pile. Within 48 to 72 hours, the temperature should spike to between 130°F and 150°F. Research from the Cornell Waste Management Institute indicates that maintaining temperatures above 131°F for at least three consecutive days is the benchmark for eliminating most plant pathogens and weed seeds.
When the temperature naturally begins to drop below 110°F, it is time to turn the pile. Turning introduces oxygen, which the thermophilic bacteria require to continue breaking down matter and generating heat. Use a pitchfork to move the outer, cooler layers of the pile into the new center, and move the hot center material to the outside. You may need to turn the pile every 4 to 7 days during the active phase. Each time you turn it, the pile will reheat, though the peak temperature will be slightly lower each time.
Safety Warning: Overheating
If your compost thermometer reads above 160°F, the pile is too hot. At these extreme temperatures, beneficial microbes die off, and the pile can become a fire hazard due to spontaneous combustion (though this is rare in small home piles). If the pile exceeds 160°F, turn it immediately to release heat and introduce cooler air.
Curing and Applying to Landscape Beds
After 3 to 6 weeks of active heating and turning, the materials will no longer reheat after being turned. The compost will look dark, crumbly, and smell like rich, earthy forest soil. However, it is not quite ready for your landscape beds. It must enter the "curing" phase.
Move the compost to a separate pile or leave it in the bin for an additional 3 to 4 weeks. Curing allows the pH to neutralize, complex organic acids to break down, and mesophilic (moderate-temperature) microbes to recolonize the material. Applying uncured compost to landscape beds can tie up soil nitrogen and stunt plant growth.
Application Rates and Techniques
Once cured, your hot compost is ready to transform your landscape beds. The Rodale Institute emphasizes that compost should be used as a soil amendment and top-dressing rather than a complete replacement for native soil.
- New Landscape Beds: Spread 2 to 3 inches of hot compost over the entire bed area and incorporate it into the top 6 to 8 inches of native soil using a broadfork or garden fork. This improves both clay and sandy soils.
- Existing Beds (Top-Dressing): Apply a 1-inch layer of compost around the base of established shrubs, perennials, and trees. Keep the compost a few inches away from the main stems or trunks to prevent rot.
- Lawn Renovation: Before overseeding, spread a thin 1/4-inch layer of finely screened compost over the turf to provide a nutrient-rich seedbed and improve soil contact.
After applying compost to your beds, cover it with 2 to 3 inches of organic mulch (such as shredded hardwood bark or pine straw). The mulch protects the compost from UV degradation, retains moisture, and slowly feeds the soil ecosystem as it breaks down, creating a sustainable, closed-loop system for your landscape.
Conclusion
Mastering hot composting is one of the most rewarding skills a landscaping enthusiast can develop. By investing a few weekends into building, monitoring, and turning a hot pile, you eliminate the need for expensive bagged soils and synthetic fertilizers. More importantly, you create a living soil amendment that builds long-term resilience, drought tolerance, and vibrant health in your landscape beds for years to come.

