
Gardening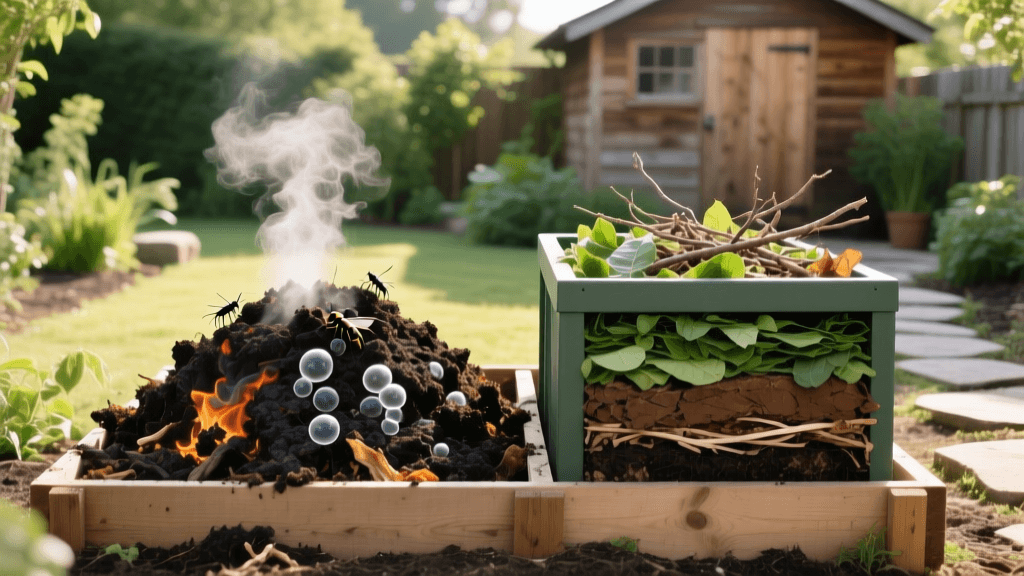
Hot vs Cold Composting: Boosting Garden Soil Health
The Foundation of Garden Soil Health
Every thriving garden begins beneath the surface. While sunlight and water are essential, the true engine of plant growth is the soil microbiome. Composting is the process of recycling organic matter into a dark, crumbly, and earthy-smelling soil amendment known as humus. Adding compost to your garden beds improves soil structure, increases water retention in sandy soils, enhances drainage in heavy clay, and provides a slow-release buffet of essential micronutrients for your plants.
According to the Rodale Institute, composting is not just about waste reduction; it is a critical regenerative practice that builds soil organic matter, sequesters carbon, and fosters a robust soil food web. However, not all compost is created equal. The method you choose to break down your kitchen scraps and yard waste—specifically hot versus cold composting—will drastically alter the timeline, the microbial composition, and the ultimate impact on your garden's soil health.
Cold Composting: The Passive Approach
Cold composting, often referred to as passive composting, is the most common method used by casual home gardeners. It involves simply piling organic materials into a bin or a designated corner of the yard and letting nature take its course over an extended period. In a cold pile, the decomposition process is driven primarily by mesophilic (moderate-temperature) bacteria, fungi, and macro-organisms like earthworms and beetles.
Pros and Cons of Cold Composting
The primary advantage of cold composting is its minimal labor requirement. You can toss in apple cores, coffee grounds, and fallen leaves whenever you have them without worrying about precise ratios or turning schedules. However, because the pile never reaches high temperatures, the decomposition process is incredibly slow, typically taking anywhere from 12 to 24 months to yield finished compost. Furthermore, cold composting does not generate enough heat to destroy weed seeds, plant pathogens, or harmful fungi, meaning you might inadvertently introduce diseases or weeds back into your garden beds.
Hot Composting: The Active, Microbial Powerhouse
Hot composting is a managed, intensive process that optimizes the environment for thermophilic (heat-loving) bacteria. By carefully balancing carbon, nitrogen, moisture, and oxygen, a hot compost pile can reach internal temperatures between 130°F and 160°F. This high-temperature phase rapidly breaks down organic matter and sanitizes the pile, effectively killing off weed seeds and soil-borne pathogens like fusarium wilt and root knot nematodes.
The Environmental Protection Agency (EPA) notes that properly managed hot composting can yield finished, nutrient-dense humus in as little as one to three months. This method requires a larger upfront volume of materials to achieve critical mass for heat retention and demands regular monitoring and physical turning to maintain aerobic conditions. The result, however, is a biologically active, weed-free soil amendment that can dramatically accelerate plant growth and disease resistance.
Hot vs. Cold Composting: A Detailed Comparison
| Feature | Cold (Passive) Composting | Hot (Active) Composting |
|---|---|---|
| Time to Finish | 12 to 24 months | 1 to 3 months |
| Effort Level | Low (occasional watering) | High (frequent turning, monitoring) |
| Temperature | Ambient to 90°F | 130°F to 160°F |
| Weed Seeds & Pathogens | Survive the process | Destroyed by high heat |
| Minimum Volume | Any size | 3x3x3 feet (27 cubic feet) |
| Primary Microbes | Fungi, Mesophilic bacteria | Thermophilic bacteria, Actinobacteria |
Mastering the Carbon-to-Nitrogen (C:N) Ratio
The secret to successful hot composting lies in the Carbon-to-Nitrogen (C:N) ratio. Carbon-rich materials (browns) provide the energy source for microbes, while nitrogen-rich materials (greens) provide the protein necessary for microbial reproduction. The ideal C:N ratio for a hot compost pile is roughly 30:1. According to research from Penn State Extension, a ratio that is too high in carbon will result in a pile that decomposes at a glacial pace, while a ratio too high in nitrogen will create a foul-smelling, anaerobic sludge.
Common Compost Materials and Their C:N Ratios
- Dry Leaves: 40:1 to 60:1 (Excellent base carbon source)
- Straw / Hay: 50:1 to 80:1 (Great for aeration and bulk)
- Shredded Cardboard / Paper: 150:1 to 300:1 (Use sparingly, wet thoroughly)
- Sawdust: 325:1 (Very high carbon; use in tiny amounts to avoid nitrogen lockout)
- Fresh Grass Clippings: 15:1 to 25:1 (High nitrogen, heat-generating)
- Coffee Grounds: 20:1 (Surprisingly close to a balanced ratio, excellent microbial food)
- Vegetable Kitchen Scraps: 15:1 to 25:1 (High moisture and nitrogen)
- Herbivore Manure (Cow, Horse, Rabbit): 15:1 to 25:1 (Powerful nitrogen activator)
To achieve the 30:1 ratio, a general rule of thumb for home gardeners is to mix three parts brown materials to one part green materials by volume. This accounts for the varying densities and moisture levels of typical household yard waste.
Step-by-Step Guide to Building a Hot Compost Pile
If you are ready to produce high-quality, pathogen-free compost for your vegetable garden, follow this actionable blueprint based on the renowned Berkeley 18-Day Hot Composting Method.
- Build to Critical Mass: Your pile must be at least 3 feet wide, 3 feet long, and 3 feet tall (1 cubic yard). Anything smaller will lose heat too quickly to sustain thermophilic bacteria.
- Chop and Shred: Microbes work from the outside in. Shred your leaves, chop your stalks, and break down kitchen scraps into pieces no larger than 2 inches. This exponentially increases the surface area for bacterial attack.
- Layer and Hydrate: As you build the pile, alternate layers of browns and greens. Water each layer as you go. The ideal moisture content is 40% to 60%. The material should feel like a wrung-out sponge—damp to the touch, but not dripping wet.
- Let it Heat Up (Days 1-4): Leave the pile completely undisturbed for the first four days. Mesophilic bacteria will begin breaking down easily accessible sugars, generating heat and paving the way for thermophiles.
- Turn the Pile (Day 4): Using a pitchfork or compost aerator, completely turn the pile. Move the outer, cooler edges to the hot center, and bring the center material to the outside. This reintroduces oxygen and redistributes moisture.
- Maintain the Schedule (Days 5-18): Turn the pile every two days. Monitor the temperature with a long-stemmed compost thermometer. It should peak around 140°F to 155°F. If it drops below 110°F before day 14, add more nitrogen (greens) or water. If it exceeds 160°F, turn it immediately to cool it down and prevent the death of beneficial microbes.
Troubleshooting Common Compost Issues
Even experienced gardeners encounter compost hiccups. Here is how to diagnose and fix the most common hot composting problems:
- The pile smells like ammonia: This indicates excess nitrogen. The microbes cannot process all the available protein, releasing it as ammonia gas. Fix: Mix in high-carbon browns like dry leaves or shredded cardboard and turn the pile.
- The pile smells like rotten eggs or sulfur: This is the scent of hydrogen sulfide, meaning your pile has gone anaerobic (lacking oxygen) and is likely too wet. Fix: Turn the pile immediately to introduce oxygen and mix in dry, bulky browns like straw or wood chips to absorb excess moisture and create air pockets.
- The pile is cold and inactive: The pile may be too dry, too small, or lacking nitrogen. Fix: Check moisture levels first. If it is dry, water it while turning. If moisture is fine, add a nitrogen activator like blood meal, fresh grass clippings, or comfrey leaves.
- Pests are invading the pile: Rodents and raccoons are attracted to fats, dairy, and meat. Fix: Never add animal products to a home compost bin. Bury your kitchen scraps deep within the center of the hot pile, and cover the bin with hardware cloth.
Applying Compost for Maximum Soil Benefit
Once your compost is dark, crumbly, and smells like a forest floor after a spring rain, it is ready to transform your garden. Finished compost can be applied in several ways depending on your soil health goals. For new raised beds, incorporate compost at a ratio of 20% to 30% of the total soil volume to establish immediate fertility and drainage. For existing garden beds, apply a 1-inch to 2-inch layer as a top dressing in the early spring; earthworms and rain will naturally incorporate the humus into the root zone without disturbing the delicate soil structure. Finally, consider brewing aerated compost tea to inoculate plant leaves and soil surfaces with beneficial microbes, providing a natural defense against foliar diseases and boosting overall plant vigor.

