
Gardening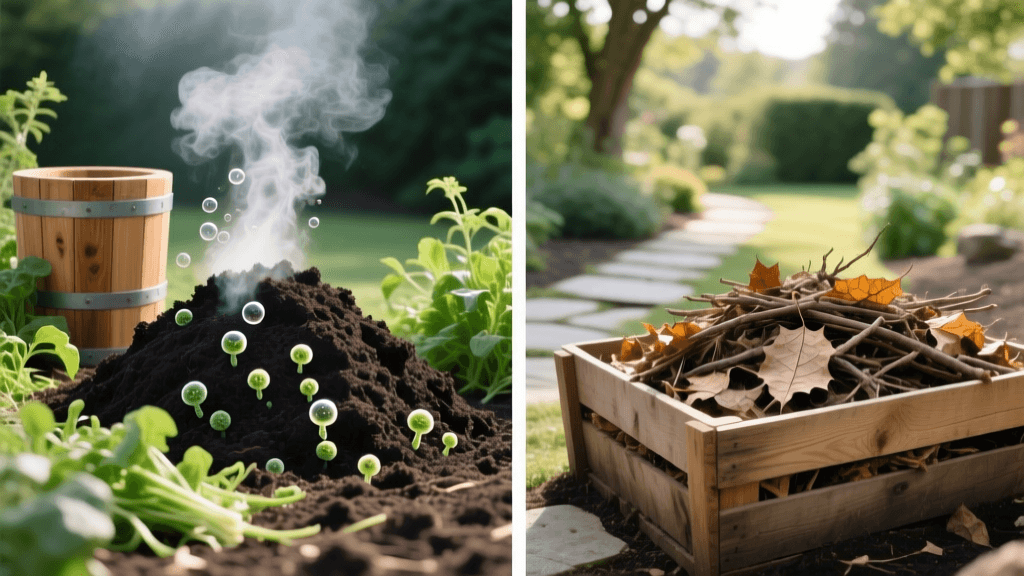
Hot vs. Cold Composting: Building Healthy Garden Soil
The Foundation of Gardening: Why Soil Health Matters
Every thriving garden begins beneath the surface. While many gardeners focus on the plants above ground, the real magic happens in the soil food web. Healthy soil is not just dirt; it is a living ecosystem teeming with bacteria, fungi, nematodes, and earthworms that break down organic matter and make nutrients bioavailable to plant roots. According to the USDA Natural Resources Conservation Service, soil health is defined as the continued capacity of soil to function as a vital living ecosystem that sustains plants, animals, and humans. One of the most effective, sustainable, and cost-efficient ways to build this vital ecosystem in your home garden is through composting.
Composting transforms kitchen scraps, yard waste, and fallen leaves into a dark, crumbly, nutrient-dense amendment often referred to as 'black gold.' However, not all composting methods are created equal. The two primary approaches—hot composting and cold composting—yield different results, require different levels of effort, and impact your soil health in unique ways. Understanding the science and practical application of both methods will help you decide which is right for your garden goals, climate zone, and available time.
Understanding the Two Main Composting Methods
At its core, composting is the biological decomposition of organic matter under controlled aerobic conditions. The microorganisms responsible for this breakdown require four essential elements: carbon (for energy), nitrogen (for protein and reproduction), oxygen (for respiration), and water (for cellular function). How you manage these four elements determines whether you are practicing hot or cold composting.
Cold Composting (The Passive Approach)
Cold composting, often called passive composting, is the 'set it and forget it' method. It involves simply piling organic materials in a corner of the yard or inside a stationary bin and letting nature take its course. Because the pile is not carefully managed for its carbon-to-nitrogen ratio, moisture, or aeration, the microbial activity remains relatively low. As a result, the pile never reaches high temperatures.
Pros: Requires minimal physical effort, accepts a wider variety of materials without strict layering, and is ideal for small households that generate kitchen scraps slowly over time.
Cons: The process is incredibly slow, taking anywhere from 12 to 24 months to produce finished compost. Furthermore, because the pile does not heat up, it will not kill weed seeds, plant pathogens, or harmful bacteria. You should avoid adding diseased plants, invasive weed roots, or meat and dairy products to a cold compost pile.
Hot Composting (The Active Approach)
Hot composting is an accelerated, managed process that harnesses the power of thermophilic (heat-loving) bacteria. By carefully balancing 'greens' (nitrogen-rich materials) and 'browns' (carbon-rich materials), maintaining optimal moisture, and turning the pile regularly to introduce oxygen, you create an environment where microbial activity generates immense heat. A properly managed hot compost pile will reach internal temperatures between 130°F and 160°F.
Pros: Produces finished compost in as little as 1 to 3 months. The high temperatures effectively destroy weed seeds, soil-borne pathogens, and harmful bacteria, resulting in a safer, more uniform soil amendment.
Cons: Requires significant physical labor (turning a heavy pile), precise monitoring, and a large initial volume of materials to achieve critical mass. It is best suited for gardeners with ample yard waste and a dedicated weekend schedule.
Hot vs. Cold Composting: A Side-by-Side Comparison
To help you visualize the differences, here is a structured comparison of the two methods based on key gardening metrics:
| Metric | Cold Composting | Hot Composting |
|---|---|---|
| Time to Finish | 12 to 24 months | 1 to 3 months |
| Labor & Effort | Low (Occasional watering) | High (Frequent turning & monitoring) |
| Internal Temperature | Ambient to 90°F | 130°F to 160°F |
| Weed Seed Destruction | No | Yes |
| Pathogen Reduction | No | Yes |
| Minimum Pile Size | Any size | 3x3x3 feet (1 cubic yard) |
| Material Ratios | Unmanaged / Random | Strict C:N Ratio (25:1 to 30:1) |
Mastering the Carbon-to-Nitrogen (C:N) Ratio
The Environmental Protection Agency (EPA) emphasizes that a successful compost pile requires the right balance of carbon-rich 'browns' and nitrogen-rich 'greens.' Carbon provides the energy source for microbes, while nitrogen provides the building blocks for their cellular growth. The ideal C:N ratio for hot composting is roughly 25:1 to 30:1 by weight.
If your pile has too much carbon, decomposition will stall. If it has too much nitrogen, it will become anaerobic and emit a foul ammonia odor. Here is a quick reference guide to common materials and their approximate C:N ratios:
- Dry Leaves (Browns): 40:1 to 60:1
- Straw / Hay (Browns): 50:1 to 80:1
- Shredded Newspaper (Browns): 150:1 to 200:1
- Wood Chips / Sawdust (Browns): 200:1 to 500:1
- Fresh Grass Clippings (Greens): 15:1 to 20:1
- Kitchen Vegetable Scraps (Greens): 15:1 to 25:1
- Coffee Grounds (Greens): 20:1
- Chicken Manure (Greens): 5:1 to 10:1
Pro Tip: A simple rule of thumb for home gardeners is to mix 2 to 3 parts browns with 1 part greens by volume. This generally approximates the ideal weight-based C:N ratio without requiring a scale.
Step-by-Step Guide to Building a Hot Compost Pile
If you want to rapidly improve your garden soil structure and fertility, hot composting is the way to go. Follow these actionable steps to build a thermophilic pile:
- Achieve Critical Mass: Your pile must be at least 3 feet wide, 3 feet long, and 3 feet high (1 cubic yard). Anything smaller will lose heat too quickly to the surrounding air.
- Chop and Shred: Microbes work from the outside of organic materials inward. Use a lawnmower or leaf shredder to break down leaves, twigs, and stalks into pieces no larger than 2 inches. This exponentially increases the surface area for bacterial attack.
- Layering (The Lasagna Method): Start with a 4-inch base of coarse twigs for drainage and aeration. Alternate 4-inch layers of browns and greens. Sprinkle a thin layer of native garden soil or finished compost between layers to inoculate the pile with local microbes.
- Hydrate the Pile: As you build, water each layer. The pile should feel like a wrung-out sponge—moist, but not dripping. Aim for a moisture content of 40% to 60%. If water pools at the base, you have overwatered; add more dry browns immediately.
- Monitor and Turn: Invest in a long-stemmed compost thermometer (such as the REOTEMP 20-inch model, typically costing around $35). Within 48 hours, the core temperature should spike above 110°F. Once it peaks and begins to drop (usually around day 4 or 5), use a compost aerator or pitchfork to turn the pile, moving the cooler outer edges into the hot center. Repeat this turning process every 3 to 5 days until the pile no longer heats up.
Troubleshooting Common Compost Problems
Even experienced gardeners encounter composting hiccups. Here is how to diagnose and fix the most common issues:
- The pile smells like ammonia: This indicates excess nitrogen (too many greens). Fix: Turn the pile and thoroughly mix in dry, carbon-heavy browns like shredded cardboard or dry leaves.
- The pile smells like rotten eggs (sulfur): The pile has gone anaerobic due to compaction or excess water. Fix: Turn the pile immediately to introduce oxygen and add coarse browns like wood chips to improve airflow.
- The pile is not heating up: The pile may be too small, too dry, or lacking nitrogen. Fix: Check the moisture level and add water if dry. If moisture is fine, mix in a high-nitrogen activator like blood meal, alfalfa meal, or fresh grass clippings, and ensure the pile meets the 3x3x3 foot minimum.
- Attracting pests (rodents or raccoons): This usually happens when meat, dairy, oils, or exposed kitchen scraps are present. Fix: Never add animal products to a home compost bin. Always bury fresh kitchen scraps deep in the center of the pile under a thick layer of browns, or use a fully enclosed, tumbling compost bin.
Conclusion
Whether you choose the low-maintenance route of cold composting or the rapid, high-reward process of hot composting, the end result is the same: a massive boost to your garden's soil health. Compost improves soil structure, increases water retention in sandy soils, enhances drainage in heavy clay soils, and provides a slow-release buffet of micronutrients. By recycling your yard and kitchen waste, you are not only reducing landfill contributions but also closing the nutrient loop in your own backyard. Start your pile today, feed the soil food web, and watch your garden thrive from the ground up.

