
Gardening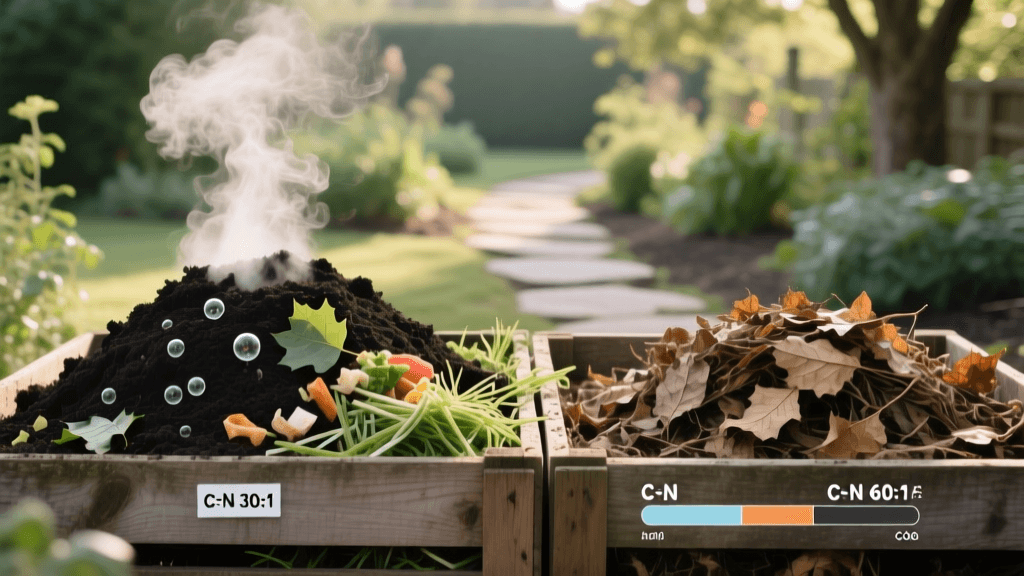
Hot vs Cold Composting: Best Methods for Garden Soil Health
The Foundation of Garden Success: Soil Health
Every thriving garden begins beneath the surface. Soil health is not merely about providing a physical anchor for plant roots; it is about cultivating a vibrant, living ecosystem. The soil food web—a complex network of bacteria, fungi, nematodes, and arthropods—relies heavily on the steady introduction of organic matter to function optimally. When you add high-quality compost to your garden beds, you are not just adding nutrients; you are inoculating your soil with beneficial microbes and improving its cation exchange capacity (CEC), which dictates how well your soil holds onto essential nutrients.
According to the Environmental Protection Agency (EPA), composting organic waste reduces methane emissions from landfills while creating a rich soil amendment that enhances water retention, suppresses plant diseases, and reduces the need for chemical fertilizers. However, not all compost is created equal. The method you choose to break down your organic matter—specifically hot versus cold composting—will drastically alter the microbial makeup, nutrient availability, and overall quality of the finished humus you apply to your vegetable and flower beds.
The Science of the Carbon-to-Nitrogen (C:N) Ratio
Before diving into the specific composting methods, it is critical to understand the fuel that drives the decomposition process: the Carbon-to-Nitrogen (C:N) ratio. Microbes require carbon for energy and nitrogen for protein synthesis and reproduction. The ideal C:N ratio for a compost pile is generally between 25:1 and 30:1.
Carbon-rich materials, often referred to as "browns," include dry leaves, straw, cardboard, and wood chips. These materials decompose slowly and provide the bulk and structure necessary for air flow within the pile. Nitrogen-rich materials, or "greens," include fresh grass clippings, vegetable scraps, and coffee grounds. These materials break down rapidly and provide the immediate energy burst microbes need to multiply.
The Cornell University Waste Management Institute emphasizes that balancing these materials is the single most important factor in composting success. If a pile has too much carbon, decomposition will stall and take years. If it has too much nitrogen, the pile will become anaerobic, slimy, and emit a strong ammonia odor as excess nitrogen off-gasses.
| Compost Material | Approximate C:N Ratio | Category |
|---|---|---|
| Dry Autumn Leaves | 60:1 | Brown (Carbon) |
| Wheat Straw | 80:1 | Brown (Carbon) |
| Shredded Newspaper | 175:1 | Brown (Carbon) |
| Fresh Grass Clippings | 15:1 | Green (Nitrogen) |
| Vegetable Kitchen Scraps | 25:1 | Green (Nitrogen) |
| Coffee Grounds | 20:1 | Green (Nitrogen) |
Cold Composting: The Passive, Fungal-Dominated Approach
Cold composting, often called passive composting, is the "set it and forget it" method of organic matter management. In this system, you simply pile your yard waste and kitchen scraps into a bin or a designated corner of the garden and let nature take its course. You do not actively monitor temperatures, and you rarely turn the pile.
Because the pile never reaches high temperatures, the decomposition process is primarily driven by mesophilic (moderate-temperature) bacteria and, eventually, a robust community of fungi. Cold composting is highly effective for breaking down woody materials and creating leaf mold, which is exceptionally rich in beneficial mycorrhizal fungi. These fungi form symbiotic relationships with plant roots, vastly extending their reach for water and phosphorus.
Pros and Cons of Cold Composting
- Pros: Requires minimal physical labor; excellent for fungal dominance; preserves more of the original nitrogen content since it does not off-gas at high temperatures; ideal for processing large volumes of autumn leaves.
- Cons: Takes significantly longer to finish (6 to 12 months, or even up to 2 years for woodier materials); does not reach temperatures high enough to kill weed seeds or soil-borne plant pathogens; kitchen scraps may attract rodents if not properly buried within the pile.
Hot Composting: The Active, Bacterial-Dominated Approach
Hot composting is an active, managed process designed to optimize the environment for thermophilic (heat-loving) bacteria. By carefully balancing the C:N ratio, ensuring adequate moisture, and providing frequent aeration through turning, you can force the microbial population to explode. This intense biological activity generates significant heat, pushing the internal temperature of the pile to between 130°F and 160°F (54°C to 71°C).
This thermophilic phase is the hallmark of hot composting. Sustaining these high temperatures for several days is crucial for soil health because it effectively pasteurizes the compost, destroying harmful pathogens, fungal diseases, and the viability of most weed seeds. The resulting compost is bacterially dominated, making it the perfect amendment for vegetable gardens and annual flower beds, which rely heavily on bacterial nutrient cycling.
Pros and Cons of Hot Composting
- Pros: Produces finished compost rapidly (1 to 3 months); destroys weed seeds and plant pathogens; high heat accelerates the breakdown of tough materials; the active turning process ensures a uniform, crumbly texture.
- Cons: Requires significant physical labor to turn the pile; demands strict monitoring of moisture and temperature; high heat can kill beneficial fungi, requiring you to re-inoculate with compost tea or mulch later; requires a large volume of material to start all at once.
Step-by-Step Guide to Building a Hot Compost Pile
If you want to produce high-quality, pathogen-free compost for your spring planting season, follow this structured approach to building a hot pile.
1. Sizing and Containment
Volume is critical for heat retention. A hot compost pile must be at least one cubic yard (3 feet wide by 3 feet long by 3 feet high). If the pile is smaller than this, the surface-area-to-volume ratio is too high, and the heat will dissipate into the surrounding air before the thermophilic phase can establish. Use a wire mesh cylinder, a wooden pallet bin, or a commercial tumbling composter designed to retain heat.
2. The Lasagna Layering Method
Gather all your materials before you begin so you can build the pile in a single day. Start with a 4-inch layer of coarse browns (like twigs or thick stalks) at the bottom to ensure drainage and basal airflow. Next, add a 4-inch layer of packed greens (grass clippings, manure, kitchen scraps). Follow this with a 4-inch layer of fine browns (shredded dry leaves, straw). Lightly water each layer as you build. Continue alternating until you reach the 3-foot mark. Always cap the top of the pile with a thick layer of browns to insulate the heat, retain moisture, and deter flies.
3. Moisture and Aeration
The microbes in your pile are aquatic organisms; they live in the microscopic water films coating the organic particles. The ideal moisture content is 50% to 60%. A simple test is the "sponge test": grab a handful of compost (wearing gloves) and squeeze it. It should feel like a wrung-out sponge, yielding only one or two drops of water. If it is too dry, the microbes will go dormant. If it is too wet, water fills the air pockets, driving out oxygen and causing anaerobic rot.
Turn the pile with a pitchfork every 3 to 4 days. This moves the cooler outer materials into the hot center and introduces fresh oxygen. You should notice steam rising from the pile immediately after turning.
Pro-Tip: Invest in a long-stemmed compost thermometer. Monitoring the core temperature takes the guesswork out of the process. When the temperature peaks and begins to drop despite turning, the thermophilic phase is complete, and the pile is entering the curing stage.
Troubleshooting Common Compost Issues
Even experienced gardeners encounter compost anomalies. Use this diagnostic list to correct imbalances in your soil-building engine:
- The pile smells like ammonia: You have too much nitrogen (low C:N ratio). The microbes cannot process the excess nitrogen, so it off-gasses. Solution: Mix in high-carbon materials like shredded cardboard or dry leaves immediately, and turn the pile to integrate them.
- The pile smells like rotten eggs: The pile has gone anaerobic due to compaction, excess moisture, or lack of aeration. Solution: Turn the pile thoroughly, add dry, bulky browns to absorb excess moisture and create air pockets, and consider inserting a perforated PVC pipe into the center for passive aeration.
- The pile is cold and shrinking slowly: The pile is likely too dry, too small, or lacks nitrogen. Solution: Check the moisture level with the sponge test. If dry, water it while turning. If moisture is fine, add a nitrogen booster like blood meal, alfalfa meal, or fresh grass clippings to jumpstart microbial activity.
Applying Finished Compost to Your Garden
Whether you utilized the hot or cold method, finished compost should look dark, crumbly, and smell like a rich forest floor after a rainstorm. The original materials should be unrecognizable.
For established garden beds and lawns, apply a 1/2-inch to 1-inch layer of compost as a top-dressing in the early spring or late fall. Earthworms and soil microbes will naturally incorporate the organic matter into the topsoil. For new raised beds or heavily compacted native soil, mix 2 to 3 inches of compost into the top 6 to 8 inches of soil using a broadfork or garden fork. Avoid using motorized rototillers, as they can destroy the delicate soil aggregate structure and harm earthworm populations.
By mastering the art of composting, you close the loop on your garden's ecosystem. You transform waste into a powerful biological tool, ensuring your soil remains fertile, resilient, and teeming with life for seasons to come.

