
Landscaping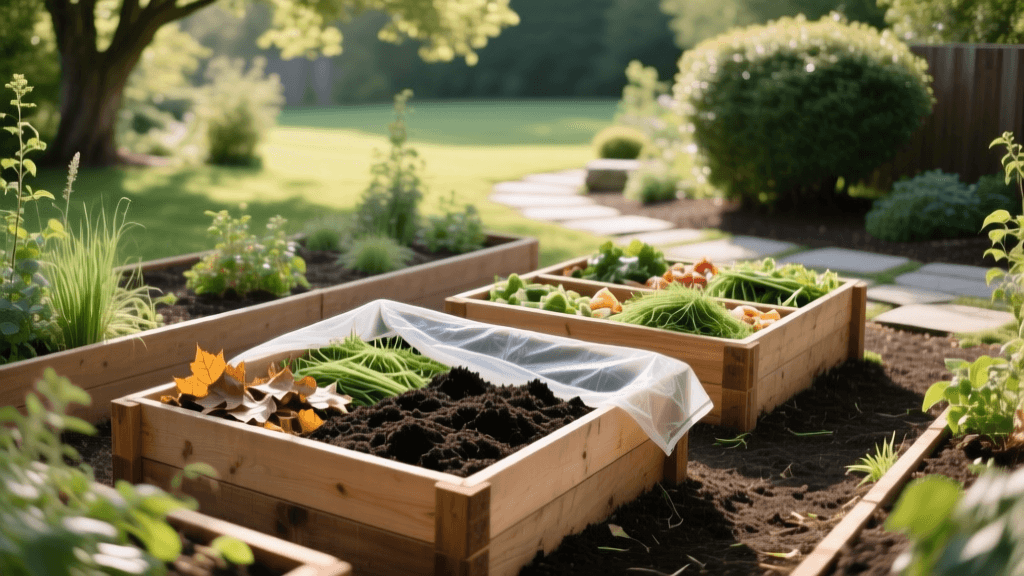
Building a Landscape Compost System for Optimal Soil Health
The Foundation of Landscaping: Why Soil Health Matters
In the world of professional landscaping and high-end garden design, the focus is often placed on hardscaping elements, rare plant cultivars, and intricate irrigation systems. However, the true foundation of any thriving landscape lies beneath the surface. Soil health is the cornerstone of sustainable landscaping, dictating plant vitality, water retention, and natural disease resistance. According to the United States Department of Agriculture (USDA), soil health is defined as the continued capacity of soil to function as a vital living ecosystem that sustains plants, animals, and humans. When landscape soil is depleted of organic matter and microbial life, plants become entirely dependent on synthetic fertilizers, leading to a cycle of chemical dependency and environmental runoff.
The most effective, cost-efficient, and biologically active method to restore and maintain soil health in landscape beds is through the application of high-quality, home-produced compost. Often referred to by horticulturists as "black gold," compost introduces billions of beneficial microorganisms, essential humic acids, and slow-release nutrients to the soil food web. By building a dedicated, high-performance compost system tailored to your landscape's specific waste output, you can close the nutrient loop, drastically reduce your yard waste disposal costs, and cultivate a resilient, vibrant outdoor living space.
Choosing the Right Compost System for Your Landscape
Before you can begin amending your garden beds, you must select a composting system that aligns with your property size, aesthetic preferences, and physical capabilities. A successful landscape composting setup requires a balance between processing capacity and ease of use. While a simple open pile works for rural properties, suburban and urban landscapes often require contained systems to deter pests and maintain curb appeal. Below is a comprehensive comparison of the most common composting systems utilized by landscaping professionals and avid home gardeners.
| System Type | Estimated Cost | Capacity | Aeration Method | Best Landscape Use Case |
|---|---|---|---|---|
| Open Wire Bin (e.g., GeoBin) | $40 - $70 | 20 - 30 cubic feet | Manual turning with a pitchfork | Large properties with heavy leaf and brush fall. |
| Enclosed Stationary Bin | $80 - $150 | 10 - 15 cubic feet | Bottom access doors; occasional stirring | Suburban yards needing pest control and tidy aesthetics. |
| Dual-Batch Tumbler | $120 - $250 | 8 - 12 cubic feet | Spinning the drum (crank or manual) | Small urban lots, patios, or gardeners with limited mobility. |
| Multi-Bay Pallet System | $0 - $50 (DIY) | 50+ cubic feet | Tractor or heavy manual pitchfork turning | Estates, community gardens, and commercial landscape depots. |
For the average residential landscape generating standard yard waste and kitchen scraps, a dual-batch tumbler paired with a stationary enclosed bin offers the best versatility. The tumbler allows for rapid, hot composting of kitchen scraps, while the stationary bin handles bulky, carbon-heavy landscape debris like fallen leaves and pruned twigs.
The Science of the Compost Recipe: Balancing Carbon and Nitrogen
The most common reason landscape compost piles fail or become malodorous is an imbalance in the Carbon-to-Nitrogen (C:N) ratio. Microbes require carbon for energy and nitrogen for protein synthesis and reproduction. The Environmental Protection Agency (EPA) recommends an ideal starting C:N ratio of roughly 30:1 by weight. In practical landscaping terms, this translates to a volume ratio of approximately three parts "browns" (carbon) to one part "greens" (nitrogen).
Carbon-Rich Materials (Browns)
- Dry Autumn Leaves: The backbone of landscape compost. Shred them with a lawnmower before adding to increase surface area.
- Wood Chips and Arborist Mulch: Excellent for structure, but break down slowly. Best used in cold, long-term compost piles.
- Cardboard and Newspaper: Uncoated, non-glossy paper products provide excellent carbon. Tear into small pieces.
- Pine Needles: Highly acidic initially, but neutralize during composting. Use in moderation (no more than 10% of the pile).
Nitrogen-Rich Materials (Greens)
- Fresh Grass Clippings: Extremely high in nitrogen. Mix thoroughly with browns to prevent anaerobic matting.
- Kitchen Vegetable Scraps: Fruit peels, coffee grounds, and tea bags are excellent microbial activators.
- Fresh Garden Prunings: Soft, green stems from deadheading perennials or pruning summer annuals.
- Manure: Herbivore manure (horse, cow, chicken) is a powerful nitrogen source. Avoid carnivore or omnivore waste to prevent pathogen contamination.
Step-by-Step Construction: Building a Hot Compost Pile
Hot composting is a thermophilic process that rapidly breaks down organic matter while simultaneously killing weed seeds and soil-borne plant pathogens. To achieve the necessary thermal mass, your compost pile must be a minimum of 3 feet wide, 3 feet long, and 3 feet high (1 cubic yard).
- Prepare the Base: Start with a 4-inch layer of coarse twigs or wood chips at the bottom of your bin to ensure adequate drainage and basal airflow.
- The Lasagna Layering Method: Add a 6-inch layer of carbon-heavy browns, followed by a 2-inch layer of nitrogen-rich greens. Sprinkle a thin layer of finished compost or native topsoil between layers to inoculate the pile with indigenous microorganisms.
- Hydration: Water each layer lightly as you build. The ideal moisture content is between 40% and 60%. A good rule of thumb is the "wrung-out sponge" test: if you squeeze a handful of the mix, it should feel damp and yield a single drop of water, but not drip freely.
- Temperature Monitoring: Invest in a high-quality, long-stemmed compost thermometer (such as the REOTEMP Backyard Compost Thermometer, typically costing around $40). Insert the probe into the center of the pile. Within 48 hours, temperatures should spike into the thermophilic range of 130°F to 160°F.
Maintenance, Moisture, and Aeration
Oxygen is the fuel that keeps the thermophilic bacteria thriving. Without adequate aeration, the pile will shift to anaerobic bacteria, resulting in foul odors (resembling sulfur or ammonia) and a slow, slimy decomposition process. To maintain a hot compost system, you must turn the pile every 3 to 5 days using a pitchfork or by spinning your tumbler. When turning, move the cooler outer edges of the pile into the hot center, and bring the hot center material to the outside.
As the pile breaks down, it will naturally shrink and cool. Once the internal temperature drops below 100°F and no longer reheats after turning, the active composting phase is complete. However, the material is not yet ready for the landscape. It must enter the "curing" or maturation phase. Move the compost to a separate bin or a covered pile and let it cure for 4 to 8 weeks. This curing period allows mesophilic organisms and beneficial fungi, such as mycorrhizae, to recolonize the compost, stabilizing the pH and ensuring it will not burn delicate plant roots upon application.
Applying Finished Compost to Landscape Beds
Finished compost should be dark brown, crumbly, and possess an earthy, forest-floor aroma. The Cornell Waste Management Institute emphasizes that properly cured compost acts as a slow-release fertilizer and a powerful soil conditioner. How you apply it depends on your landscaping goals.
Top-Dressing Existing Landscape Beds
For established ornamental beds, shrub borders, and perennial gardens, avoid deep tilling, which can destroy existing soil structure and sever shallow feeder roots. Instead, apply a 1 to 2-inch layer of finished compost directly to the soil surface around the base of the plants, keeping it a few inches away from the main stems or tree trunks to prevent rot. Over the course of the season, earthworms and soil arthropods will naturally incorporate the organic matter into the subsoil, improving water infiltration and nutrient availability.
Amending New Planting Zones
When installing new hardscape borders or preparing bare soil for a new garden bed, compost should be incorporated into the top 6 to 8 inches of the native soil. Aim for a compost-to-soil volume ratio of no more than 20% to 30%. Exceeding this ratio can lead to excessive moisture retention and poor root anchoring for larger shrubs and trees.
Brewing Compost Tea for Foliar Feeding
Liquid compost extracts, or "compost teas," are an excellent way to deliver soluble nutrients and beneficial biology directly to plant foliage, aiding in the suppression of fungal diseases like powdery mildew and black spot on roses. Steep 2 cups of finished compost in 5 gallons of dechlorinated water for 24 to 48 hours, using an aquarium air pump to keep the solution highly oxygenated. Strain the liquid and apply it via a pump sprayer to the leaves of your landscape plants during the early morning hours.
Conclusion
Integrating a robust composting system into your landscape management routine is one of the most impactful investments you can make for your property. By transforming yard waste and kitchen scraps into biologically active humus, you not only reduce your environmental footprint but also cultivate a resilient, self-sustaining soil ecosystem. Healthy soil translates to healthier plants, reduced irrigation needs, and a landscape that thrives in harmony with nature.

