Pest Control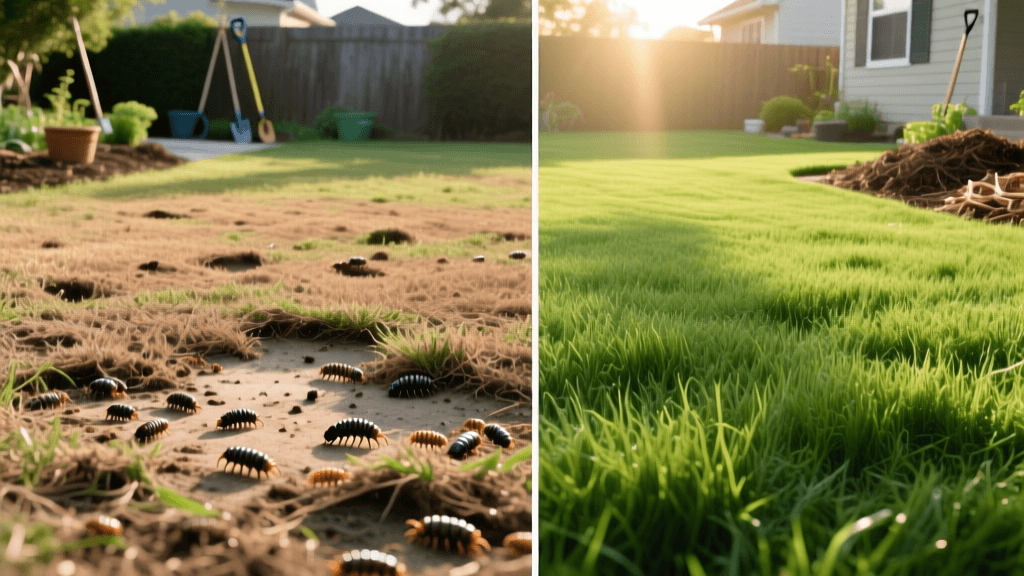
Lawn Grub Transformation: 90-Day Before and After Guide
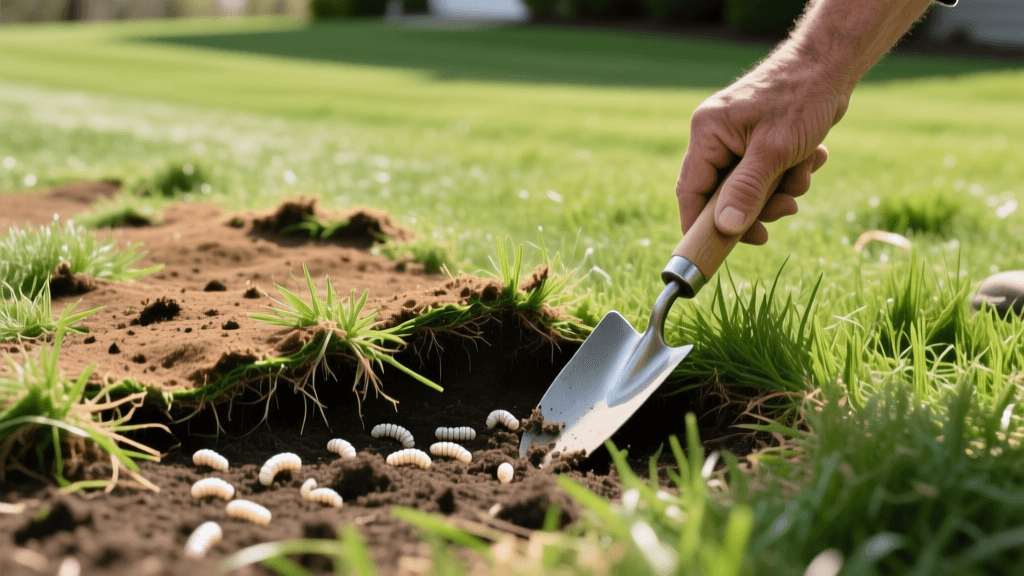
The 'Before' State: Assessing the Grub Devastation
There are few sights more heartbreaking for a homeowner than stepping out onto a once-lush lawn only to find it transformed into a patchy, brown, and spongy wasteland. If your turf feels like a freshly laid carpet that can be rolled back with ease, or if you notice skunks, raccoons, and crows tearing up your yard in search of a midnight snack, you are likely dealing with a severe white grub infestation. White grubs are the larval stage of scarab beetles, including Japanese beetles, June bugs, and European chafers. They live just beneath the soil surface, aggressively feasting on grassroots and severing the plant's ability to absorb water and nutrients.
According to the University of Minnesota Extension, a threshold of more than 10 grubs per square foot generally warrants immediate intervention. In our 90-day transformation case study, the 'before' state of a 5,000-square-foot cool-season lawn featured severe localized die-off, shallow root systems, and active animal digging. The goal was not just to kill the pests, but to completely rehabilitate the soil ecosystem and restore a dense, vibrant turf. Here is the exact step-by-step roadmap we used to take this lawn from devastated to pristine.
Phase 1: Eradication and Triage (Days 1–14)
The first step in any major lawn transformation is stopping the active threat. You have two primary routes for grub eradication: fast-acting chemical controls or biological organic controls. Both are highly effective if timed and applied correctly.
The Chemical Route: Curative Insecticides
For rapid knockdown of active, large grubs in late summer or early fall, a curative insecticide containing Trichlorfon (commonly sold as Dylox 6.2G) is the industry standard. Trichlorfon works quickly, killing grubs within 24 to 48 hours of ingestion and contact.
- Application Rate: Apply 3 pounds of Dylox 6.2G per 1,000 square feet using a broadcast spreader.
- Crucial Step: You must water the product in immediately with at least 0.5 inches of water. Trichlorfon degrades rapidly in sunlight and must be washed into the root zone where the grubs are feeding.
- Timing: Apply in the early morning or late evening to minimize evaporation.
The Organic Route: Beneficial Nematodes
If you prefer to maintain a strictly organic lawn, beneficial nematodes are your best ally. The Environmental Protection Agency (EPA) highlights nematodes as a highly effective, natural biological control that targets soil-dwelling pests without harming earthworms, pets, or humans. Specifically, you need the species Heterorhabditis bacteriophora (Hb), which actively hunts grubs, enters their bodies, and releases bacteria that kill the host within 48 hours.
- Application Rate: Apply approximately 25,000 nematodes per square foot (roughly 125 million for a 5,000 sq ft lawn).
- Crucial Step: Nematodes are living organisms. Apply them in the evening or on a cloudy day to avoid UV light damage. The soil must be kept consistently moist for 10 to 14 days post-application to allow the nematodes to move through the soil profile and locate their hosts.
Phase 2: Soil Rehabilitation (Days 15–30)
Once the grubs have been eradicated, the 'before' state of the soil is left compacted, damaged, and devoid of healthy root structures. Simply throwing seed on dead dirt will not yield a lasting transformation. We must rebuild the soil architecture.
Core Aeration
On Day 15, we performed a deep core aeration. Using a gas-powered aerator, we pulled thousands of 2-to-3-inch soil plugs from the ground. This process alleviates the compaction caused by heavy animal digging and foot traffic, creating vital channels for oxygen, water, and future fertilizers to reach the subsoil. Leave the plugs on the lawn; they will break down naturally and act as a mild top-dressing.
Compost Top-Dressing
Immediately following aeration, we applied a 1/4-inch layer of finely screened organic compost across the entire 5,000-square-foot area. This required roughly 3 to 4 cubic yards of compost. The compost sweeps down into the aeration holes, introducing beneficial microbes and organic matter that promote rapid root regeneration and improve soil moisture retention.
Phase 3: Overseeding and Root Building (Days 31–75)
With the pests gone and the soil prepped, the visual transformation truly begins. The bare and thin patches left behind by the grubs need to be filled with aggressive, deep-rooting turfgrass.
Seed Selection and Sowing
For this cool-season lawn transformation, we selected a Rhizomatous Tall Fescue (RTF) blend. RTF is highly drought-tolerant, resistant to future pest pressure, and spreads via underground rhizomes to create a dense, traffic-tolerant carpet. We applied the seed at a rate of 6 pounds per 1,000 square feet (30 pounds total) using a rotary spreader, ensuring even coverage over the compost top-dressing.
Starter Fertilization
New seedlings require a specific nutrient profile to establish quickly. We applied a high-phosphorus starter fertilizer (N-P-K ratio of 18-24-6) at the time of seeding. Phosphorus is critical for early root development, which anchors the new grass firmly into the soil, making it harder for any surviving pests to pull the young plants up.
The Watering Regimen
For the first 21 days, the lawn was watered lightly three times a day for 10 minutes per zone to keep the top inch of soil constantly moist. Once the seedlings reached 2 inches in height, we transitioned to deep, infrequent watering—1 inch of water per week, applied in a single morning session—to force the roots to grow deep into the compost-enriched soil.
The 'After' State: Day 90 Transformation
By Day 90, the transformation was nothing short of spectacular. The spongy, easily torn turf of the 'before' state was entirely replaced by a dense, dark emerald-green carpet. When we performed a tug-test on the new Tall Fescue, the roots held firmly, anchoring deeply into the rehabilitated soil. More importantly, the local wildlife had moved on; without the buffet of grubs beneath the surface, the skunks and raccoons stopped digging, leaving the lawn pristine. Following Integrated Pest Management (IPM) principles, we successfully turned a reactive pest disaster into a proactive, thriving ecosystem.
90-Day Transformation Cost and Timeline Breakdown
Understanding the financial and temporal investment is crucial for planning your own lawn rescue. Below is the exact breakdown for our 5,000-square-foot case study.
| Phase | Action | Product/Material | Est. Cost (5k sq ft) |
|---|---|---|---|
| Days 1-2 | Eradication (Chemical) | Dylox 6.2G (15 lbs needed) | $45.00 |
| Days 1-14 | Eradication (Organic Alt.) | Hb Nematodes (125 Million) | $95.00 |
| Day 15 | Core Aeration | Gas Aerator Rental (4 hours) | $85.00 |
| Day 16 | Top-Dressing | Screened Compost (4 cu. yards) | $160.00 |
| Day 31 | Overseeding | RTF Tall Fescue Seed (30 lbs) | $120.00 |
| Day 31 | Fertilization | Starter Fertilizer 18-24-6 | $35.00 |
| Ongoing | Watering | Municipal Water (Est. 90 days) | $60.00 |
Note: Total estimated cost ranges from $500 (chemical route) to $550 (organic nematode route) for a complete professional-grade DIY rehabilitation.
Preventative Maintenance: Protecting the 'After' State
A true transformation includes ensuring the 'before' state never returns. Curative treatments kill existing grubs, but they do not protect against the next generation of beetle eggs laid in mid-summer. To lock in your 90-day transformation, you must apply a preventative grub control product the following spring.
Look for products containing Chlorantraniliprole (commonly sold as Scotts GrubEx). Unlike older chemical preventatives, Chlorantraniliprole is highly targeted, safe for pollinators, and does not harm the beneficial nematodes or earthworms you worked hard to cultivate. Apply it between late May and early June, and water it in with 0.25 inches of water. This creates a protective barrier in the soil that safely eliminates young grubs as they hatch in August, guaranteeing your lawn remains a lush, green sanctuary for years to come.