
Landscaping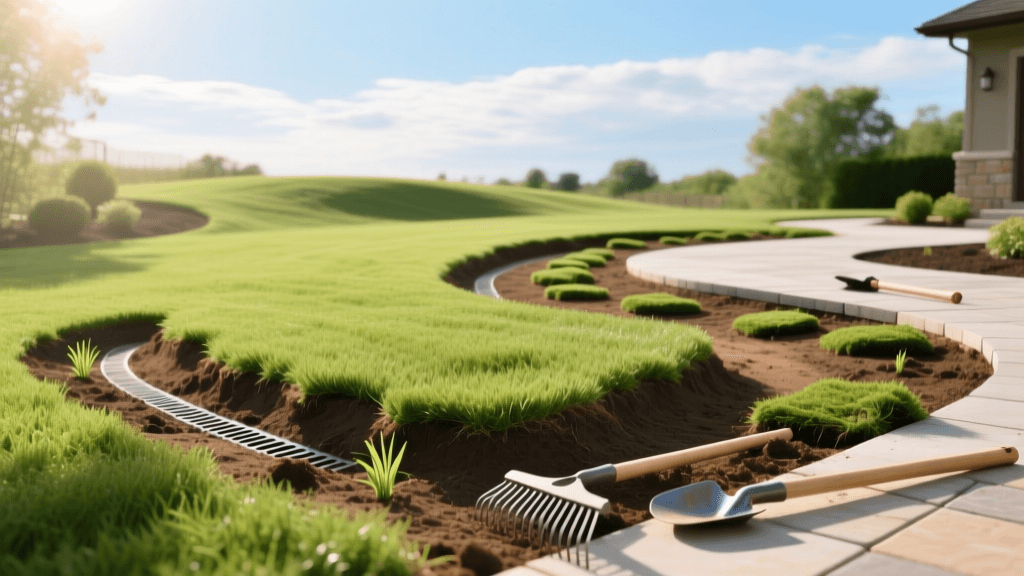
How to Renovate and Recover Lawns After Hardscaping
Introduction to Post-Hardscape Lawn Recovery
Installing a new patio, retaining wall, or outdoor kitchen dramatically elevates the functionality and aesthetic appeal of your landscape. However, the installation process is often brutal on the surrounding turf. Heavy machinery, material staging, and foot traffic severely degrade the soil structure, leaving you with a compacted, patchy, and poorly draining lawn. True landscape design does not end when the pavers are laid; it culminates in the seamless integration and recovery of the softscape. Renovating a lawn after hardscaping requires a systematic approach to soil science, hydrology, and turfgrass management.
The Hidden Damage: Soil Compaction and Altered Hydrology
Before dropping seed or laying sod, it is crucial to understand the subterranean damage caused by construction. Skid steers and excavators exert immense pressure on the soil profile. This pressure collapses soil aggregates, drastically reducing pore space. When soil pore space drops below 30%, oxygen and water cannot reach the root zone, leading to shallow root systems and turf decline.
Furthermore, hardscapes create large impervious surfaces that alter natural drainage patterns. If the surrounding lawn is not properly regraded, water will pool against the new hardscape edges, undermining the base materials and drowning adjacent grass roots. Addressing these two issues—compaction and hydrology—is the cornerstone of successful lawn renovation.
Step 1: Site Clearance and Precision Regrading
The first step in recovery is meticulous site clearance. Construction sites are notorious for leaving behind hidden debris that will ruin mower blades and stunt grass growth. Rake the area thoroughly to remove gravel, concrete washout, stray nails, and plastic sheeting. If concrete washout has altered the soil pH, you may need to remove the top two inches of soil entirely.
Once the site is clear, focus on precision grading. The goal is to establish a minimum 2% slope (a drop of 1/4 inch per foot) directing water away from hardscape edges, retaining walls, and your home foundation. Use a laser level or a string line to establish your grade. If the soil is severely depleted, this is the time to bring in a high-quality, screened topsoil to build up low spots. Avoid using heavy clay fills, as they will only exacerbate future drainage and compaction issues.
Step 2: Deep Soil Decompression
Standard lawn aeration (which typically pulls 3-inch cores) is insufficient for post-construction compaction. The heavy machinery used in hardscaping compacts soil far deeper than the standard root zone. To truly renovate the soil profile, you need aggressive decompression.
| Method | Depth | Best Use Case | Relative Cost |
|---|---|---|---|
| Standard Core Aeration | 2 - 4 inches | Mild compaction, annual maintenance | $ |
| Deep-Tine Aeration | 6 - 12 inches | Severe construction compaction, heavy clay soils | $$$ |
| Radial Trenching | 8 - 10 inches | Tree protection zones near hardscape excavation | $$$$ |
| Liquid Aeration (Surfactants) | Variable | Supplemental treatment, breaking surface tension | $$ |
For most post-hardscaping renovations, deep-tine aeration is the gold standard. This process uses solid or coring tines to fracture the soil profile up to a foot deep without turning it over, preserving the soil ecosystem while creating vital channels for air, water, and new roots.
Step 3: Soil Testing and Biological Amendments
Never guess when it comes to soil chemistry. Hardscaping materials like limestone gravel, concrete dust, and mortar can significantly raise soil pH, locking up essential nutrients. According to the Cornell University Soil Health initiative, a comprehensive soil test will reveal not just N-P-K levels, but also organic matter content and aggregate stability, which are critical for recovery.
A standard soil test will measure pH, phosphorus, potassium, calcium, and magnesium. However, for post-construction recovery, request an organic matter percentage test. Soils with less than 3% organic matter struggle to support a vigorous turfgrass root system, especially when subjected to the radiant heat of nearby stone pavers. If your pH is above 7.5 due to concrete leaching, you may need to apply elemental sulfur to bring it back to the optimal 6.0 to 6.8 range for most turfgrasses.
Once you have your soil test results, amend the soil accordingly. To rebuild the biological activity destroyed by heavy equipment, topdress the lawn with 1/4 to 1/2 inch of premium, screened compost. The NC State Extension emphasizes that incorporating organic matter improves the water-holding capacity of sandy soils while simultaneously improving the drainage and structure of heavy clay soils. Compost introduces beneficial microbes that help break down thatch and make nutrients bioavailable to your new turfgrass.
Step 4: Selecting Turfgrass for Hardscape Microclimates
Hardscaping fundamentally changes the microclimate of your yard. Stone, brick, and concrete absorb and radiate heat, creating localized "heat islands" that can scorch adjacent grass. Conversely, new pergolas or tall retaining walls may cast deep, permanent shade over areas that previously received full sun.
When selecting seed or sod for renovation, you must match the turfgrass to these new conditions:
- Heat-Radiating Edges (South/West facing patios): Choose heat and drought-tolerant species like Tall Fescue (for cool-season zones) or Zoysiagrass (for warm-season zones). These grasses have deep root systems that can withstand the radiant heat and faster evaporation rates near stone.
- Shaded Retaining Walls: Opt for fine fescues or shade-tolerant Kentucky Bluegrass blends. If the shade is too dense, consider transitioning the edge into a shade-tolerant groundcover like creeping jenny or hostas to avoid a perpetual bare spot.
- High Traffic Transition Zones: Where the lawn meets a walkway or patio seating area, use a durable, wear-resistant blend featuring perennial ryegrass to handle the foot traffic transitioning between the hardscape and softscape.
For a detailed breakdown of regional turfgrass adaptation, the University of Minnesota Extension provides excellent resources on matching grass species to specific environmental stressors and renovation techniques.
Step 5: Seeding, Sodding, and Establishment
With the soil decompressed, graded, and amended, it is time to establish the new turf. The choice between seeding and sodding depends on your budget, the time of year, and erosion risks.
When to Choose Sod
Sod is the superior choice for steep slopes adjacent to retaining walls where seed washout is a high risk. It provides immediate erosion control and an instant aesthetic finish. When laying sod over renovated soil, ensure you roll it to eliminate air pockets between the sod roots and the compost-topdressed soil. Water heavily immediately after installation to encourage rapid root knit.
When to Choose Seed
Overseeding or hydroseeding is more cost-effective and offers a wider variety of turfgrass blends. If seeding, use a starter fertilizer that is high in phosphorus (if local environmental regulations permit) to stimulate rapid root development. Apply a thin layer of peat moss or a specialized seed blanket over the seeded area to retain moisture and protect the seeds from birds and wind.
Pro Tip: Keep the top inch of soil consistently moist during the first 14 to 21 days of seed germination. This usually requires light watering 2 to 3 times a day. Once the grass reaches mowing height, transition to deep, infrequent watering to encourage deep root growth.
When mowing the newly established lawn for the first time, ensure your mower blades are razor-sharp. Dull blades will tear the tender young grass, leaving frayed ends that are highly susceptible to fungal diseases like dollar spot or brown patch. Set your mower deck to the highest setting for the first three cuts to allow the root system to fully anchor into the amended soil profile before experiencing the stress of heavy defoliation.
Budgeting for Lawn Recovery
Renovating a lawn after a major landscaping project is an investment in the longevity of your entire property. Below is a general cost guide to help you budget for the recovery phase.
| Service / Material | Unit | Average Cost |
|---|---|---|
| Debris Removal & Grading | Per sq. ft. | $1.00 - $2.50 |
| Deep-Tine Aeration | Per 1,000 sq. ft. | $150 - $300 |
| Compost Topdressing (1/2 inch) | Per cubic yard (installed) | $80 - $150 |
| Sod Installation (Material & Labor) | Per sq. ft. | $1.50 - $3.00 |
| Hydroseeding | Per sq. ft. | $0.20 - $0.50 |
Conclusion
Lawn renovation and recovery after hardscaping is not merely about planting new grass; it is about rebuilding the ecological foundation of your landscape. By taking the time to properly grade for drainage, aggressively relieve soil compaction, and amend the soil biology, you ensure that your new turfgrass will thrive alongside your new outdoor living spaces. A meticulously recovered lawn provides the perfect, lush frame for your hardscaping investment, boosting both curb appeal and the long-term health of your property.

