
Lawn Care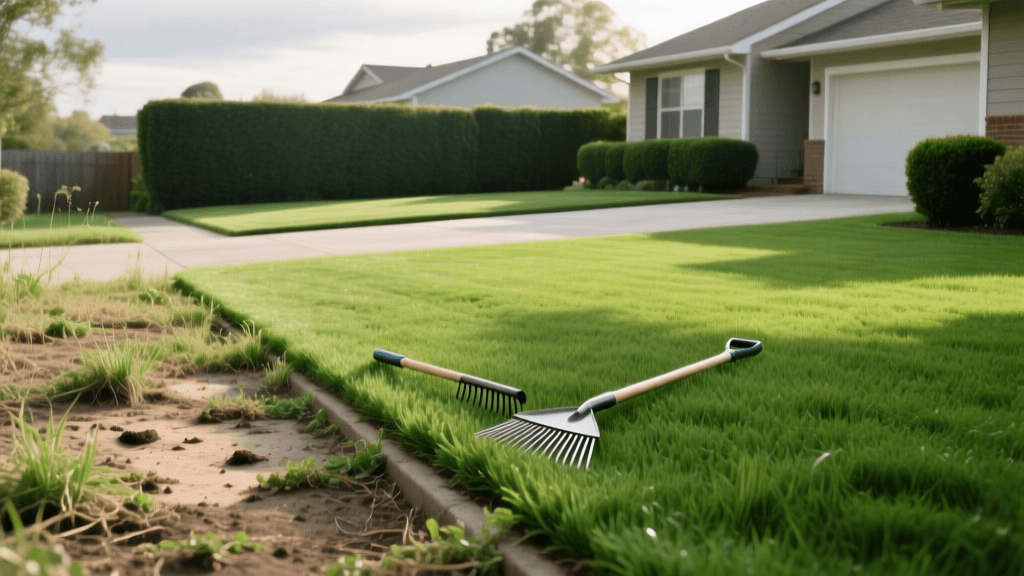
From Patchy to Perfect: A Lawn Renovation Transformation
The Vision: From a Backyard Eyesore to a Lush Oasis
Every homeowner dreams of stepping onto a thick, emerald-green carpet of grass. But for many, the reality is a patchy, weed-choked yard that turns into a muddy mess after every rainstorm. If your lawn looks more like a battlefield than a suburban oasis, you are not alone. The good news? A complete lawn renovation can completely reverse years of neglect. In this guide, we will walk through a dramatic before-and-after transformation of a failing cool-season lawn, detailing the exact steps, products, and timelines required to achieve professional-grade results.
The "Before" State: Diagnosing a Failing Lawn
Before we can build a beautiful lawn, we must understand why the current one is failing. Our case study features a 5,000-square-foot front yard suffering from classic symptoms of chronic neglect:
- Severe Soil Compaction: Water pooled on the surface for hours after rainfall, and a screwdriver could barely penetrate the top inch of soil.
- Weed Infestation: Over 40% of the turf canopy was composed of broadleaf weeds, crabgrass, and invasive Poa annua (annual bluegrass).
- Thatch Buildup: A half-inch layer of dead organic matter prevented water and nutrients from reaching the shallow, struggling root zone.
- Thin, Pale Turf: The existing grass was a mix of dying Kentucky Bluegrass and weak perennial ryegrass, lacking the deep roots needed to survive summer heat.
To achieve a true transformation, spot-treating weeds and tossing a handful of seed on top of the dirt would not suffice. This lawn required a complete reset.
Phase 1: The Great Reset (Weeks 1-2)
Eradiation and Scalping
The first step in any major lawn renovation is clearing the canvas. According to turfgrass experts at Penn State Extension, attempting to overseed into a heavily weeded, compacted lawn results in a germination rate of less than 10%. To fix this, we applied a non-selective herbicide (glyphosate) to kill all existing vegetation.
After waiting 14 days for the existing grass and weeds to turn completely brown, we brought out the mower. We "scalped" the dead lawn down to a height of just 1 inch, using a bagging attachment to remove all the dead clippings and thatch. This exposed the bare soil, creating the perfect seedbed for the new grass.
Phase 2: Core Aeration and Soil Amendment (Week 3)
Relieving Compaction and Balancing pH
With the soil exposed, it was time to address the compaction. We rented a heavy-duty, walk-behind core aerator (a Billy Goat model with tines capable of pulling 3-inch deep plugs). We made two passes over the entire 5,000-square-foot area: one horizontally and one vertically, creating a grid of thousands of small holes. This process allows oxygen, water, and nutrients to penetrate deep into the soil profile.
Following aeration, we conducted a soil test. The results showed a pH of 5.8 (too acidic for optimal cool-season grass growth) and a severe phosphorus deficiency. Based on the University of Minnesota Extension guidelines for soil amendment, we applied:
- Pelletized Lime: 25 lbs per 1,000 sq ft to raise the pH to the ideal 6.5 range.
- Organic Compost Topdressing: A thin layer (about 1/4 inch) of screened compost was dragged across the lawn using a leveling rake to fill the aeration holes and introduce beneficial microbes.
Phase 3: Overseeding and Feeding (Week 4)
Selecting the Right Seed and Fertilizer
For the "After" transformation, we chose a premium Turf-Type Tall Fescue (TTTF) blend. TTTF is renowned for its deep root system, drought tolerance, and dark green color. We calibrated our broadcast spreader and applied the seed at a heavy renovation rate of 8 to 10 lbs per 1,000 square feet (totaling roughly 45 lbs of seed for the 5,000 sq ft yard).
Immediately after seeding, we applied a high-phosphorus starter fertilizer (Scotts Turf Builder Starter Food for New Grass, 24-25-4). Phosphorus is critical for rapid root development in seedlings. We then lightly raked the area to ensure seed-to-soil contact, which is the single most important factor in successful germination.
Phase 4: The Germination and Establishment Window (Weeks 5-8)
Precision Watering and the First Mow
The transition from "Before" to "After" hinges entirely on the watering schedule during the first 21 days. Grass seed must remain consistently moist to sprout. Following conservation and efficiency guidelines outlined by EPA WaterSense, we utilized a smart irrigation timer to apply water efficiently without causing runoff.
The 30-Day Watering Schedule
- Days 1-14 (Germination): Watered 3 times a day (8:00 AM, 12:00 PM, 4:00 PM) for 10 minutes per zone. The goal was to keep the top 1 inch of soil damp, not soggy.
- Days 15-21 (Seedling Growth): Reduced frequency to once a day for 20 minutes, encouraging the new roots to stretch deeper into the soil to find moisture.
- Days 22-30 (Establishment): Transitioned to deep, infrequent watering—1 inch of water applied twice a week.
Pro Tip: Do not mow the new grass until it reaches at least 3.5 inches in height. When you do make the first cut, only remove the top 1/3 of the blade using a razor-sharp mower blade to avoid tearing the fragile seedlings out of the ground.
The "After" State: 90 Days Later
Ninety days after the initial herbicide application, the transformation was nothing short of miraculous. The pale, weed-ridden dirt patch was gone. In its place stood a dense, vibrant, dark-green carpet of Tall Fescue.
The structural changes were just as impressive as the visual ones. The core aeration and compost topdressing had completely altered the soil drainage; water no longer pooled on the surface. The deep roots of the TTTF were actively pulling moisture from deep within the subsoil, making the lawn highly resilient to heat stress. Furthermore, the sheer density of the new turf naturally choked out any attempts by weed seeds to germinate, eliminating the need for harsh chemical herbicides.
Renovation Breakdown: Timeline and Cost Table
Below is a detailed breakdown of the renovation process, including estimated costs for a standard 5,000-square-foot lawn. Prices may vary based on your region and whether you choose to rent equipment or hire a professional landscaping service.
| Phase | Timeframe | Key Action | Materials Needed | Est. Cost (DIY) |
|---|---|---|---|---|
| 1. Eradication | Weeks 1-2 | Kill existing weeds and grass, scalp lawn | Glyphosate, Pump Sprayer, Mower | $45 |
| 2. Aeration & Prep | Week 3 | Core aeration, lime application, compost | Aerator Rental, Pelletized Lime, Compost | $160 |
| 3. Seed & Feed | Week 4 | Overseed with TTTF, apply starter fertilizer | 45 lbs TTTF Seed, Starter Fertilizer | $220 |
| 4. Establishment | Weeks 5-8 | Precision watering, first mow | Water (Utility cost), Sharp Mower Blade | $30 |
| Total | 8 Weeks | Full Lawn Transformation | All Materials & Rentals | ~$455 |
Final Thoughts on Your Lawn Transformation
Transforming a lawn from a patchy, compacted mess into a pristine, professional-grade turf is not an overnight process. It requires patience, precise timing, and a willingness to do the heavy lifting during the preparation phase. However, as the "Before and After" results clearly demonstrate, the investment of time and roughly $450 in DIY materials yields a massive return in curb appeal, property value, and personal enjoyment. By following this structured renovation schedule, you can permanently erase the "before" and step into a beautiful, sustainable "after."

