
Gardening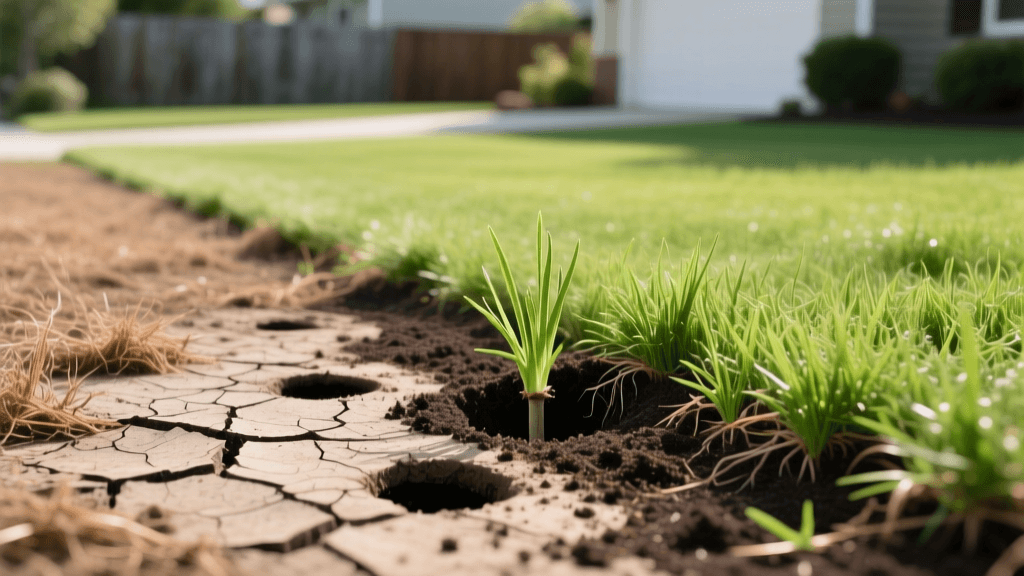
The Ultimate Lawn Renovation and Soil Recovery Guide
Introduction to Lawn Renovation and Soil Recovery
A struggling, patchy, or heavily compacted lawn is a common frustration for homeowners. While many gardeners focus heavily on their vegetable beds and flower borders, the largest 'crop' on most properties—the turfgrass—often suffers from severe neglect. Lawn renovation is not just about throwing down grass seed and hoping for rain; it is a comprehensive process of soil recovery, biological restoration, and strategic planting. By applying core gardening principles like soil preparation and composting to your turf, you can transform a barren, weed-choked yard into a vibrant, resilient landscape.
The intersection of lawn care and gardening lies beneath the surface. Healthy turf requires a thriving soil food web, proper drainage, and balanced nutrients. This guide will walk you through a proven, step-by-step lawn renovation protocol designed to recover damaged soil and establish a deep-rooted, drought-tolerant lawn.
Assessing the Damage: Why Lawns Fail
Before purchasing seed or fertilizer, you must diagnose why your lawn is failing. The most common culprits include soil compaction, excessive thatch buildup, nutrient depletion, and improper mowing practices. Heavy foot traffic and clay-heavy soils lead to compaction, which chokes grass roots by depriving them of oxygen and preventing water infiltration. Thatch—a dense layer of dead and living organic matter between the soil surface and the green blades—can harbor pests and block moisture. If your lawn feels spongy when you walk on it, or if water pools on the surface after a light rain, you are likely dealing with compaction and thatch issues that require immediate mechanical intervention.
Step 1: Soil Testing and Targeted Amendment
Never guess your soil's needs. The foundation of any successful garden or lawn renovation is a comprehensive soil test. For $15 to $30, you can send a soil sample to a local university extension laboratory to receive a detailed breakdown of your soil's pH, nitrogen, phosphorus, potassium, and organic matter content. Turfgrass generally thrives in a slightly acidic to neutral pH range of 6.0 to 7.0. If your test reveals highly acidic soil (below 6.0), you will need to apply pelletized limestone. Conversely, highly alkaline soils (above 7.5) may require elemental sulfur or acidifying organic amendments. Skipping this step is the most common reason lawn renovations fail, as locked-up nutrients cannot be absorbed by new seedlings regardless of how much fertilizer you apply.
Step 2: Core Aeration and Thatch Management
To alleviate compaction, core aeration is mandatory. Unlike spike aeration, which merely punches holes and can actually increase compaction in heavy clay soils, core aeration uses hollow tines to extract 2- to 3-inch plugs of soil, leaving them on the surface to break down. This process creates vital channels for air, water, and nutrients to reach the root zone. You can rent a walk-behind core aerator from a local hardware store for approximately $80 to $100 per day. For optimal recovery, run the aerator over your lawn in two perpendicular directions to ensure maximum soil fracturing. The best time to perform this step is in early fall for cool-season grasses, or late spring for warm-season varieties.
Step 3: Compost Topdressing for Deep Soil Recovery
This is where gardening expertise truly elevates lawn care. Topdressing your aerated lawn with high-quality, screened compost is the single most effective way to recover dead soil biology. As noted by the Environmental Protection Agency (EPA), compost enriches soils, helps retain moisture, and reduces the need for chemical fertilizers by introducing beneficial microbes that break down thatch naturally.
Apply a 1/4 to 1/2 inch layer of finely screened organic compost across the entire lawn. Use a push broom or a leveling rake to work the compost deep into the aeration holes. To calculate your needs, remember that one cubic yard of compost will cover approximately 1,000 square feet at a 1/3-inch depth. Bulk compost typically costs between $30 and $50 per cubic yard, making it a highly cost-effective soil amendment compared to bagged retail products.
Step 4: Strategic Overseeding and Seed Selection
Once the soil is aerated and amended with compost, it is time to overseed. The University of California Agriculture and Natural Resources (UC ANR) emphasizes that selecting the right turfgrass species for your specific microclimate and sun exposure is critical for long-term lawn resilience. Avoid cheap, generic seed mixes that contain high percentages of annual ryegrass or weed seeds.
- Tall Fescue: Ideal for transitional zones and shaded areas. It features deep roots, excellent drought tolerance, and requires 5 to 8 lbs of seed per 1,000 square feet for overseeding.
- Kentucky Bluegrass (KBG): Best for full-sun northern climates. It spreads via rhizomes, creating a dense, self-repairing sod. Apply 2 to 3 lbs per 1,000 square feet.
- Perennial Ryegrass: Known for rapid germination (5-7 days). It is often mixed with KBG or fescue to provide quick erosion control and shade for slower-germinating seeds. Apply 5 to 6 lbs per 1,000 square feet.
Step 5: Starter Fertilization
New grass seedlings require immediate access to phosphorus for root development and nitrogen for blade growth. Apply a high-quality starter fertilizer immediately after seeding. Products like Scotts Turf Builder Starter Food provide a quick-release synthetic boost, while organic gardeners may prefer Milorganite or Espoma Organic Lawn Food, which feed the soil microbes over a longer period without the risk of burning tender new shoots.
Lawn Renovation Timeline and Action Plan
Consistency is the key to successful lawn recovery. Use the following structured timeline to manage your renovation project from start to finish.
| Timeline | Action Required | Details & Estimated Costs |
|---|---|---|
| Week 1 | Soil Testing & Mowing | Send soil sample to lab ($20). Mow existing grass as short as possible (1.5 inches) and bag clippings. |
| Week 2 | Core Aeration | Rent aerator ($90). Make two passes over the lawn. Leave soil plugs on the grass. |
| Week 3 | Compost Topdressing & Seeding | Spread 1/3 inch of screened compost ($45). Broadcast grass seed and starter fertilizer. |
| Week 3-5 | Intensive Watering | Water lightly 2-3 times daily to keep the top 1 inch of soil consistently moist. Do not let seed dry out. |
| Week 6 | First Mowing | Mow only when new grass reaches 3.5 inches. Set mower to 3 inches. Never remove more than 1/3 of the blade. |
| Week 8 | Transition to Deep Watering | Reduce watering frequency to twice a week, but increase duration to encourage deep root growth (1 inch per week). |
Watering and Long-Term Maintenance
The most critical phase of lawn renovation occurs in the first 21 days after seeding. The seedbed must remain constantly moist, which usually requires light watering two to three times a day for 10 to 15 minutes per zone. Once the new grass reaches mowing height, you must transition to deep, infrequent watering. According to the Royal Horticultural Society (RHS), encouraging deep root growth through infrequent but thorough soakings makes the lawn significantly more resilient to summer droughts and disease pressure.
Healthy soil is the foundation of a resilient lawn. By treating your turf with the same soil-building respect you give your vegetable garden, you create an ecosystem that naturally resists weeds, pests, and environmental stress.
By combining mechanical aeration, organic compost topdressing, and strategic overseeding, you are not just patching a few bare spots—you are fundamentally renovating the soil architecture. This gardening-centric approach to lawn recovery ensures that your turf will remain thick, green, and vigorous for years to come, reducing your long-term reliance on chemical interventions and excessive irrigation.

