
Gardening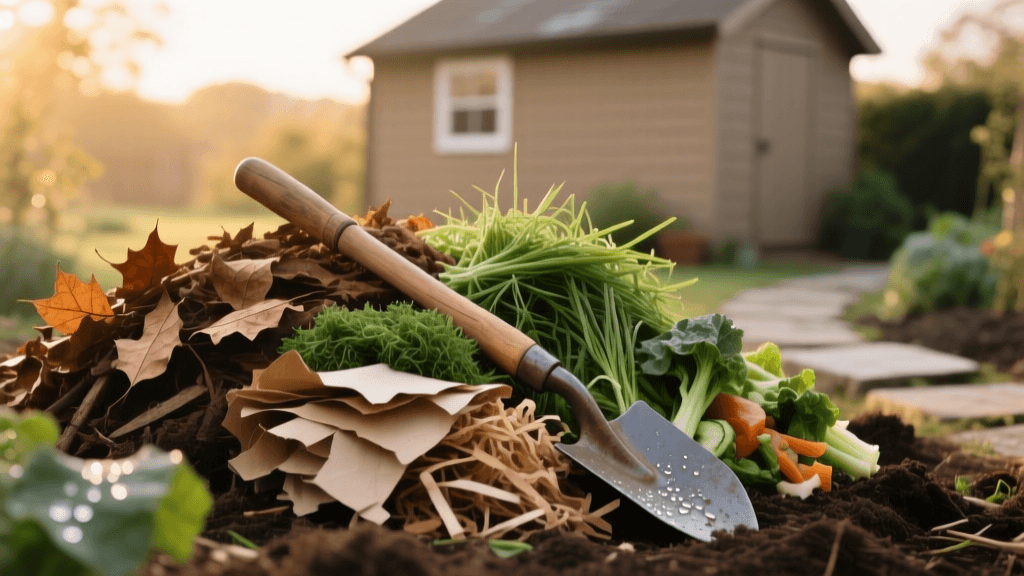
Mastering Compost C:N Ratios for Healthier Garden Soil
The Science of Composting: Why C:N Ratios Matter
Building rich, dark, crumbly compost is the cornerstone of organic gardening and long-term soil health. While many gardeners toss kitchen scraps and yard waste into a bin and hope for the best, mastering the carbon-to-nitrogen (C:N) ratio is the true secret to rapid, odor-free decomposition. According to the Environmental Protection Agency (EPA), composting is a biological process that relies on microorganisms to break down organic matter. These microbes require a balanced diet to thrive, multiply, and generate the heat necessary to kill weed seeds and pathogens.
Carbon provides the energy and structural material for microbes, while nitrogen is essential for building proteins and reproducing cellular structures. When these elements are out of balance, your compost pile can become a slimy, foul-smelling mess or a dry, inert pile that takes years to break down. Understanding how to manipulate this ratio transforms your garden waste into 'black gold' in a fraction of the time.
Understanding the 'Browns' (Carbon) and 'Greens' (Nitrogen)
In gardening parlance, compost materials are broadly categorized into 'browns' and 'greens'. This color-coding system is a helpful mnemonic, though it is not always perfectly literal.
Browns: The Carbon Powerhouses
Brown materials are typically dry, dead, and woody. They are rich in carbon, which breaks down slowly and provides the bulk and aeration structure of your compost pile. Examples include dried autumn leaves, straw, shredded newspaper, cardboard, sawdust, and pine needles. Without sufficient browns, a compost pile lacks the necessary air pockets for aerobic decomposition, leading to anaerobic conditions and terrible odors.
Greens: The Nitrogen Boosters
Green materials are usually fresh, moist, and rich in nitrogen. They act as the catalyst that ignites microbial activity. Examples include vegetable kitchen scraps, fresh grass clippings, coffee grounds, and fresh manure. While they are called 'greens', materials like coffee grounds (which are brown in color) are classified as 'greens' due to their high nitrogen content.
The Ideal Compost Carbon-to-Nitrogen Ratio
The Cornell Waste Management Institute and other agricultural extensions recommend a target C:N ratio of roughly 25:1 to 30:1 by weight for optimal hot composting. At this ratio, microorganisms have exactly enough nitrogen to process the available carbon without excess nitrogen off-gassing as ammonia (which causes bad smells) or carbon remaining undecomposed.
However, weighing your kitchen scraps and yard waste is highly impractical for the home gardener. Instead, experts recommend measuring by volume. A general rule of thumb for volume mixing is 2 to 3 parts browns to 1 part greens. Because brown materials like dry leaves and straw are lighter and fluffier than dense, wet kitchen scraps, a 3:1 volumetric ratio naturally approximates the ideal 30:1 weight ratio.
Data Table: C:N Ratios of Common Compost Materials
To help you plan your compost inputs, here is a breakdown of common materials and their approximate C:N ratios by weight. Blending high-carbon and high-nitrogen materials is key to hitting that 30:1 sweet spot.
| Material | Category | Approximate C:N Ratio | Best Used For |
|---|---|---|---|
| Sawdust | Brown | 325:1 | Bulking agent (use sparingly) |
| Dried Autumn Leaves | Brown | 60:1 | Primary carbon base |
| Straw / Hay | Brown | 50:1 | Aeration and structure |
| Shredded Newspaper | Brown | 175:1 | Moisture absorption |
| Fruit & Veggie Scraps | Green | 15:1 | Daily nitrogen additions |
| Coffee Grounds | Green | 20:1 | Nitrogen boost, odor control |
| Fresh Grass Clippings | Green | 17:1 | Quick heat generation |
| Chicken Manure | Green | 7:1 | Super-charging slow piles |
Step-by-Step Guide to Building a Balanced Pile
Building a hot compost pile requires specific dimensions and maintenance routines to ensure the core reaches temperatures between 130°F and 160°F.
- Size Matters: Construct a pile that is at least 3 feet wide, 3 feet long, and 3 feet tall (1 cubic yard). This volume is the minimum required to insulate the core and retain heat.
- Layering: Start with a 4-inch layer of coarse twigs at the bottom for drainage. Alternate layers of browns (6 inches) and greens (2 inches), watering each layer as you build.
- Moisture Control: The pile should feel like a wrung-out sponge. If it is too dry, microbial activity halts. If it is too wet, water fills the air pockets, causing anaerobic rot. Add water with a hose or watering can as you build the layers.
- Turning Schedule: For hot composting, turn the pile with a pitchfork every 3 to 7 days. This moves the cooler outer materials into the hot center and introduces fresh oxygen. Expect the pile to heat up within 48 hours of turning.
- Curing: After the active heating phase ends (usually 21 to 30 days), let the compost cure for an additional 45 to 60 days. This allows beneficial fungi to establish and the pH to stabilize before applying it to your garden beds.
Troubleshooting Common Compost Imbalances
Even experienced gardeners encounter compost hiccups. Here is how to diagnose and fix C:N imbalances based on sensory cues.
The Pile Smells Like Ammonia or Garbage
Diagnosis: Too much nitrogen (too many greens). The excess nitrogen is off-gassing as ammonia gas.
Fix: Turn the pile immediately and mix in 2 to 3 parts dry browns (like shredded leaves or straw) to absorb the excess moisture and balance the ratio. Leave the lid off your bin for a day to let excess moisture evaporate.
The Pile is Dry, Cool, and Ants Are Moving In
Diagnosis: Too much carbon (too many browns) and insufficient moisture.
Fix: Add nitrogen-rich greens such as fresh grass clippings, coffee grounds, or a liquid compost activator (like diluted fish emulsion). Water the pile thoroughly while turning it to ensure moisture reaches the core.
The Pile is Slimy and Matted
Diagnosis: Lack of oxygen and excess moisture, often from adding too many wet greens like grass clippings without enough bulky browns.
Fix: Mix in coarse browns like wood chips or shredded cardboard to create air pockets. Turn the pile vigorously to break up clumps.
Real-World Costs and Sourcing Materials
Maintaining a steady supply of browns and greens can be highly cost-effective if you source locally.
- Carbon (Browns): Dried leaves are free if you rake your own yard or ask neighbors. Straw bales cost between $8 and $15 each at local farm stores and provide excellent structure. Shredded office paper and uncoated cardboard are free household byproducts.
- Nitrogen (Greens): Kitchen scraps are free. Coffee grounds can often be sourced for free from local cafes if you ask politely and bring your own bucket. Bagged steer or chicken manure costs around $5 to $8 per 40-lb bag at hardware stores.
- Finished Compost Costs: If you need to supplement your own production, bagged premium organic compost costs $5 to $10 per 1.5 cubic feet. For large raised bed projects, bulk compost delivered by a landscape supply yard is much more economical, typically ranging from $30 to $50 per cubic yard (which covers about 100 square feet at a 3-inch depth).
Conclusion
Mastering the carbon-to-nitrogen ratio elevates your composting from a passive waste-disposal chore to an active soil-building science. By carefully balancing your browns and greens, monitoring moisture, and turning your pile on schedule, you will produce nutrient-dense humus that dramatically improves soil structure, water retention, and plant vitality in your garden.

