
Landscaping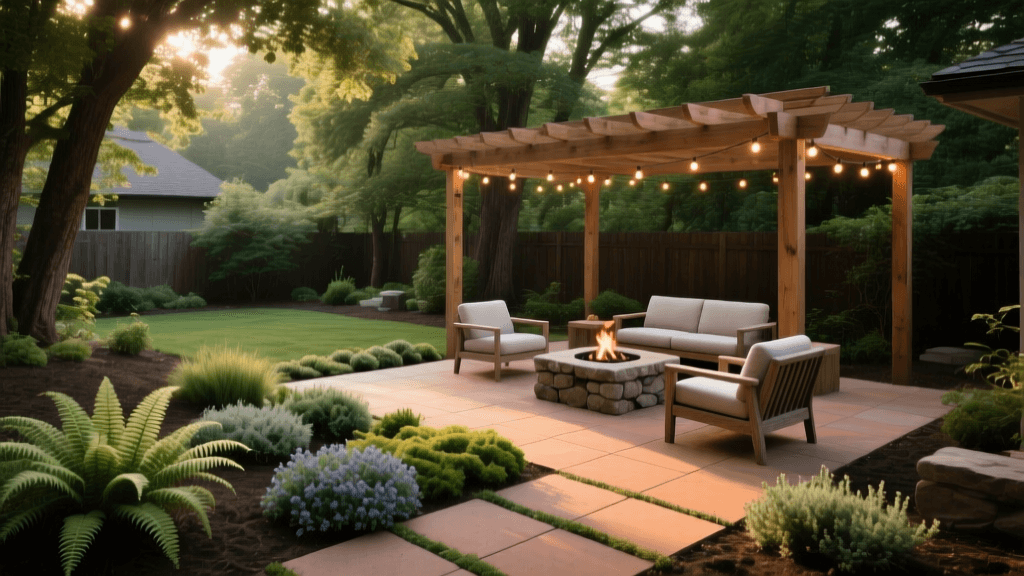
Muddy Backyard Transformation: Shade Patio Makeover
The 'Before' Scenario: A Soggy, Unusable Shade Trap
Every homeowner and landscaper has encountered the dreaded 'backyard swamp.' In this specific transformation project, the homeowners were dealing with a 400-square-foot area of their backyard that was completely unusable for nine months of the year. Surrounded by mature oak and maple trees, the area received less than three hours of dappled sunlight daily. The existing turfgrass had long since surrendered to the shade, leaving behind a compacted, bare patch of heavy clay soil that turned into a muddy slip-and-slide after every rainstorm.
The core issues were threefold: severe soil compaction from years of foot traffic, a negative grade that trapped surface runoff, and a complete lack of sunlight to sustain traditional lawn grass. The homeowners wanted an outdoor living space where they could place patio furniture and enjoy their morning coffee without sinking into the mud. They needed a hardscaping solution that would not harm the root systems of their beloved mature trees, alongside a softscaping strategy that embraced the shade rather than fighting it.
The Vision: Designing a Permeable Paver Oasis
The transformation plan centered on two key landscaping principles: sustainable stormwater management and shade-tolerant ecology. Traditional concrete or solid paver patios require extensive excavation and can suffocate tree roots by blocking water and oxygen exchange. Furthermore, solid surfaces exacerbate drainage issues by forcing runoff into already saturated adjacent beds.
To solve this, we designed a permeable paver patio. According to the Environmental Protection Agency's Green Infrastructure guidelines, permeable pavements are highly effective at reducing stormwater runoff, filtering pollutants, and allowing vital moisture to reach the subsoil and tree root zones. By pairing this hardscape with robust, shade-loving groundcovers in the surrounding beds, we aimed to create a cohesive, low-maintenance ecosystem that looked intentional and elegant year-round.
Step-by-Step Transformation Process
1. Excavation and Sub-Base Preparation
The first step in any successful hardscaping project is a solid foundation. Because we were working within the critical root zone of mature trees, we avoided deep, aggressive trenching. Instead, we carefully excavated the area to a depth of 8 inches, using hand tools near the major tree roots to prevent damage. The native clay soil was heavily compacted, so we scarified the bottom 2 inches to improve subgrade percolation.
We then laid down a non-woven geotextile fabric (Mirafi 500X) to separate the native clay from our aggregate base, preventing the base from sinking into the mud over time. The base reservoir was filled with 6 inches of washed, angular ASTM No. 57 crushed stone. This specific stone size creates large void spaces that temporarily store stormwater, allowing it to slowly infiltrate the native soil below. We compacted the base in 2-inch lifts using a vibratory plate compactor to ensure a level, stable foundation that would not shift during freeze-thaw cycles.
2. Installing the Permeable Paver System
For the surface, we selected Belgard Aqua Roc permeable pavers. These pavers feature built-in spacer bars that ensure uniform joints, which are essential for water infiltration. Over the compacted base, we added a 1-inch bedding layer of ASTM No. 8 stone (smaller, clean-washed gravel). Unlike traditional paver installations that use polymeric sand or fine masonry sand—which would clog a permeable system—the No. 8 stone allows water to pass freely through the joints.
The pavers were laid in a staggered running bond pattern to add visual width to the narrow backyard. Once the field was cut and fitted around the tree trunks (leaving a generous 3-foot radius of open mulch beds around the base of each tree to protect the root flares), we swept additional No. 8 stone into the joints and ran the plate compactor over the surface one final time to lock everything into place.
3. Softscaping with Shade-Tolerant Groundcovers
With the hardscape complete, the surrounding muddy borders needed a permanent, living solution. Traditional mulch washes away in heavy rain, and turfgrass will not survive the shade. We turned to aggressive, shade-tolerant groundcovers that act as a living mulch, stabilizing the soil and absorbing excess moisture.
When selecting plants, databases like the Missouri Botanical Garden's Plant Finder are invaluable for verifying shade tolerance and soil moisture requirements. We selected three primary species for the borders: Sweet Woodruff (*Galium odoratum*) for its delicate white spring blooms and mat-forming habit; Creeping Jenny (*Lysimachia nummularia*) for its vibrant chartreuse foliage that brightens dark shade; and Autumn Fern (*Dryopteris erythrosora*) to provide architectural height and texture. We planted 2-inch plugs spaced 12 inches apart, amending the native clay with 30% organic compost to give them a strong start.
Project Breakdown: Costs, Materials, and Timeline
Transforming a landscape requires a realistic understanding of the investment involved. Below is a detailed breakdown of the materials, costs, and time required for this 400-square-foot permeable paver and groundcover transformation. Industry data from the National Association of Landscape Professionals suggests that well-executed hardscaping projects like this can yield a return on investment of up to 70% upon home resale, while vastly improving daily livability.
| Project Phase | Materials Used | Estimated Cost (400 sq. ft.) | Time Required |
|---|---|---|---|
| Excavation & Base Prep | Geotextile fabric, ASTM No. 57 stone | $1,100 - $1,500 | 2 Days |
| Paver Installation | Belgard permeable pavers, No. 8 joint stone | $4,500 - $6,000 | 3 Days |
| Softscaping & Beds | Groundcover plugs, organic compost, edging | $600 - $900 | 1 Day |
| Total Project | All inclusive labor and materials | $6,200 - $8,400 | 6 Days |
The 'After' Results: Functionality Meets Curb Appeal
The transformation was nothing short of spectacular. The 'before' photos show a depressing, waterlogged patch of dirt that attracted mosquitoes and ruined shoes. The 'after' photos reveal a sophisticated, dry, and highly functional outdoor room. The permeable paver system performed flawlessly during the first major spring rainstorm; instead of pooling on the surface or flooding the adjacent lawn, the water vanished instantly into the joints, silently recharging the groundwater and hydrating the nearby oak trees.
The softscaping borders filled in beautifully within two growing seasons. The Sweet Woodruff and Creeping Jenny formed a dense, weed-suppressing carpet that requires zero mowing and minimal watering. The chartreuse foliage of the Creeping Jenny provides a striking visual contrast against the slate-grey tones of the permeable pavers, drawing the eye and making the small backyard feel larger and more inviting.
Expert Tips for Your Own Shade Transformation
If you are planning to reclaim a muddy, shaded area of your own property, keep these professional landscaping tips in mind:
- Test Your Percolation Rate: Before installing any permeable system, dig a test hole and fill it with water. If it takes more than 24 hours to drain, your native clay may be too dense, and you will need to incorporate an underdrain pipe connected to a daylight exit or dry well.
- Protect Tree Root Flares: Never build hardscaping or pile soil directly against the trunk of a mature tree. Always leave a wide, mulched buffer zone to allow the root flare to breathe and prevent trunk rot.
- Embrace Living Groundcovers: Stop wasting money on grass seed that will never germinate in heavy shade. Invest in perennial groundcovers that are engineered by nature to thrive in the understory of forests.
- Maintain the Joints: While permeable pavers are low maintenance, they are not no-maintenance. Use a leaf blower to clear autumn leaves and debris from the joints annually to prevent organic matter from clogging the stone voids and reducing infiltration rates.
By combining sustainable hardscaping materials with ecologically appropriate plantings, you can turn your landscape's worst problem area into its most celebrated feature.

