
Landscaping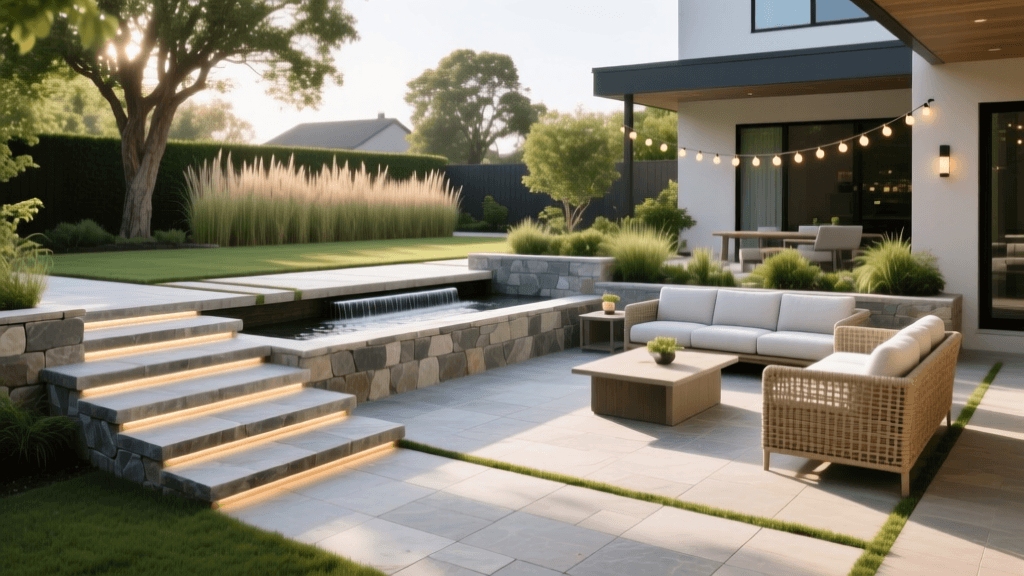
How to Build a Multi-Level Paver Patio for Entertaining
Transforming Your Backyard with a Multi-Level Paver Patio
When it comes to elevating your home's curb appeal and creating the ultimate outdoor entertaining space, few landscaping projects deliver a return on investment quite like a multi-level paver patio. Unlike a flat, monotonous concrete slab, a tiered hardscape design introduces architectural interest, solves complex grading and slope issues, and naturally divides your outdoor living area into distinct functional zones. Whether you are hosting a large summer barbecue or enjoying a quiet evening by the fire pit, a well-designed multi-level patio provides the perfect, versatile backdrop.
Designing a tiered patio requires careful planning, an understanding of structural retaining walls, and a keen eye for landscape aesthetics. This comprehensive guide will walk you through the essential steps of planning, material selection, and construction to ensure your new outdoor space is both structurally sound and visually stunning.
Planning Your Patio Zones for Entertaining
The primary advantage of a multi-level patio is the ability to create separate "rooms" for different activities without the need for physical walls. When mapping out your space, consider how you and your guests will flow through the area.
- The Upper Tier (Dining and Cooking): This level is typically closest to the house and serves as the primary hub for outdoor dining and grilling. To comfortably fit a dining table for six to eight people, a grill station, and adequate walking space, plan for a minimum footprint of 12 by 14 feet. Ensure this tier is perfectly level to prevent wobbly tables and chairs.
- The Lower Tier (Lounging and Fire Features): Dropping down 12 to 18 inches to a second level creates an intimate, cozy atmosphere. This is the ideal location for a built-in or portable fire pit, deep seating, and conversation areas. A circular or semi-circular design with a minimum diameter of 15 feet works beautifully for this zone.
- The Transition (Stairs and Landings): Connect the two levels with wide, inviting stairs. For outdoor entertaining, wider treads (at least 16 inches deep) and shorter risers (6 inches high) feel more natural and allow guests to sit on the steps when extra seating is needed.
Selecting the Right Pavers and Materials
The materials you choose will dictate the longevity, maintenance requirements, and overall aesthetic of your patio. High-quality brands like Belgard, Techo-Bloc, and Unilock offer interlocking concrete pavers that mimic natural stone while providing superior durability. Below is a comparison of the most popular hardscaping materials to help you make an informed decision.
| Material Type | Average Cost (per sq. ft.) | Durability & Maintenance | Best Use Case |
|---|---|---|---|
| Interlocking Concrete Pavers | $4 - $8 | High durability; easy to replace individual units if damaged. Requires polymeric sand. | Versatile; ideal for both upper dining tiers and lower fire pit zones. |
| Natural Flagstone | $15 - $25+ | Extremely durable but can be uneven. Requires professional setting and occasional sealing. | High-end curb appeal; organic, rustic aesthetics. |
| Porcelain Pavers | $10 - $18 | Stain-resistant, frost-proof, and fade-resistant. Requires a specialized setting bed. | Modern, sleek designs; high-traffic dining areas. |
| Permeable Concrete Pavers | $6 - $10 | Allows water to pass through joints. Requires periodic vacuuming to prevent clogging. | Eco-friendly builds; areas with strict stormwater runoff regulations. |
Excavation and Base Preparation: The Secret to Longevity
The most common reason paver patios fail, shift, or sink is inadequate base preparation. For a multi-level patio, the excavation process is even more critical, as the lower tier will require deeper digging to accommodate the retaining wall foundation.
Step-by-Step Base Construction
- Excavation: Dig down approximately 9 to 11 inches below your desired final patio height. This accounts for a 6 to 8-inch gravel base, a 1-inch sand setting bed, and the thickness of the paver itself (usually 2 3/8 inches).
- Geotextile Fabric: Lay down a non-woven geotextile landscape fabric over the compacted soil. This prevents the gravel base from mixing with the native clay or soil below, which is a primary cause of settling.
- Gravel Base: Add 3/4-inch minus crushed stone in 2-inch layers (lifts). Use a mechanical plate compactor to thoroughly compact each layer. A properly compacted base should feel as hard as concrete.
- Screeding Sand: Spread a 1-inch layer of coarse concrete sand or stone dust. Use aluminum screed rails and a straight 2x4 board to create a perfectly level surface for laying the pavers.
Building the Retaining Wall for the Tier Drop
To create the multi-level effect, you will need to build a segmental retaining wall between the upper and lower tiers. Products like Allan Block or Versa-Lok are engineered with a pinning system or a setback lip that naturally leans the wall into the retained soil, providing immense structural strength.
Begin by trenching for the wall's foundation. The first course of blocks should be buried at least 10% of the total wall height (or a minimum of 6 inches) below grade. Fill the hollow cores of the retaining wall blocks and the 12-inch gap behind the wall with 3/4-inch clean, washed drainage gravel. This ensures that hydrostatic pressure does not build up behind the wall during heavy rains, which could otherwise cause the wall to bulge or collapse.
Managing Drainage and Stormwater Runoff
Proper drainage is vital for protecting your home's foundation and preserving the integrity of your hardscape. The patio surface should have a minimum slope of 1/8 inch per foot away from your house. Furthermore, integrating sustainable drainage solutions can significantly benefit the local ecosystem.
According to the Environmental Protection Agency (EPA), permeable pavements can significantly reduce stormwater runoff, filter pollutants, and replenish groundwater supplies. If your local municipality has strict impervious surface limits, utilizing permeable pavers with an open-graded aggregate base for your lower entertaining tier is an excellent, eco-friendly solution that maintains high curb appeal while managing water responsibly.
Illuminating the Space: Hardscape Lighting
To ensure your multi-level patio is safe and usable after the sun goes down, strategic lighting is essential. Avoid harsh floodlights; instead, opt for low-voltage LED hardscape lighting integrated directly into the architecture.
- Step Lights: Install recessed LED fixtures under the capstones of your retaining wall stairs to illuminate the treads and prevent tripping hazards.
- Wall Wash Lighting: Place uplights at the base of nearby trees or architectural features to cast dramatic shadows and highlight the texture of your pavers.
For illumination, the U.S. Department of Energy recommends using LED fixtures for outdoor applications due to their exceptional energy efficiency, long lifespan, and durability in extreme weather conditions. Utilizing a smart transformer allows you to control the ambiance of your entertaining zones directly from your smartphone.
Softening the Hardscape: Landscaping for Curb Appeal
A multi-level patio can look stark and imposing if not properly integrated into the surrounding landscape. Softening the hard edges of your retaining walls and pavers with strategic plantings is the final step in maximizing curb appeal.
Create built-in planter beds along the perimeter of the upper tier. Use cascading plants like creeping Jenny, trailing rosemary, or sweet alyssum to spill over the retaining wall caps, visually connecting the two levels. For privacy and wind-blocking around the lower fire pit zone, plant evergreen shrubs such as arborvitae or boxwood in staggered groupings. Add a layer of high-quality hardwood mulch to the garden beds to retain moisture and provide a rich, finished contrast against the stone pavers.
Final Thoughts on Budget and ROI
While a multi-level paver patio is a significant investment—typically ranging from $25 to $45 per square foot when professionally installed—the return on investment is substantial. Real estate experts consistently note that well-designed outdoor living spaces can recoup up to 70% of their cost upon resale, while drastically improving your daily quality of life. By carefully planning your entertaining zones, investing in a proper base, and integrating sustainable drainage and lighting, you will create a breathtaking outdoor oasis that serves as the envy of the neighborhood for decades to come.

