
Landscaping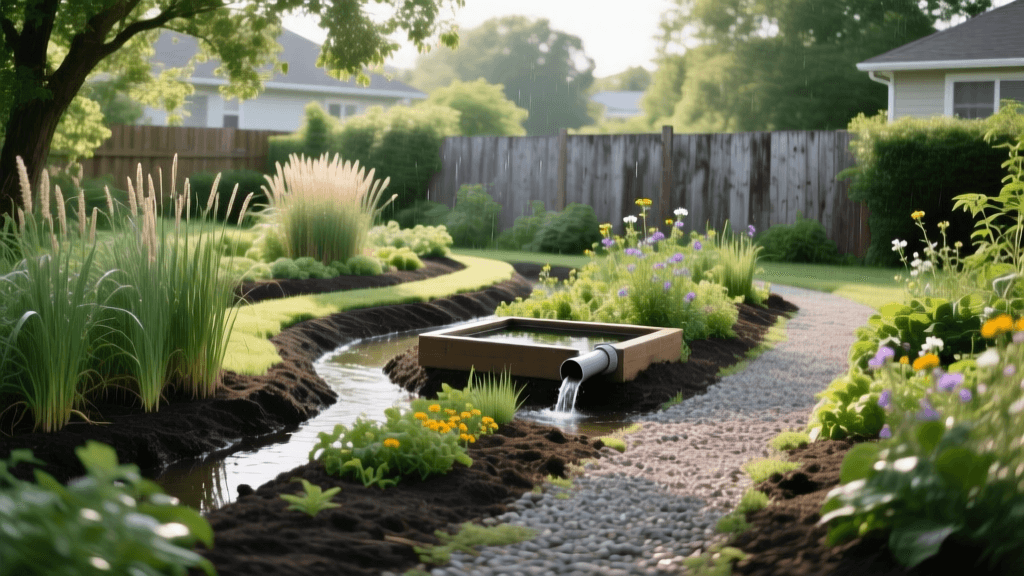
Building a Chemical-Free Rain Garden for Yard Drainage
Introduction to Chemical-Free Rain Gardens
Yard drainage issues can lead to flooded basements, eroded topsoil, and stagnant puddles that breed mosquitoes. While many homeowners turn to synthetic chemical treatments or extensive concrete hardscaping to manage water and the weeds that follow, a far more sustainable and effective solution exists: the rain garden. A rain garden is a landscaped depression designed to capture, absorb, and naturally filter stormwater runoff from roofs, driveways, and lawns.
By adopting a chemical-free and organic approach to building and maintaining your rain garden, you not only solve your drainage problems but also protect local watersheds. Synthetic fertilizers, herbicides, and pesticides wash directly into storm drains during heavy rains, contributing to toxic algal blooms and aquatic ecosystem collapse. According to the University of Minnesota Extension, a properly designed rain garden can reduce the amount of pollution reaching lakes and streams by up to 80%. This guide will walk you through the exact steps to design, build, and maintain a thriving, chemical-free rain garden.
The Hidden Cost of Synthetic Landscape Chemicals
Before breaking ground, it is crucial to understand why a chemical-free approach is mandatory for a rain garden. The primary function of this landscape feature is to capture runoff and allow it to percolate into the groundwater table. If you treat the plants in your rain garden with synthetic nitrogen fertilizers or broadleaf herbicides, the very water you are capturing will become a vehicle for transporting those toxins directly into the local aquifer and nearby waterways.
Organic landscaping relies on building healthy soil biology rather than force-feeding plants with water-soluble synthetic salts. By utilizing compost, natural mulches, and native plants adapted to your local climate, you create a self-sustaining ecosystem that requires zero chemical intervention to thrive, filter water, and manage weeds.
Step 1: Siting and Planning Your Rain Garden
Location is the most critical factor in rain garden success. You must capture water where it naturally flows, but you also need to protect your home's structural integrity.
- The 10-Foot Rule: Always locate your rain garden at least 10 feet away from your home's foundation to prevent water seepage into your basement or crawl space.
- Avoid Utilities and Septic Systems: Never build a rain garden directly over a septic drain field or utility lines. Always call 811 a few days before digging to have local utility companies mark underground lines.
- Sunlight and Slope: Choose a spot that receives full to partial sun (at least 6 hours of direct sunlight) and is situated on a gentle slope or natural depression where runoff naturally collects.
Step 2: The Percolation Test and Excavation
Before you commit to a specific location, you must ensure the soil can actually drain. Clay-heavy soils can hold water for days, turning a rain garden into a permanent, mosquito-infested pond. Perform a simple percolation test:
- Dig a test hole about 12 inches deep and 6 inches wide in your chosen location.
- Fill the hole with water and let it drain completely to saturate the soil.
- Refill the hole with water and insert a ruler. Measure how much the water level drops in one hour.
- Your soil must drain at a minimum rate of 1 inch per hour. If it drains slower, you will need to amend the soil heavily or choose a different site.
Once the site is approved, excavate the basin. A typical residential rain garden is 6 to 8 inches deep, with gently sloping sides to prevent erosion and allow easy access for maintenance. Pile the excavated soil on the downhill side to create a small berm that helps contain the water during heavy downpours.
Organic Soil Amendment Recipe
If your native soil is heavy clay or drains poorly, do not rely on synthetic soil conditioners. Instead, use a highly porous, organic soil mix that promotes rapid drainage and provides slow-release nutrients. The Penn State Extension recommends a specific blend for optimal biofiltration:
- 50% Coarse Builder's Sand: Provides the necessary structure and drainage channels.
- 25% Topsoil: Adds mineral content and bulk.
- 25% Organic Compost: Supplies slow-release nutrients, retains moisture during dry spells, and feeds beneficial soil microbes. Avoid peat moss, as its harvesting is environmentally destructive; use compost or coconut coir instead.
Step 3: Selecting Native Plants for Natural Filtration
Native plants are the engines of a chemical-free rain garden. Their deep, extensive root systems (often reaching 4 to 8 feet deep) break up compacted soil, create pathways for water to infiltrate, and filter out pollutants. Furthermore, native plants are adapted to your local rainfall patterns, meaning they require no synthetic fertilizers or supplemental watering once established.
When designing your planting plan, divide the garden into three distinct hydrological zones based on how long water sits in each area after a storm.
| Garden Zone | Moisture Level | Recommended Native Plants |
|---|---|---|
| Bottom (Center) | Wettest; holds water the longest (up to 48 hours). | Blue Flag Iris, Swamp Milkweed, Joe-Pye Weed, Cardinal Flower. |
| Slopes (Sides) | Medium; alternates between wet and dry conditions. | Black-Eyed Susan, New England Aster, Blue Vervain, Wild Bergamot. |
| Edges (Berm) | Dryest; rarely submerged, acts as the upland border. | Little Bluestem, Purple Coneflower, Butterfly Weed, Prairie Dropseed. |
For a comprehensive list of native plants suited to your specific region and their benefits to local pollinators, consult resources like the National Audubon Society's native plant database.
Step 4: Organic Weed and Pest Management
The most common reason homeowners abandon organic landscaping is weed pressure during the first two years of establishment. Without synthetic herbicides like glyphosate, you must rely on strategic mulching, biological controls, and organic pre-emergents.
The Power of Hardwood Mulch
Apply a 2 to 3-inch layer of triple-shredded, undyed hardwood mulch over the exposed soil. Avoid dyed mulches, which can leach heavy metals and chemical colorants into the water you are trying to filter. Never use cocoa bean mulch, as it is highly toxic to dogs. Hardwood mulch suppresses weed seeds, retains soil moisture, and slowly breaks down to feed the soil food web. As the mulch decomposes, simply top it off annually to maintain the 3-inch depth.
Corn Gluten Meal: The Organic Pre-Emergent
To stop weeds before they start without using synthetic chemicals like trifluralin, utilize Corn Gluten Meal (CGM). CGM is a byproduct of corn milling that naturally inhibits root formation in germinating seeds. It does not harm established plants or transplants.
- Timing: Apply in early spring when soil temperatures reach 55°F, which typically coincides with the blooming of forsythia bushes.
- Application Rate: Broadcast evenly at a rate of 20 pounds per 1,000 square feet of garden bed.
- Activation: Water the area lightly immediately after application to dissolve the inhibiting proteins, then allow the top layer of soil to dry out for the next few days.
- Limitation: CGM only prevents seed germination. It will not kill existing weeds. You must hand-pull any established perennial weeds before applying.
Pest Management Through Biodiversity
In a chemical-free landscape, pests are managed by their natural predators. By planting a diverse array of native flowering plants, you attract beneficial insects like ladybugs, lacewings, and parasitic wasps that naturally keep aphid and mite populations in check. If an outbreak occurs, use targeted organic treatments like insecticidal soap or neem oil, applying only in the late evening to avoid harming foraging pollinators.
Step 5: Long-Term Chemical-Free Maintenance
A well-designed rain garden requires surprisingly little maintenance once the native plants have established their deep root systems, usually by the end of the second growing season.
- Watering: Provide 1 inch of water per week during the first two summers. Afterward, the deep roots will tap into the groundwater, and supplemental watering will only be necessary during extreme droughts.
- Sediment Removal: After heavy storms, inspect the inlet and the basin floor. If silt or debris has accumulated, shovel it out to maintain the garden's water-holding capacity and prevent soil compaction.
- Organic Feeding: Never use synthetic fertilizers. Instead, top-dress the garden with a half-inch layer of organic compost every late fall. The winter freeze-thaw cycles will work the compost into the soil, providing a gentle, slow-release nutrient boost for the spring.
- Spring Cleanup: Leave plant stalks standing through the winter to provide overwintering habitat for native bees and birds. Cut them back to about 12 inches in early spring, leaving the cut stems on the ground to continue providing habitat.
Expert Tip: A rain garden is not a pond; it is a temporary holding basin. If water stands for more than 48 hours after a storm, you have a drainage issue that could lead to mosquito breeding. If this happens, aerate the soil with a broadfork and incorporate more coarse sand and compost to improve percolation.
Conclusion
Building a chemical-free rain garden is one of the most impactful landscaping projects a homeowner can undertake. It transforms a problematic, waterlogged area of your yard into a vibrant, ecological asset that solves drainage issues, reduces landscape maintenance, and protects local waterways from toxic runoff. By relying on deep-rooted native plants, organic soil amendments, and natural weed suppression techniques like corn gluten meal and hardwood mulch, you create a resilient outdoor space that thrives in harmony with nature. Embrace the organic approach, and watch as your landscape becomes a beautiful, self-sustaining sanctuary for both your family and local wildlife.

