
Landscaping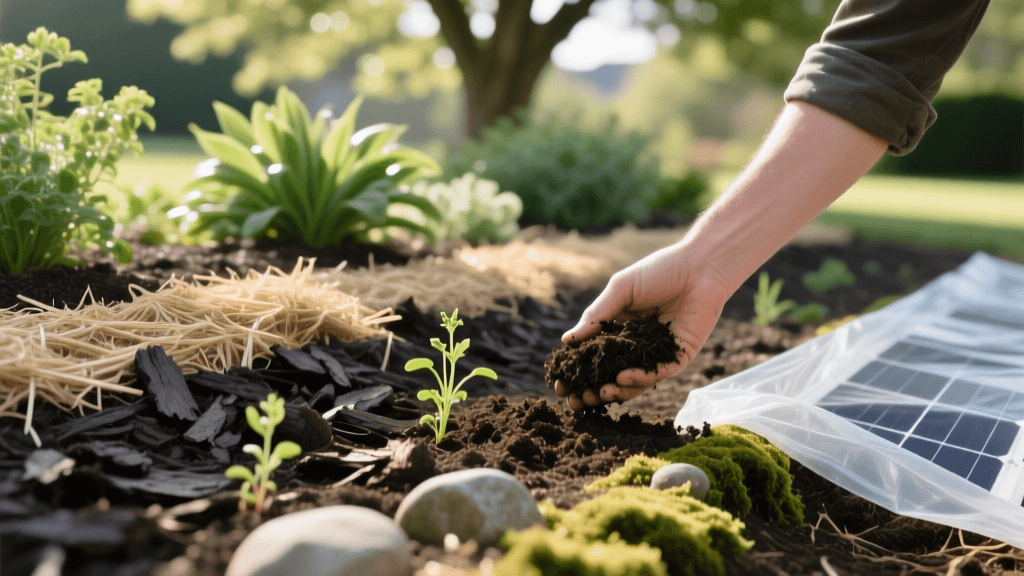
Chemical-Free Weed Control for Landscape Garden Beds
Embracing Organic Landscaping: Beyond Synthetic Herbicides
Maintaining pristine landscape garden beds without relying on synthetic chemicals is a cornerstone of modern, sustainable landscaping. For decades, homeowners and commercial groundskeepers leaned heavily on broad-spectrum synthetic herbicides like glyphosate to keep landscape beds weed-free. However, a growing body of research highlights the detrimental effects these chemicals can have on soil microbiomes, beneficial insect populations, and local watersheds. Transitioning to a chemical-free weed management strategy does not mean surrendering your garden to a jungle of invasive species. Instead, it requires a proactive, multi-layered approach that focuses on prevention, ecological competition, and targeted organic interventions.
When you eliminate synthetic chemicals from your landscaping toolkit, you shift the paradigm from 'eradication' to 'management and balance.' By building healthy soil, blocking weed germination, and utilizing natural post-emergent treatments, you can maintain stunning, low-maintenance landscape beds that support local ecosystems rather than harming them. According to the University of California Agriculture and Natural Resources, an integrated approach combining physical barriers, cultural practices, and least-toxic chemical alternatives is the most effective long-term strategy for landscape weed management.
Pre-Planting Preparation: Solarization and Stale Seedbeds
The most effective weed control happens before a single plant is installed. If you are establishing a new landscape bed or renovating an overgrown one, soil solarization and the stale seedbed technique are powerful, chemical-free methods to clear the area.
Soil Solarization
Soil solarization utilizes the sun's thermal energy to heat the soil to temperatures that kill weed seeds, soil-borne pathogens, and nematodes. This is best performed during the hottest months of summer (typically June through August). First, clear the area of existing vegetation and till the soil to a depth of six inches. Water the soil deeply, as moisture conducts heat more effectively than dry soil. Next, cover the bed with a 2-to-4-mil sheet of clear plastic, burying the edges in a shallow trench to trap the heat. Leave the plastic in place for four to six weeks. The trapped heat will effectively pasteurize the top layer of soil, giving your new landscape bed a clean, weed-free slate.
The Stale Seedbed Technique
If solarization is not an option, the stale seedbed technique is an excellent alternative. Prepare your soil for planting and water it as if you are ready to sow seeds or install transplants. Wait one to two weeks for the first flush of weed seeds to germinate. Once the weed seedlings are small and vulnerable, lightly hoe the top inch of soil or apply a natural, non-residual organic herbicide to kill them. Because you are not deeply tilling the soil, you avoid bringing a new batch of dormant weed seeds to the surface. You can then plant your desired landscape specimens into a bed with significantly reduced weed pressure.
The First Line of Defense: Organic Mulches
Once your plants are in the ground, organic mulch is your primary weapon against weed germination. Mulch suppresses weeds by blocking the sunlight required for weed seeds to photosynthesize and sprout. Furthermore, as organic mulches decompose, they feed the soil food web, improving soil structure, moisture retention, and nutrient availability.
For optimal weed suppression, apply a uniform layer of organic mulch 3 to 4 inches thick across the entire landscape bed. Be careful to practice 'ring mulching' around trees and shrubs—keep the mulch at least 2 to 3 inches away from the base of plant stems and trunks to prevent rot and rodent damage. Never practice 'volcano mulching,' where mulch is piled high against the trunk, as this invites disease and provides a bridge for weeds to bypass the mulch layer.
Comparing Organic Mulch Materials
Not all mulches are created equal. The table below compares common organic mulches based on their weed suppression capabilities and best use cases in landscape design.
| Mulch Type | Weed Suppression | Decomposition Rate | Best Landscape Application |
|---|---|---|---|
| Arborist Wood Chips | Excellent | Slow (2-3 years) | Large shrub beds, tree rings, pathways |
| Pine Needles (Straw) | Very Good | Medium (1-2 years) | Acid-loving plants (azaleas, rhododendrons), slopes |
| Shredded Hardwood Bark | Good | Medium (1 year) | Formal garden beds, perennial borders |
| Cocoa Bean Hulls | Good | Fast (6-12 months) | Small ornamental beds (Note: Toxic to dogs) |
| Leaf Mold | Moderate | Fast (6 months) | Woodland gardens, soil amendment |
Living Mulches: Groundcovers that Outcompete Weeds
In nature, bare soil is rare. Ecological landscaping embraces this principle by using 'living mulches' or groundcovers to carpet the soil surface. By planting aggressive, low-growing perennials, you occupy the physical space and consume the resources that weeds would otherwise exploit.
When selecting a groundcover, match the plant to the site's light and moisture conditions. For sunny, dry landscape beds, Thymus serpyllum (Creeping Thyme) or Sedum spurium (Stonecrop) provide dense, drought-tolerant mats that choke out weeds while attracting pollinators. For shaded areas beneath trees where turfgrass and traditional mulches struggle, Galium odoratum (Sweet Woodruff) or Vinca minor (Periwinkle) offer lush, weed-suppressing foliage.
To establish a living mulch effectively, plant your groundcover plugs closely together—typically 8 to 12 inches apart, depending on the species. During the first growing season, you will still need to hand-pull weeds that emerge between the plugs. However, once the groundcover knits together and forms a continuous canopy in the second year, weed maintenance drops to near zero.
Natural Post-Emergent Weed Control
Despite your best preventative efforts, some weeds will inevitably breach your defenses. When hand-pulling is impractical, organic post-emergent herbicides offer a chemical-free solution. It is crucial to understand that organic herbicides are primarily 'contact' herbicides, meaning they burn the foliage they touch but do not translocate to the roots like systemic synthetic chemicals. They are most effective on young, annual weeds before they establish deep taproots.
Horticultural Vinegar (Acetic Acid)
Standard household vinegar (5% acetic acid) is generally too weak to kill anything but the most delicate weed seedlings. For effective landscaping weed control, professionals use horticultural vinegar, which contains 20% to 30% acetic acid. According to the National Pesticide Information Center (NPIC), acetic acid acts as a rapid desiccant, breaking down cell membranes and causing plant tissue to dry out and die within hours of application.
Because 20% acetic acid is highly corrosive, it requires careful handling. Always wear safety goggles, chemical-resistant gloves, and long sleeves when mixing and spraying. Apply horticultural vinegar on a hot, sunny, windless day to maximize the burn effect and prevent drift onto your desirable landscape plants. To improve the adhesion of the vinegar to waxy weed leaves, add a few drops of organic liquid castile soap or a commercial organic surfactant to your sprayer.
Fatty Acid Soaps and Essential Oils
For gardeners who prefer not to handle high-concentration acids, herbicidal soaps (fatty acids) and essential oil blends (such as clove, peppermint, or citrus oils) are excellent alternatives. These organic compounds disrupt the cellular integrity of broadleaf weeds and are completely biodegradable, leaving no toxic residue in the soil. They are ideal for spot-treating weeds in tight spaces, such as cracks in hardscaping or at the base of delicate perennials.
Proper Tools and Timing for Mechanical Control
For perennial weeds with deep taproots (like dandelions, dock, or bindweed), organic sprays will only kill the top growth, allowing the weed to resprout from the root. In these cases, mechanical removal is required. The key to organic mechanical weeding is to remove the entire root system without disturbing the surrounding soil, which could awaken dormant weed seeds.
Invest in high-quality, specialized weeding tools. A traditional Japanese Hori Hori knife features a sharp, serrated edge and a pointed tip, making it perfect for slicing through taproots deep in the soil. A stirrup hoe (or scuffle hoe) is invaluable for large landscape beds; it glides just beneath the soil surface, severing weed crowns from their roots with minimal soil disruption. For tight spaces, a Cape Cod weeder allows for precise surgical strikes against individual weeds.
Timing is just as critical as the tool. Always schedule your hand-pulling sessions immediately after a heavy rain or a deep irrigation cycle. Moist soil releases roots easily, ensuring you extract the entire weed. Pulling weeds in dry, compacted soil often results in the foliage snapping off at the crown, guaranteeing the weed will return within weeks.
Conclusion: Cultivating a Resilient Landscape
Chemical-free weed control in landscape beds is not a single action, but a holistic system of soil management, physical barriers, and ecological competition. By utilizing soil solarization, applying the correct depth of organic mulch, establishing living groundcovers, and deploying targeted natural herbicides when necessary, you can maintain immaculate landscape beds without compromising the health of your soil or the surrounding environment. Over time, as your soil biology thrives and your desired plants establish dominance, the weed pressure will naturally decline, rewarding your organic efforts with a vibrant, sustainable, and truly resilient landscape.

