
Landscaping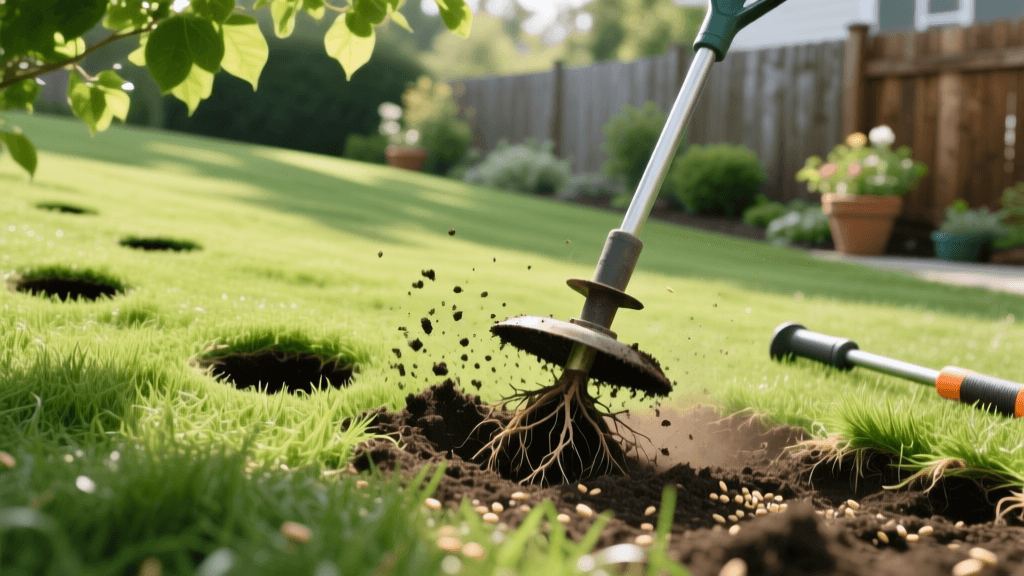
How to Renovate a Compacted Lawn: Aeration and Overseeding Guide
Reviving Your Turf: The Ultimate Lawn Renovation Guide
A lush, vibrant lawn is the cornerstone of exceptional landscape design, but over time, even the most meticulously maintained turf can fall victim to environmental stressors. Foot traffic, heavy mowing equipment, playful pets, and extreme weather events all contribute to a silent lawn killer: soil compaction. When soil becomes compacted, the essential pore spaces that hold oxygen, water, and nutrients are crushed, effectively suffocating the root system. If your grass is thinning, pooling water after rainstorms, or turning brown despite regular watering, it is time for a comprehensive lawn renovation.
Lawn renovation and recovery is not just about throwing down a few handfuls of seed and hoping for the best. It requires a strategic, multi-step approach to reverse soil degradation and reintroduce vigorous turfgrass varieties. According to the Penn State Center for Turfgrass Science, combining core aeration with strategic overseeding is the most effective method for relieving compaction and re-establishing a dense, resilient turf canopy. This guide will walk you through the exact measurements, product recommendations, and timelines needed to transform a struggling, compacted lawn into a thriving landscape feature.
Understanding Soil Compaction and Thatch Buildup
Before picking up a shovel or renting an aerator, it is crucial to understand the mechanics of a failing lawn. Healthy soil should consist of roughly 50% solid material (minerals and organic matter) and 50% pore space. These pores are vital for gas exchange and water infiltration. When heavy loads compress the soil, particularly in clay-heavy landscapes, the pore space drops dramatically. Roots cannot penetrate the hardpan layer, leading to shallow root systems that are highly susceptible to drought and heat stress.
Compaction is often exacerbated by a thick layer of thatch—the interwoven layer of living and dead stems and roots that accumulates between the soil surface and the green grass blades. While a thin layer of thatch (under half an inch) provides insulation and moisture retention, a layer exceeding 0.75 inches acts like a sponge, preventing water and fertilizer from reaching the soil. Core aeration physically breaks through both the thatch layer and the compacted soil, pulling out cylindrical plugs and creating micro-environments where new seeds can germinate with direct soil contact.
When to Renovate: Timing is Everything
Timing your lawn renovation correctly is arguably the most critical factor in your recovery success rate. Grass seeds require specific soil temperatures and moisture levels to germinate and establish before extreme weather sets in. Cool-season grasses thrive when air temperatures are between 60°F and 75°F, while warm-season grasses prefer the heat of late spring and early summer.
| Grass Type Category | Common Varieties | Ideal Renovation Window | Secondary Window |
|---|---|---|---|
| Cool-Season Grasses | Tall Fescue, Kentucky Bluegrass, Perennial Ryegrass | Early Fall (Late Aug - Mid Oct) | Early Spring (Mid Mar - Mid Apr) |
| Warm-Season Grasses | Bermudagrass, Zoysia, Centipedegrass, St. Augustine | Late Spring to Early Summer (May - June) | Not Recommended (Dormancy risks) |
As noted by the University of Minnesota Extension, fall is universally the superior time for cool-season lawn renovation. The soil is still warm from the summer, which promotes rapid seed germination, while the cooler air temperatures reduce heat stress on tender seedlings. Furthermore, fall weed competition is significantly lower than in the spring, giving your new grass a distinct competitive advantage.
Step-by-Step Lawn Renovation Process
Step 1: Mow Low and Clear the Canvas
Begin your renovation by lowering your mower deck to a height of 1.5 to 2 inches. Scalping the lawn slightly allows the aerator tines to penetrate deeper into the soil and ensures that overseeded grass is not shaded out by existing, overgrown blades. After mowing, use a heavy-duty leaf rake or a mechanical dethatcher to vigorously remove dead grass, leaves, and debris. This exposes the soil surface and prepares it for mechanical aeration.
Step 2: Core Aeration Execution
Rent a walk-behind core aerator from a local hardware store. Avoid spike aerators or aerator shoes; these simply punch holes into the ground, which can actually increase compaction along the sides of the holes. A true core aerator uses hollow tines to extract soil plugs measuring 2 to 3 inches in length.
- Preparation: Water your lawn deeply 24 hours before aerating. The soil should be moist but not muddy. If the ground is too dry, the tines will not penetrate; if it is too wet, the machine will tear up the turf.
- Execution: Make at least two passes over your lawn. The first pass should follow your standard mowing pattern, and the second pass should be perpendicular (at a 90-degree angle) to the first. Aim for 15 to 20 aeration holes per square foot.
- Post-Aeration: Leave the extracted soil cores on the lawn. They will break down naturally over the next two to three weeks, depositing beneficial soil microorganisms back into the thatch layer to aid in decomposition.
Step 3: Soil Testing and Amendment
Before applying seed, it is highly recommended to conduct a soil test to determine your pH and nutrient deficiencies. Most turfgrasses prefer a pH between 6.0 and 7.0. If your soil is highly acidic (below 6.0), apply pelletized lime at a rate of 50 lbs per 1,000 square feet. If your soil is compacted clay, this is the ideal time to apply a thin layer of organic compost topdressing to improve soil structure and water retention.
Step 4: Overseeding with Precision
Select a high-quality, weed-free seed blend suited to your region and sunlight conditions. For high-traffic areas, a mix of 80% Tall Fescue and 20% Kentucky Bluegrass offers an excellent balance of deep-rooted drought tolerance and rhizomatous spreading.
- Tall Fescue Application Rate: 6 to 8 lbs per 1,000 square feet.
- Kentucky Bluegrass Application Rate: 2 to 3 lbs per 1,000 square feet.
- Perennial Ryegrass (Nurse Crop): 4 to 5 lbs per 1,000 square feet (germinates in 5-7 days to hold soil while slower seeds establish).
Step 5: Starter Fertilizer Application
Newly germinated seeds require immediate access to phosphorus to develop strong root systems. Apply a high-quality starter fertilizer with an N-P-K ratio similar to 18-24-12 or 10-18-10. Do not use standard lawn fertilizers, as they are typically high in nitrogen and may burn tender seedlings or promote weed growth. Apply the starter fertilizer immediately after seeding, following the manufacturer's coverage instructions precisely.
Watering for Recovery: The Smart Approach
Watering is the make-or-break phase of lawn renovation. Grass seed must remain consistently moist until germination occurs. This typically requires light, frequent watering—often two to three times a day for 10 to 15 minutes per zone—depending on your local climate and wind conditions. Once the seedlings reach a height of 1 inch, gradually reduce the frequency of watering while increasing the duration to encourage deeper root growth. To ensure you are not wasting water during this intensive recovery period, consult the guidelines provided by the EPA WaterSense program. Utilizing smart irrigation controllers or soil moisture sensors can help you maintain the delicate moisture balance required for seed germination without causing runoff or fungal diseases associated with overwatering.
Cost Breakdown: DIY vs. Professional Renovation
Lawn renovation is an investment in your property's curb appeal and ecological health. Below is a cost comparison for renovating a standard 5,000 square foot lawn. Prices vary by region, equipment availability, and material quality.
| Renovation Component | DIY Estimated Cost (5,000 sq ft) | Professional Service Estimated Cost |
|---|---|---|
| Core Aeration (Rental vs. Labor) | $85 - $110 (Daily Rental) | $150 - $225 |
| Premium Turfgrass Seed (25-40 lbs) | $120 - $180 | $150 - $250 |
| Starter Fertilizer & Soil Amendments | $40 - $75 | $60 - $100 |
| Compost Topdressing (Optional) | $100 - $150 (Bulk Delivery) | $300 - $500 |
| Total Estimated Project Cost | $345 - $515 | $660 - $1,075 |
While the DIY route offers significant financial savings, it requires substantial physical labor, particularly when maneuvering a 250-pound core aerator across your landscape. Professional landscaping services bring commercial-grade equipment and agronomic expertise, ensuring optimal seed-to-soil contact and precise fertilizer calibration.
Post-Renovation Care and Recovery Timeline
Patience is vital during the lawn recovery process. Here is what you can expect in the weeks following your renovation:
- Days 5-10: Fast-germinating varieties like Perennial Ryegrass will begin to sprout. The lawn will take on a faint green haze. Continue daily light watering.
- Days 14-21: Tall Fescue and Kentucky Bluegrass will emerge. You can begin to taper off watering to every other day, applying roughly 0.5 inches of water per session.
- Weeks 4-5: The new grass will reach roughly 3 inches in height. It is now safe to perform the first mowing. Ensure your mower blades are razor-sharp to prevent tearing the young, tender grass blades. Never remove more than the top third of the grass blade.
- Weeks 6-8: The aeration cores will have fully dissolved into the canopy. The lawn will appear significantly denser. You can now transition to a standard, deep-and-infrequent watering schedule of 1 to 1.5 inches per week.
Conclusion
Renovating a compacted, worn-out lawn is one of the most rewarding landscaping projects a homeowner can undertake. By systematically relieving soil compaction through core aeration, introducing resilient modern turfgrass cultivars via overseeding, and maintaining a strict watering and fertilization regimen, you can completely reverse years of environmental damage. A properly renovated lawn not only elevates the aesthetic appeal of your outdoor living space but also serves as a natural bio-filter, reducing runoff and cooling the surrounding microclimate. Commit to the process, respect the biological timelines of your turf, and enjoy the results of a deeply rooted, vibrant landscape for years to come.

