
Lawn Care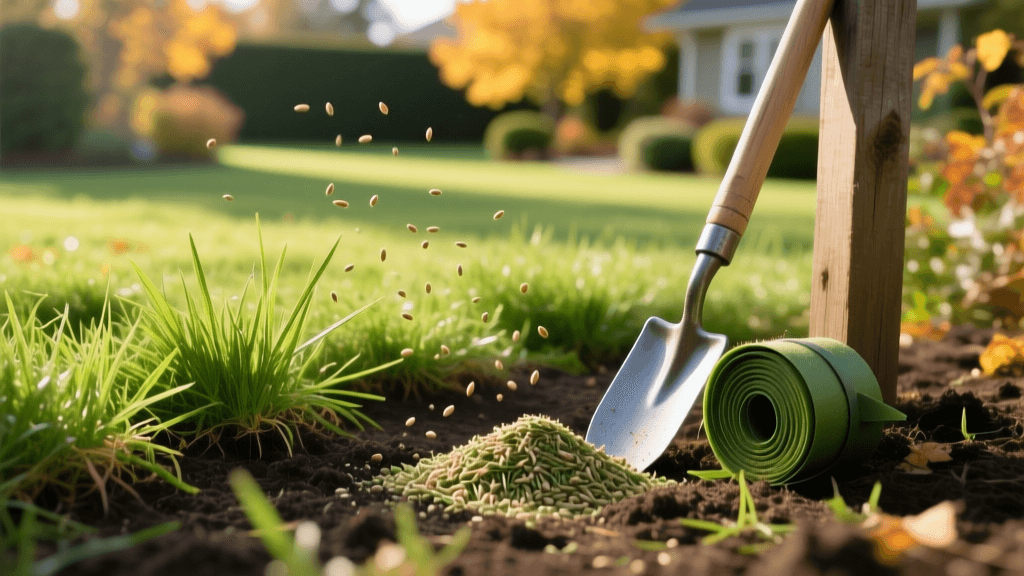
Step-by-Step Guide to Renovating a Thin, Weedy Lawn
Assessing Your Lawn: Renovation vs. Replacement
A thin, patchy, and weed-infested lawn is one of the most common frustrations for homeowners. Before you spend thousands of dollars on complete sod replacement, it is crucial to assess whether your lawn can be saved through renovation and overseeding. The general rule of thumb among turfgrass professionals is the 50% rule. If your lawn consists of more than 50% healthy, desirable grass, a targeted renovation involving core aeration, weed control, and overseeding is the most cost-effective route. If the lawn is less than 50% desirable grass and heavily dominated by creeping charlie, crabgrass, or bare soil, a full kill-and-reseed renovation is required.
According to turfgrass experts at University of Minnesota Extension, late summer to early fall (mid-August through mid-September) is the absolute best time to undertake cool-season lawn renovation. The warm soil promotes rapid seed germination, while the cooling air temperatures reduce heat stress on young seedlings and naturally suppress annual summer weeds.
The Fall Lawn Renovation Timeline
Successful lawn recovery requires strict adherence to a timeline. Below is a structured 8-week schedule for a complete cool-season lawn renovation.
| Week | Action Item | Product/Tool Needed |
|---|---|---|
| Week 1 | Soil Testing & Initial Weed Control | Mail-in soil test kit, Glyphosate or Mesotrione |
| Week 2 | Scalping & Dethatching | Mower set to 1.5 inches, Power rake or dethatcher |
| Week 3 | Core Aeration & Soil Amendment | Core aerator rental, Lime or sulfur (based on soil test) |
| Week 4 | Overseeding & Starter Fertilizer | High-quality seed blend, Starter fertilizer (e.g., 18-24-12) |
| Week 5-6 | Intensive Watering & Germination | Programmable sprinkler timer |
| Week 7 | First Mow & Weed Monitoring | Sharp mower blades, selective herbicide (if needed) |
| Week 8 | Winterizer Fertilizer Application | High-potassium winterizer fertilizer |
Step 1: Weed Eradication and Soil Preparation
You cannot successfully plant new grass in a bed of aggressive weeds. If you are doing a full renovation, apply a non-selective herbicide like glyphosate to kill all existing vegetation. Wait 7 to 14 days for the existing grass and weeds to completely brown out. If you are only overseeding a thin lawn and want to preserve the existing good grass, avoid glyphosate. Instead, manually pull broadleaf weeds or use a selective herbicide well in advance of seeding.
One of the greatest breakthroughs in lawn renovation is the use of Mesotrione (commonly sold under the brand name Tenacity). Mesotrione is a unique pre-emergent and post-emergent herbicide that can be applied at the exact time of seeding. It prevents weed seeds like crabgrass and dandelions from germinating without harming your new Kentucky Bluegrass or Tall Fescue seedlings. Always read the label carefully, as it can temporarily bleach existing desirable grass.
Before any seed touches the dirt, you must address soil chemistry. A Rutgers Extension fact sheet on lawn renovation emphasizes that a soil test is non-negotiable. Cool-season grasses thrive in a pH range of 6.0 to 7.0. If your soil is too acidic (below 6.0), apply pelletized lime at the rate recommended by your test results. If it is too alkaline, apply elemental sulfur. Broadcasting these amendments during the aeration process allows them to penetrate deeper into the soil profile.
Step 2: Core Aeration and Dethatching
Soil compaction is the silent killer of lawns. It restricts oxygen, water, and nutrient flow to the root zone. Core aeration involves pulling 2-to-3-inch plugs of soil out of the ground, which alleviates compaction and creates perfect micro-environments for grass seed to fall into and germinate.
Rent a walk-behind core aerator from a local hardware store. To get the best results, water your lawn deeply the day before aerating to soften the soil. Run the aerator over the lawn in two perpendicular directions (a crisscross pattern) to ensure maximum plug extraction. According to Penn State Extension, leaving the extracted soil cores on the lawn is highly beneficial; they will break down over the next few weeks with rain and mowing, returning valuable microbes and topsoil to the thatch layer, aiding in natural decomposition.
Step 3: Selecting the Right Seed and Starter Fertilizer
Do not buy cheap, generic seed from a big-box store. Cheap seed is often loaded with annual ryegrass fillers and weed seeds. Invest in premium, certified seed blends. For high-traffic areas and drought resistance, choose a Turf-Type Tall Fescue blend (such as Jonathan Green Black Beauty or Pennington Smart Seed). For a lush, dark-green, self-repairing lawn, opt for a 100% Kentucky Bluegrass mix or an 80/20 KBG and Perennial Ryegrass mix.
When applying seed, use a broadcast spreader calibrated to the specific rate on the bag. For overseeding, apply at a rate of 3 to 5 pounds per 1,000 square feet. For a full renovation on bare dirt, increase the rate to 6 to 8 pounds per 1,000 square feet. Immediately follow seeding with a high-quality starter fertilizer. Starter fertilizers are rich in phosphorus (the middle number on the bag, such as 18-24-12), which is critical for rapid root development in young seedlings. Standard lawn fertilizers lack the phosphorus needed for new grass establishment.
Step 4: Overseeding and Watering Protocols
Watering is the single most critical factor in lawn renovation. Grass seed must remain consistently moist until it germinates and establishes a root system. If the seed dries out even once during the germination phase, the embryo will die, and you will be left with bare patches.
Set your sprinkler system or oscillating sprinklers to water the lawn lightly 2 to 3 times a day. The goal is not to flood the lawn, but to keep the top half-inch of soil moist. Water for 5 to 10 minutes in the early morning, again around noon, and a final light watering in the mid-afternoon. Avoid watering in the late evening, as prolonged overnight moisture on seedlings can invite damping-off disease and fungal pathogens. Once the new grass reaches about 1.5 inches in height, gradually reduce the frequency of watering while increasing the duration, encouraging the roots to grow deep into the soil.
Step 5: Post-Germination Care and Weed Prevention
Once the new grass reaches roughly 3 to 3.5 inches tall, it is time for the first mow. Ensure your mower blade is freshly sharpened; a dull blade will tear tender young grass out by the roots. Mow the lawn down to 2.5 inches, and never remove more than one-third of the grass blade in a single mowing. Leave the clippings on the lawn to act as a natural mulch and return nitrogen to the soil.
About 6 to 8 weeks after germination, transition from a starter fertilizer to a high-quality winterizer fertilizer. Winterizer formulas are typically high in potassium (e.g., 32-0-10), which acts as an antifreeze for the grass plant, strengthening cell walls and promoting deep root energy storage to survive the harsh winter months and explode with growth the following spring.
Estimated DIY Renovation Costs
Renovating your own lawn requires an investment of time and money, but it is significantly cheaper than hiring a professional landscaping crew or laying sod. Below is a structured cost breakdown for a DIY renovation per 1,000 square feet:
- Soil Testing: $15 - $30 (One-time fee for the entire lawn)
- Core Aerator Rental: $50 - $90 per day (Covers up to 5,000 sq ft easily)
- Premium Grass Seed: $35 - $60 per 1,000 sq ft (Depending on KBG vs. Tall Fescue)
- Starter Fertilizer: $10 - $15 per 1,000 sq ft
- Mesotrione (Tenacity): $60 for a small bottle (Covers up to 5,000 sq ft)
By following this meticulous, science-backed renovation protocol, you can transform a tired, weed-choked yard into a thick, vibrant, and resilient lawn that will be the envy of the neighborhood for years to come.

