Tree Care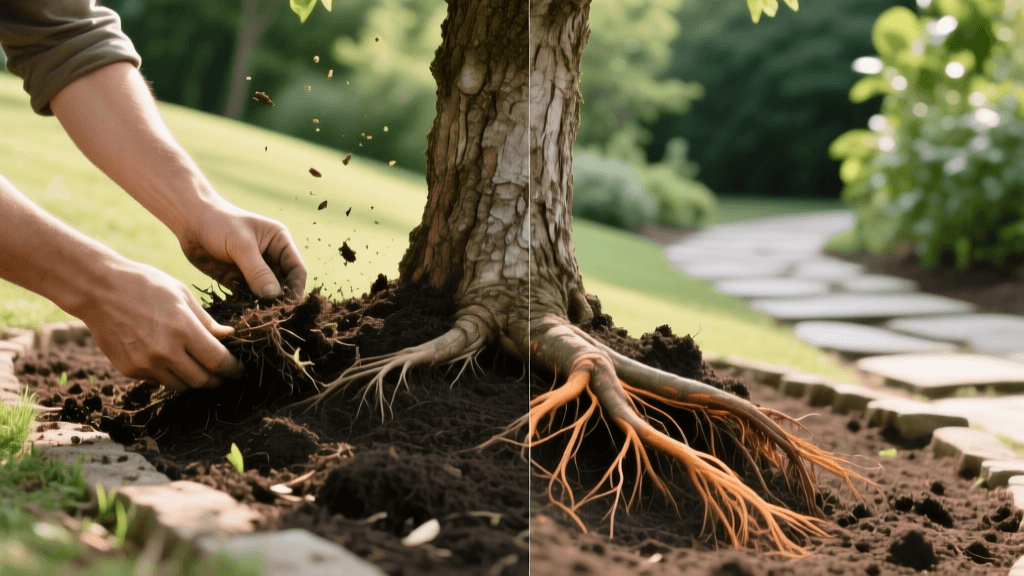
Before & After: Rescuing Trees From Volcano Mulch and Girdling Roots
The Silent Epidemic in Our Landscapes
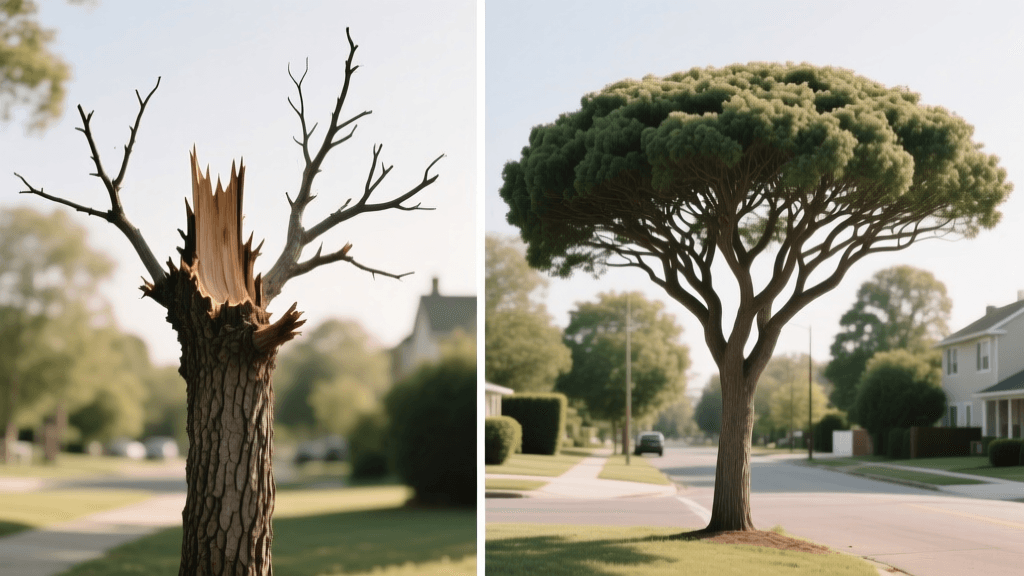
Picture a newly planted maple or oak in a suburban front yard. The homeowner wants to protect it, so they pile mulch high against the trunk in a neat, volcano-like cone. Fast forward ten years. The "Before" state of this tree is often grim: the canopy is thinning, leaves are turning yellow prematurely, and the trunk plunges straight into the ground like a telephone pole. This is a tree in slow decline, suffocating from improper mulching and strangling itself with girdling roots.
But there is hope. Through targeted root collar excavation, strategic pruning, and proper mulching techniques, we can achieve a stunning "After" transformation. This guide walks you through the exact process of rescuing a neglected landscape tree, complete with actionable steps, tool recommendations, cost estimates, and a timeline for recovery. Whether you are a homeowner looking to save a beloved shade tree or a landscaping professional, understanding this before-and-after transformation is critical for long-term tree health.
Understanding the "Before" State: Why Trees Decline
Before we can transform a tree, we must understand the physiological damage caused by common landscaping mistakes. The two primary culprits in premature tree decline are volcano mulching and girdling roots.
The Suffocation of Volcano Mulch
Tree roots require oxygen to survive and function. When mulch is piled against the trunk—often 12 to 24 inches deep—it creates an anaerobic environment. According to the University of Maryland Extension, excessive mulch depth prevents gas exchange, leading to the death of fine feeder roots. Furthermore, the constant moisture trapped against the bark causes secondary phloem rot, inviting fungal pathogens and wood-boring insects that accelerate the tree's decline.
The Stranglehold of Girdling Roots
When a tree is planted too deeply or buried under mulch volcanoes, it attempts to survive by pushing out adventitious roots from the trunk. These roots often wrap around the main structural roots or the trunk itself. As the tree grows in diameter, these girdling roots act like a tourniquet, cutting off the flow of water and nutrients between the canopy and the root system. The Morton Arboretum notes that girdling roots are a leading cause of sudden canopy dieback and structural failure in mature urban trees.
"A tree's root flare should always be visible. If your tree looks like a telephone pole stuck in the ground, it is slowly suffocating." — Certified Arborist Adage
The Transformation Process: Step-by-Step Rescue
Transforming a suffocating tree into a thriving specimen requires careful excavation and precise pruning. Here is the exact protocol for achieving a successful "After" state.
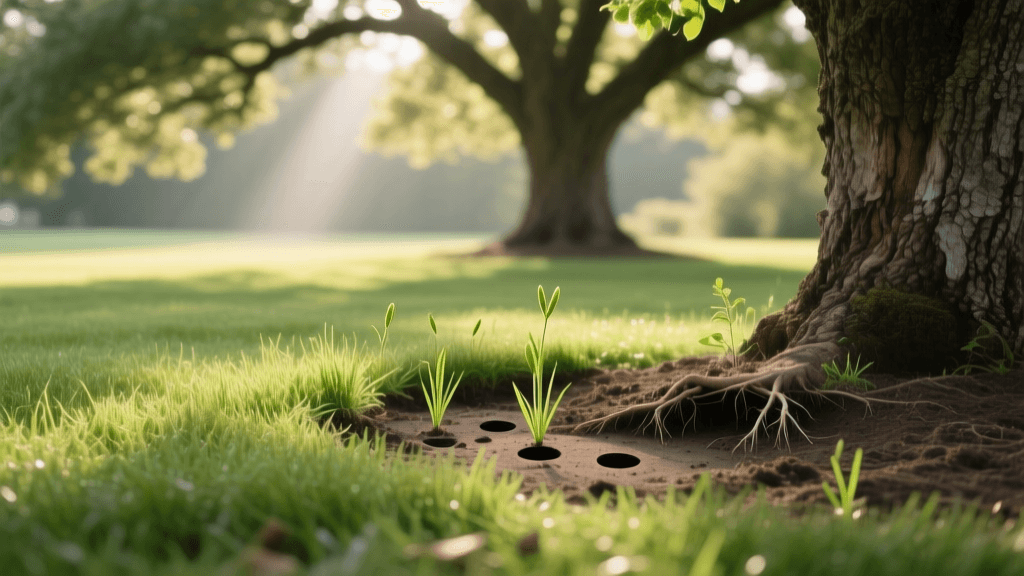
Step 1: Root Collar Excavation (Unearthing the Flare)
The goal is to expose the root flare—the area where the trunk transitions into the structural roots.
- Timing: Early spring before bud break, or late fall after leaf drop, to minimize stress.
- Method: Use a hand trowel, a hori-hori knife, or a specialized AirSpade (if hiring a professional). Carefully remove the soil and mulch within a 3 to 5-foot radius of the trunk.
- Measurements: Excavate until you see the structural roots flaring outward. This may require removing 6 to 18 inches of buried soil and compacted mulch.
- Cost: DIY costs are minimal (under $30 for basic hand tools). Hiring an arborist with an AirSpade typically costs between $300 and $600, depending on the tree's size and soil compaction.
Step 2: Strategic Root Pruning
Once the root flare is exposed, you will likely find girdling roots. Not all encircling roots can be safely removed; if a root is larger than one-third the diameter of the trunk, removing it could destabilize the tree.
For smaller, strangling roots, use a sterilized pruning saw or chisel to make clean cuts. Sever the root completely so it cannot heal and re-graft. The University of Minnesota Extension recommends cutting the root back to a point where it is growing away from the trunk to encourage proper outward growth.
Step 3: Applying the 3-3-3 Mulch Rule
The "After" state relies on maintaining the newly exposed root flare. We replace the volcano mulch with a properly applied mulch ring using the 3-3-3 rule:
- 3 Inches Deep: No more than 3 inches of mulch to allow oxygen penetration.
- 3 Feet Wide: A minimum 3-foot radius (preferably out to the drip line) to protect the trunk from mower damage and retain soil moisture.
- 3 Inches Away: Keep the mulch at least 3 inches away from the actual trunk bark to prevent rot.
Product Recommendation: Use natural, aged shredded hardwood bark or pine bark nuggets. Avoid dyed mulches, which can contain harmful chemical residues, and avoid rubber mulch, which offers no biological benefit and traps heat.
Essential Tree Rescue Toolkit
To execute this transformation, you need the right tools. Here is a structured list of what you will need for a DIY root collar excavation:
- Hori-Hori Knife: ($25) Ideal for slicing through compacted mulch and severing small fibrous roots.
- Silky Gomtaro Pruning Saw: ($60) A razor-sharp Japanese pull saw for making clean, flush cuts on girdling roots up to 2 inches thick.
- Bypass Loppers: ($40) For clearing away adventitious roots sprouting from the lower trunk.
- Isopropyl Alcohol (70%): ($5) Crucial for sterilizing your cutting tools between every single cut to prevent the spread of soil-borne pathogens like Phytophthora.
- Wheelbarrow and Tarp: For hauling away the excavated, compacted soil and old, sour-smelling anaerobic mulch.
Before vs. After: Health Metrics and Landscape Value
The visual and physiological differences between a neglected tree and a rescued tree are profound. The following data table illustrates the transformation metrics you can expect when correcting planting and mulching errors.
| Health Metric | Before (Neglected / Volcano Mulched) | After (Excavated / Properly Mulched) |
|---|---|---|
| Root Flare Visibility | 0% (Buried 6-18 inches deep) | 100% (Fully exposed and flaring) |
| Lower Trunk Condition | Soft, spongy, decaying bark | Firm, dry, actively callusing |
| Canopy Density | Sparse, thin, early fall coloration | Dense, vibrant, full leaf-out |
| Terminal Branch Growth | Less than 2 inches per year | 12 to 18 inches per year |
| Pest Vulnerability | High (attracts borers and fungi) | Low (natural defenses restored) |
| Estimated Property Value Impact | Depreciating asset (removal liability) | Adds $1,000+ in mature tree value |
The "After" Timeline: What to Expect Post-Transformation
Tree rescue is not an overnight fix. Trees operate on a slow biological timeline, and the "After" results will unfold over several growing seasons.
Year 1: The Recovery Phase
In the first year after excavation and root pruning, the tree will focus its energy below ground. You may not see a massive explosion of canopy growth. Instead, look for improved leaf color and the absence of premature leaf drop. The tree is healing its root wounds and pushing new feeder roots into the properly mulched soil.
Year 2: The Vigor Phase
By the second growing season, the transformation becomes obvious. Terminal growth (the new growth at the tips of the branches) will increase significantly. The canopy will thicken, providing better shade and aesthetic appeal. The root flare will remain prominent, and the trunk will begin to swell naturally at the base.
Year 3 and Beyond: Long-Term Maintenance
The tree is now thriving, but it requires ongoing maintenance to stay in the "After" state. Monitor the mulch ring annually. As the hardwood mulch decomposes, it will need a light top-dressing (1 inch) every spring. Ensure that irrigation systems are not spraying directly onto the trunk, and adjust sprinkler heads as the tree's root zone expands.
Conclusion: Investing in the Future of Your Landscape
The transformation from a suffocating, girdled tree to a vibrant, structurally sound specimen is one of the most rewarding projects in landscape management. By recognizing the dangerous "Before" signs of volcano mulching and buried root flares, and by taking decisive action to excavate, prune, and properly mulch, you are literally giving the tree a second chance at life. While the upfront cost and labor of root collar excavation may seem daunting, the "After" results—a healthier, safer, and more beautiful tree that will stand for decades—make it an invaluable investment in your property's ecosystem.