Tree Care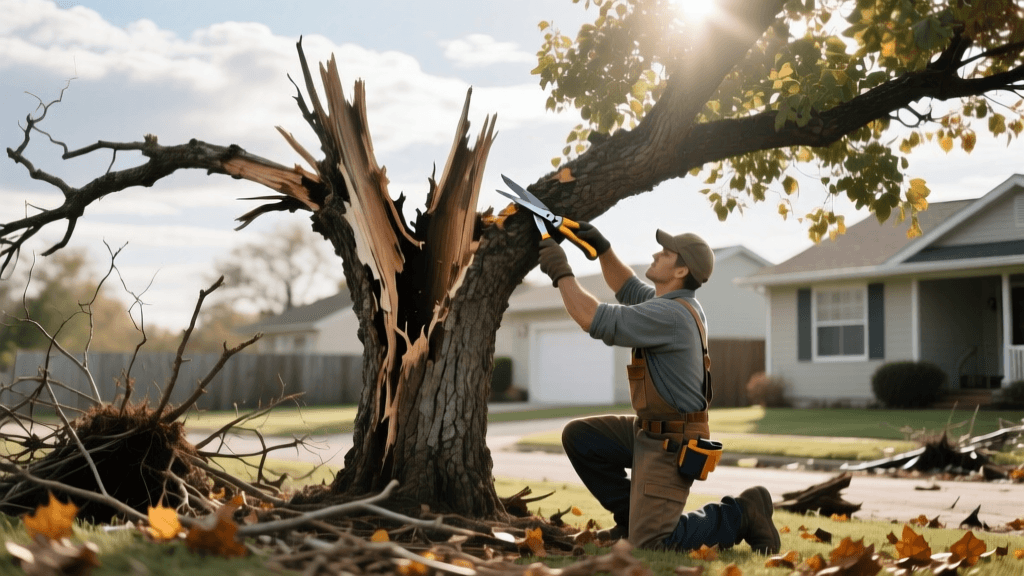
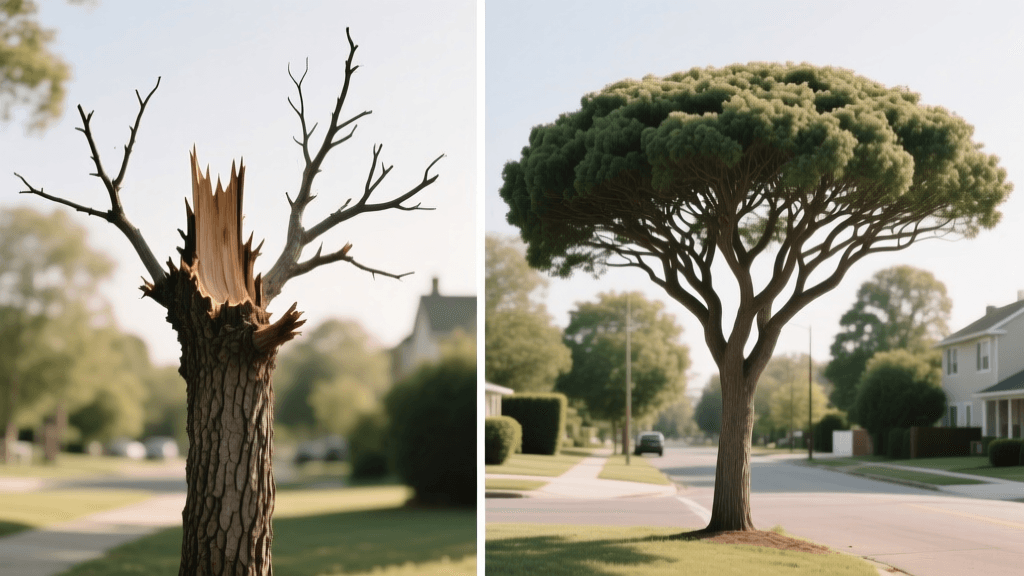
Storm-Damaged Tree Restoration: A Before and After Guide
The Devastating 'Before': Assessing Storm Damage
Severe weather events can transform a lush, vibrant landscape into a hazardous mess of splintered wood and torn canopies in a matter of minutes. When you first survey your property after a major storm, the 'before' state of your trees often looks bleak. Jagged branch stubs, stripped bark, and exposed heartwood are not just unsightly; they are open invitations for decay fungi and wood-boring insects. However, a damaged tree is not necessarily a dead tree. Through a specialized arboricultural practice known as crown restoration, many storm-damaged trees can be coaxed back to structural integrity and visual beauty.
The transformation from a hazardous, broken silhouette to a thriving, balanced canopy does not happen overnight. It requires a strategic, multi-year pruning plan, an understanding of tree biology, and a keen eye for future growth. According to the International Society of Arboriculture (ISA), proper storm damage management is critical for long-term tree survival, emphasizing that hasty, improper pruning can cause more harm than the storm itself.
The Triage Decision: Save or Remove?
Before initiating any 'before and after' transformation, you must determine if the tree is a viable candidate for restoration. Not every tree can be saved. The general rule of thumb used by certified arborists is the 50% rule: if more than 50% of the tree's crown (branches and leaves) has been destroyed, the tree may not produce enough foliage to photosynthesize and sustain itself through the recovery process.
Additionally, inspect the trunk and root plate. Deep vertical cracks in the main trunk, uprooting (heaving soil at the base), or severe damage to the primary leader of a mature tree often necessitate complete removal for safety reasons. If the damage is confined to secondary scaffold branches and the main trunk is intact, your tree is an excellent candidate for a crown restoration transformation.
The Transformation Process: Step-by-Step Crown Restoration
Crown restoration is the selective pruning of damaged branches to re-establish a strong, stable structure. This process mimics the natural shedding of branches while guiding the tree's future growth.
Step 1: Hazard Reduction and the 3-Cut Method
The immediate 'before' state often features hanging branches, known as 'widow-makers.' Your first step is safety. Remove all broken, hanging, and severely cracked limbs. For heavy limbs, always use the 3-cut method to prevent the weight of the branch from tearing the bark down the trunk as it falls:
- Cut 1 (The Undercut): Make a small notch on the underside of the branch, about 12 inches from the trunk, cutting one-third of the way through.
- Cut 2 (The Relief Cut): Cut completely through the branch from the top, a few inches further out than the undercut. The branch will snap off cleanly.
- Cut 3 (The Collar Cut): Make the final cut just outside the branch collar (the swollen area where the branch meets the trunk). Never cut flush against the trunk, as this destroys the tree's natural defense zone.
Step 2: Cleaning the Wounds and Respecting CODIT
Trees do not 'heal' in the human sense; they compartmentalize decay. This biological process is known as CODIT (Compartmentalization of Decay in Trees). When making your final pruning cuts on torn stubs, cut back to the nearest lateral branch that is at least one-third the diameter of the branch being removed. This lateral branch will help draw sap to the wound site, accelerating the formation of callus tissue. Never apply pruning paint or wound sealants; research consistently shows these products trap moisture and actually accelerate decay.
Step 3: Selecting and Training a New Leader
If the central leader (the main upward-growing trunk) was snapped, the 'after' transformation relies on selecting a new leader. Choose a strong, upward-growing lateral branch near the break. You may need to splint or tape it to a temporary stake to train it vertically. Over the next few years, subordinate competing branches by shortening them, ensuring your new leader remains the dominant vertical force.
Before and After Transformation Metrics
To truly understand the impact of crown restoration, it is helpful to look at the measurable changes that occur over time. The table below outlines the typical progression of a moderately damaged shade tree (such as a Red Maple or White Oak) undergoing professional restoration.
| Metric | Before (Immediate Storm Damage) | 1 Year Post-Restoration | 3 to 5 Years Post-Restoration |
|---|---|---|---|
| Canopy Symmetry | Severe lean, large gaps, missing primary scaffolds | Balanced scaffold selection, visible pruning structure | Full, symmetrical crown, gaps filled by new growth |
| Wound Healing | Jagged bark, exposed heartwood, active sap bleeding | Callus tissue (woundwood) forming at cut margins | Wounds 50% to 80% compartmentalized and covered |
| Risk Level | High (hazardous hanging limbs, weak unions) | Low (hazards removed, structure stabilized) | Minimal (structurally sound, wind-firm canopy) |
| Aesthetic Value | Unsightly, distressed, jagged silhouette | Neat, purposeful, but visibly pruned | Natural, healthy, and visually restored |
Essential Tools and Budgeting for the Job
Achieving a professional 'after' result requires the right equipment. Dull tools crush plant tissue, delaying compartmentalization and inviting disease. For a DIY approach on smaller, reachable branches, invest in high-quality bypass pruners like the Felco 2 (approx. $60) and a curved pruning saw like the Silky Bigboy (approx. $75). For higher limbs, a 14-foot pole pruner with a bypass blade and integrated saw is essential.
However, the 'before' state of large, mature trees often involves massive, heavy limbs high in the canopy. In these cases, hiring an ISA Certified Arborist is not just recommended; it is a critical safety measure. Professional storm damage cleanup and initial crown restoration typically cost between $500 and $1,500, depending on the tree's size, the severity of the damage, and site accessibility. This cost usually includes a follow-up visit one year later to perform subordination pruning, which is vital for the long-term 'after' transformation.
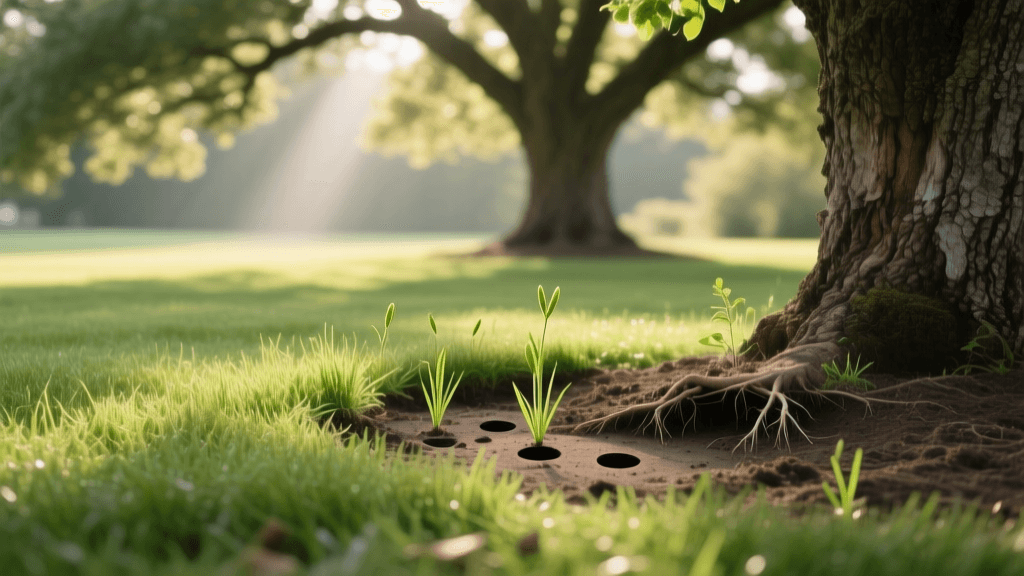
Post-Transformation Aftercare: Securing the 'After'
The pruning is only half the battle. A tree that has lost a significant portion of its canopy is under immense physiological stress. The Morton Arboretum emphasizes that post-storm aftercare is crucial for helping trees rebuild their energy reserves and defend against secondary pests.
Hydration and Mulching
Storms often bring heavy rain, but subsequent weeks may be dry. Ensure your recovering tree receives 1 to 1.5 inches of water per week during the growing season. Apply a layer of organic wood chip mulch in a wide ring around the tree to retain moisture and regulate soil temperature. Follow the '3-3-3 rule': apply a 3-inch deep layer of mulch, starting 3 inches away from the trunk, and extending out to a 3-foot radius (or further, ideally to the drip line). Never pile mulch against the trunk in a 'volcano' shape, as this causes bark rot and encourages girdling roots.
Fertilization and Monitoring
Avoid applying high-nitrogen synthetic fertilizers immediately after storm damage. Pushing rapid, weak, leafy growth can overwhelm the tree's compromised root system and create structurally weak new branches. Instead, rely on the natural nutrients released by your organic mulch. If a soil test indicates a specific deficiency, use a slow-release, organic fertilizer the following spring.
Finally, monitor the 'after' state closely. Look for signs of failure, such as the sudden appearance of fungal conks (mushrooms) on the trunk, which indicate advanced internal decay, or the presence of sawdust-like frass at the base, signaling bark beetle attacks. By combining immediate, biologically sound pruning with vigilant aftercare, you can successfully guide your storm-damaged trees through a remarkable before and after transformation, ensuring they remain safe, healthy, and beautiful for decades to come. For more foundational knowledge on making the right cuts, the Arbor Day Foundation offers excellent visual guides on proper pruning angles and branch collar identification.