Tree Care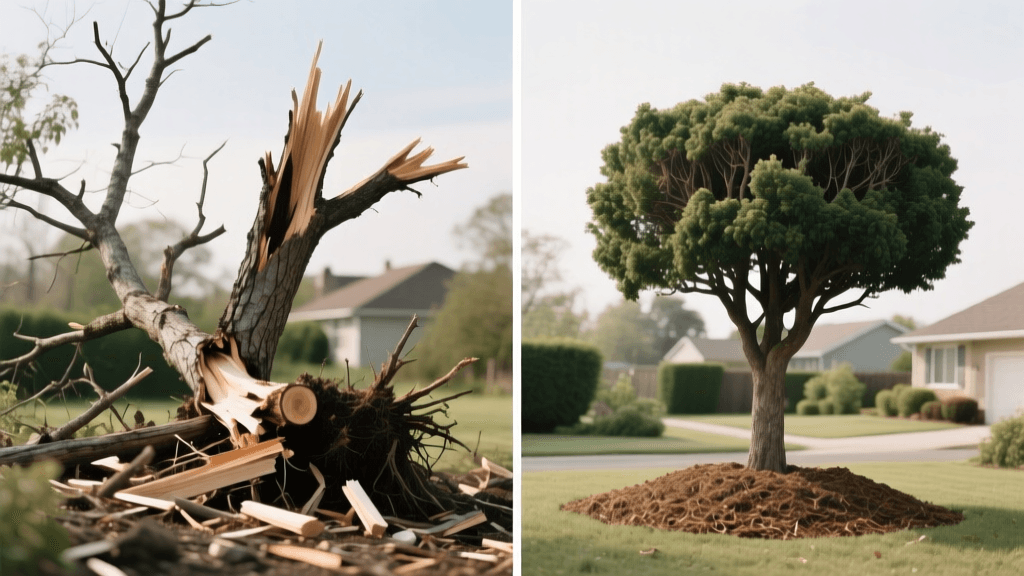
Storm Damaged Tree Restoration: Before And After Guide
The Power of Tree Transformation: From Hazard to Haven
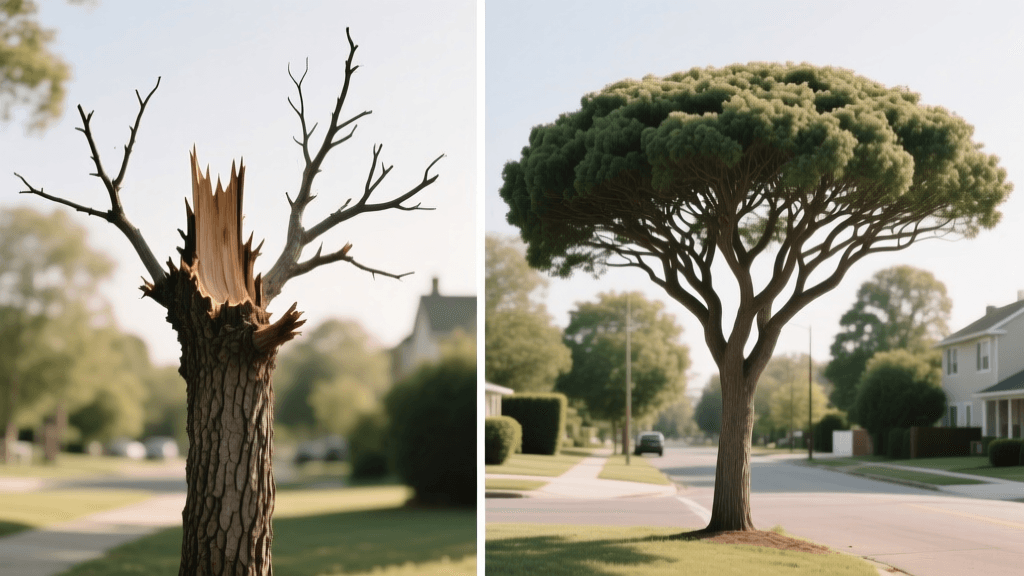
Witnessing a beloved, decades-old shade tree splinter during a severe summer squall is a heartbreaking experience for any homeowner. The immediate aftermath often leaves behind a jagged, unbalanced eyesore that poses a severe safety risk to your property. However, a damaged tree is not necessarily a dead tree. Through the art and science of crown restoration, structural pruning, and targeted root-zone care, you can facilitate a stunning before-and-after transformation. This comprehensive guide will walk you through the exact steps to take a storm-battered tree from a hazardous liability back to a thriving, beautiful landscape focal point.
According to the International Society of Arboriculture (ISA), many trees that suffer partial crown loss or limb failure can fully recover if proper pruning techniques are applied promptly and correctly. The key lies in understanding the physiological differences between the 'before' state of shock and damage, and the 'after' state of balanced, compartmentalized growth.
Assessing the 'Before' State: Identifying Damage and Decline
Before you make a single cut, you must thoroughly assess the 'before' condition of your tree. Storm damage typically manifests in three primary ways: torn bark, exposed heartwood, and hanging limbs (often referred to by arborists as 'widowmakers'). Additionally, years of neglect prior to the storm may have left the tree with included bark (where two branches grow too closely together, trapping bark in the union) and a co-dominant central leader, making it highly susceptible to splitting.
Signs Your Tree is a Candidate for Restoration
- Trunk Integrity: The main trunk is largely intact without massive vertical splits extending down to the root flare.
- Remaining Canopy: At least 50% of the original crown and foliage remains attached and healthy.
- Root System: There is no significant soil heaving at the base, indicating that the structural root plate has not been compromised or uprooted.
If your tree meets these criteria, it has the biological energy reserves required to push new growth and seal over wounds, setting the stage for a dramatic before-and-after transformation over the next three to five years.
The 'After' Vision: Goals of Crown Restoration
The ultimate 'after' vision is a tree with a single, dominant central leader, well-spaced lateral branches, and a balanced canopy that allows wind to pass through rather than acting as a sail. Crown restoration is a multi-year process. You are not trying to force the tree back into its exact pre-storm shape immediately; rather, you are selectively pruning to encourage a strong, resilient architecture that will develop over time.
Step-by-Step Transformation Guide
Step 1: Safety and Tool Preparation
Never attempt to remove large, hanging limbs near power lines or structures; hire a certified arborist for those hazards. For accessible limbs, invest in high-quality bypass tools. A Silky Gomboy 240 folding saw and Felco 2 bypass hand pruners are industry favorites that make clean cuts, which is vital for the 'after' healing process. Dull tools crush the cambium layer, delaying recovery and inviting fungal pathogens.
Step 2: The Three-Cut Method for Heavy Limbs
To prevent the weight of a torn branch from ripping healthy bark down the trunk, use the three-cut method:
- The Undercut: Cut about 12 inches away from the trunk, going one-third of the way up from the bottom of the branch.
- The Relief Cut: Move two inches further out and cut completely through the branch from the top down. The limb will snap off cleanly at the relief cut, leaving a manageable stub.
- The Final Collar Cut: Locate the branch collar (the swollen area where the branch meets the trunk) and the branch bark ridge. Make your final cut just outside the collar, angling slightly to match the collar's natural slope. Never cut flush against the trunk, as this destroys the tree's natural defense zone.
Step 3: Subordination and Selecting a New Leader
If the central leader was snapped off, you must train a new one. Identify a strong, upward-growing lateral branch near the break. Use 'subordination cuts' (reduction cuts) to shorten the competing lateral branches surrounding your chosen new leader. This redirects the tree's auxins (growth hormones) into the new leader, accelerating its upward growth. The University of Minnesota Extension emphasizes that reduction cuts should be made just above a smaller, lateral side-branch that is at least one-third the diameter of the limb being removed.
Step 4: Wound Care and the Myth of Tree Paint
In the 'before' era of tree care, it was common practice to paint pruning cuts with black tar or sealants. Modern arboriculture has completely debunked this. Trees heal through a process called CODIT (Compartmentalization of Decay in Trees). They do not heal like human skin; instead, they build chemical and physical walls around the wound to isolate decay. Applying sealant traps moisture and fungi inside the wound, accelerating rot. Leave the cuts exposed to the air and let the tree's natural biology take over.
Before and After Transformation Matrix
Understanding the timeline and visual changes helps set realistic expectations for your landscape project.
| Tree Feature | Before (Damaged / Neglected) | After (Restored / Maintained) | Recovery Timeline |
|---|---|---|---|
| Canopy Architecture | Asymmetrical, co-dominant leaders, dense interior | Single leader, balanced lateral spread, wind-permeable | 3 to 5 years of directional growth |
| Pruning Wounds | Jagged tears, stripped bark, flush cuts | Clean collar cuts, callus tissue (woundwood) forming evenly | 1 to 2 inches of callus growth per year |
| Root Zone / Soil | Compacted soil, turfgrass competition, volcano mulch | 2-4 inch donut mulch ring, aerated soil, high organic matter | 1 to 2 seasons for soil biology improvement |
| Foliage Density | Yellowing, sparse, undersized leaves due to stress | Deep green, robust leaf size, dense terminal shoot growth | 12 to 24 months post-restoration |
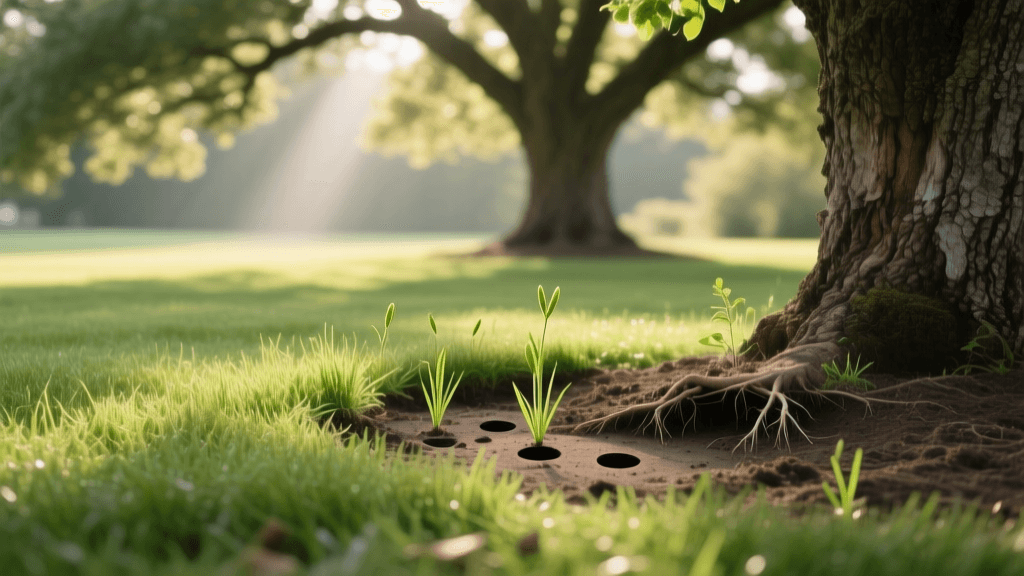
Ground-Level Transformation: Mulching and Root Care
A true before-and-after tree transformation is not limited to the canopy; it must include the root zone. Many storm-damaged trees were already stressed prior to the weather event due to poor soil conditions and improper mulching. 'Volcano mulching'—piling mulch high against the trunk—causes bark decay and encourages girdling roots, severely weakening the tree's structural anchor.
The 'After' Mulching Standard
Transform the base of your tree by removing all turfgrass within a 3 to 6-foot radius of the trunk. Apply a 2 to 4-inch layer of organic, undyed wood chips or shredded bark. Crucially, keep the mulch at least 3 inches away from the actual trunk to prevent moisture buildup and rodent damage. As detailed by extension experts at the University of Minnesota, this wide, flat 'donut' of mulch mimics the natural forest floor, regulating soil temperature, retaining vital moisture, and slowly adding organic matter as it decomposes.
Hydration and Soil Recovery
Following the shock of severe pruning and storm trauma, the tree's ability to uptake water is compromised because its transpiration rate (water loss through leaves) has been drastically altered, yet the root system remains the same size. Deep, infrequent watering is required to encourage deep root anchoring.
The Golden Rule of Watering: Provide 10 gallons of water per inch of trunk diameter (measured at breast height, or DBH) every 7 to 10 days during the growing season, assuming no significant rainfall. Use a slow-release soaker hose or a tree watering bag (like a Treegator) placed over the mulch ring to allow water to penetrate deeply into the soil profile rather than running off the surface.
Cost Expectations: DIY vs. Professional Arborist
The financial investment for a before-and-after restoration varies wildly based on the tree's size and the severity of the damage.
- DIY Approach ($50 - $200): Suitable for small to medium trees (under 20 feet) with minor limb damage. Costs cover high-quality hand saws, loppers, safety glasses, and bulk mulch.
- Certified Arborist ($400 - $1,500+): Essential for mature trees, large hanging limbs, or trees requiring climbing and rigging. A professional will carry liability insurance and possess the expertise to execute complex reduction cuts that guarantee the tree's long-term structural integrity.
Conclusion: Patience Yields the Best Results
Transforming a storm-damaged tree from a jagged hazard into a robust, beautiful landscape asset is not an overnight process. It requires a keen eye for structural pruning, a commitment to proper root-zone mulching, and above all, patience. By respecting the tree's natural biological defense systems and providing consistent aftercare, you will be rewarded with a stunning 'after' transformation that will provide shade, beauty, and ecological value for decades to come.