Tree Care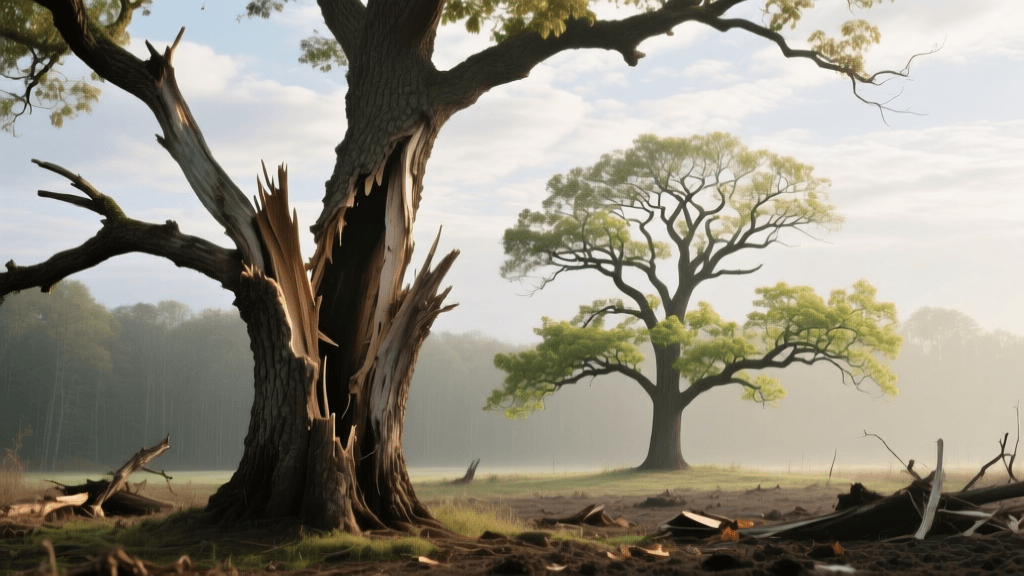
Before & After: Restoring Storm-Damaged Mature Trees
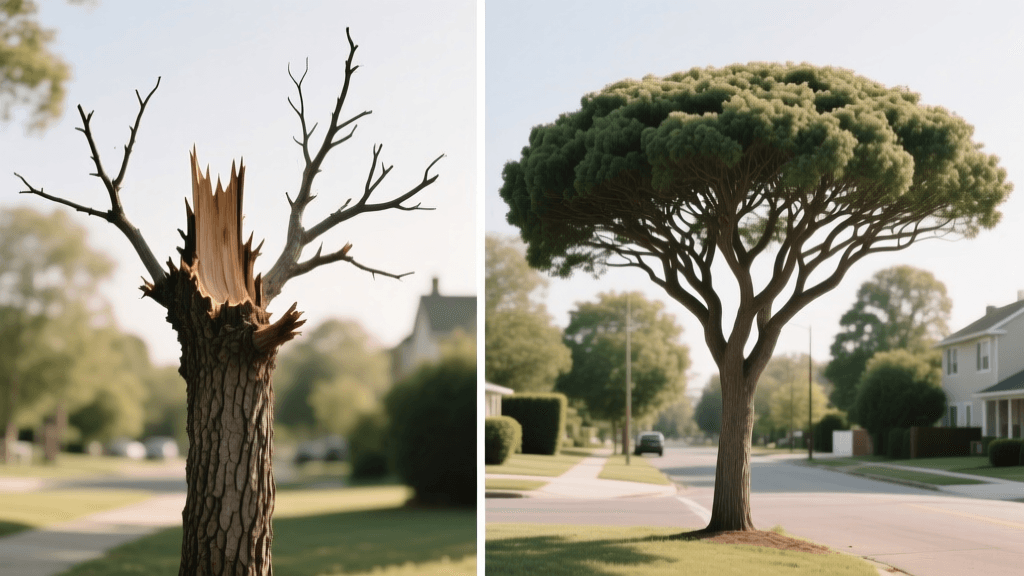
The Before State: Assessing the Devastation
When a severe microburst or ice storm tears through your property, the immediate aftermath is often a scene of arboreal devastation. The 'Before' state of a storm-damaged mature tree is characterized by jagged bark tears, hanging 'widow-maker' branches, exposed heartwood, and a compromised structural integrity. For many homeowners, the emotional response is to immediately call a removal service. However, mature trees provide immense ecological and financial value, and with the right arboricultural techniques, a battered tree can undergo a stunning transformation.
Before initiating any restoration, you must objectively evaluate the 'Before' condition to determine if the tree is a viable candidate for saving. According to the University of Minnesota Extension, a tree is generally worth saving if it has not lost more than 50 percent of its crown and the main trunk is not split. If the root plate has heaved or the trunk has suffered a massive vertical split down to the soil line, the 'After' state will never be safe, and removal is the only responsible option.
Visualizing the After: The Goal of Crown Restoration
The goal of transforming a storm-damaged tree is not to make it look exactly as it did the day before the storm. Instead, the 'After' state focuses on structural safety, biological health, and encouraging a balanced, resilient canopy. A successfully restored tree will compartmentalize its wounds, push out vigorous epicormic shoots to fill canopy gaps, and develop strong branch unions that can withstand future weather events.
A successful before-and-after tree transformation prioritizes long-term structural safety over immediate aesthetic perfection. Patience is required, as the canopy will take three to five years to fully fill in.
The Transformation Process: Step-by-Step Pruning
Achieving a safe and beautiful 'After' state requires precise pruning techniques. Haphazardly hacking off broken limbs will lead to decay and weak water sprouts, ruining the tree's future.
Phase 1: Emergency Triage and Hazard Removal
The first step in the transformation is removing immediate hazards. This involves safely lowering hanging branches and clearing debris. Never attempt to remove large, suspended limbs on your own; the tension and compression forces in storm-damaged wood are unpredictable and highly dangerous. This phase is best left to certified arborists equipped with cranes and rigging gear.
Phase 2: Cleaning the Wounds with the 3-Cut Method
Once the immediate hazards are gone, the remaining torn stubs must be cleaned to allow the tree to begin its healing process. To prevent bark from tearing down the trunk and stripping the vital cambium layer, always use the 3-Cut Method:
- Cut 1 (The Undercut): Make an upward cut about 12 to 18 inches away from the trunk, going roughly one-third of the way through the branch.
- Cut 2 (The Top Cut): Move two inches further out from the undercut and saw straight down. The branch will snap off cleanly without tearing the trunk bark.
- Cut 3 (The Final Collar Cut): Locate the branch collar (the swollen area where the branch meets the trunk) and the branch bark ridge. Make a clean, angled cut just outside the collar. Never cut flush against the trunk, as this destroys the tree's natural defense zone.
Phase 3: Crown Restoration and Subordination
The International Society of Arboriculture (TreesAreGood) strongly advises against 'topping' a damaged tree. Topping creates a biological disaster that results in weakly attached, rapid-growth sprouts. Instead, use subordination cuts to reduce the length of competing lateral branches, encouraging a new central leader or a balanced, multi-leader canopy. Make reduction cuts back to a lateral branch that is at least one-third the diameter of the limb being removed.
Before & After Case Study: The Heritage White Oak
To illustrate the power of proper restoration, consider this data tracking a 60-foot White Oak that lost a major co-dominant leader during a summer derecho. The tree underwent professional crown restoration, followed by a strict biological support regimen.
| Metric | The Before (Day 1 Post-Storm) | The After (Year 3 Post-Restoration) |
|---|---|---|
| Canopy Density | 40% (Severe loss, unbalanced) | 85% (Full, symmetrical foliage) |
| Hazard Rating | High (Exposed heartwood, hanging limbs) | Low (Clean unions, callused wounds) |
| Wound Closure | Open, jagged bark tears | 95% compartmentalized and sealed |
| Structural Integrity | Compromised, top-heavy lean | Balanced, subordinated laterals |
| Root Zone Health | Compacted by storm debris and foot traffic | Aerated, properly mulched, thriving |
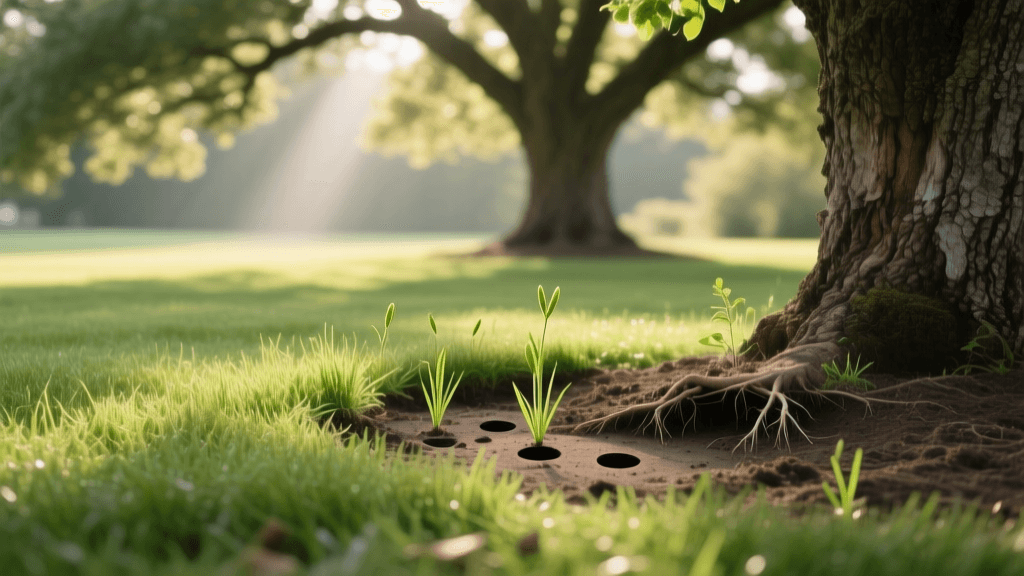
Ensuring the After: Post-Transformation Care
The pruning is only half the battle. The 'After' state relies heavily on how you support the tree's root system and energy reserves in the months following the storm.
Proper Mulching Techniques
Storms often strip away natural leaf litter, exposing roots to temperature extremes. Re-establish the root zone using the 3-3-3 rule: apply a mulch ring 3 feet in radius (extend to the drip line if possible), 3 inches deep, and keep it 3 inches away from the trunk flare. Use organic hardwood mulch to retain moisture and regulate soil temperature. Avoid 'volcano mulching,' which invites fungal pathogens and rodent damage.
Hydration and Fertilization
A tree missing a large portion of its canopy has a reduced capacity to photosynthesize, but its root system still demands water. During the first two growing seasons post-storm, provide deep, slow watering. Apply 15 to 20 gallons of water per week during dry spells, utilizing a soaker hose or slow-drip tree bag. Avoid high-nitrogen fertilizers immediately after the storm; forcing rapid, weak growth will compromise the tree's structural recovery. The Arbor Day Foundation recommends waiting until the tree shows signs of natural, vigorous recovery before applying a slow-release, balanced fertilizer.
Debunking the Wound Sealant Myth
In the past, arborists painted pruning cuts with black tar or wound sealants to protect the 'After' state from insects and rot. Modern science has proven this practice is actively harmful. Sealants trap moisture against the wood, accelerating decay and preventing the formation of wound wood (callus tissue). Leave all cuts exposed to the air and let the tree's natural biochemical defenses do the work.
Cost Breakdown: DIY vs. Professional Restoration
Transforming a storm-damaged tree requires an investment of time and money. Understanding the costs helps set realistic expectations for your landscape's recovery.
- DIY Minor Restoration ($50 - $150): Suitable only for small trees under 15 feet tall with minor limb damage. Costs cover a high-quality pruning saw, loppers, and mulch. This requires knowledge of the branch collar and the 3-cut method.
- Professional Arborist Restoration ($400 - $1,500+): Essential for mature trees, large hanging limbs, or damage near utility lines. This cost includes a certified arborist's hazard assessment, crane or bucket truck rental, precise structural pruning, and debris hauling. While expensive, it is a fraction of the cost of removing a mature tree and planting a new one, which can easily exceed $3,000.
Conclusion: Embracing the New Normal
The journey from a storm-ravaged 'Before' to a thriving, resilient 'After' is a testament to the incredible survival instincts of mature trees. By resisting the urge to top or over-prune, utilizing proper cutting techniques, and nurturing the root zone, you can guide your damaged trees through a successful transformation. While the tree may bear the scars of the storm for decades, those callused wounds will ultimately stand as a testament to its resilience and your dedicated stewardship.