Tree Care
Before & After: Restoring a Topped Crape Myrtle Tree
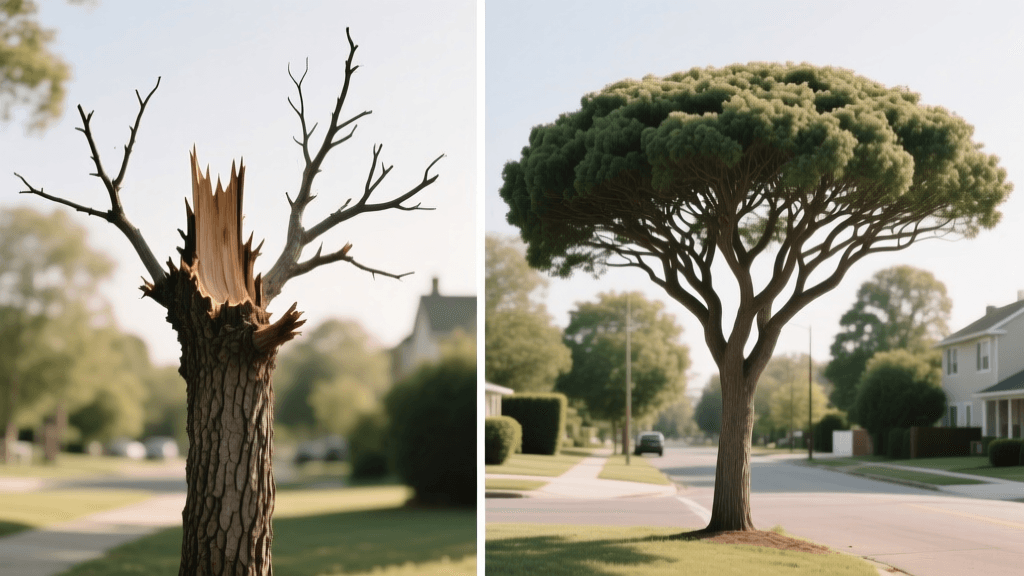
The 'Before' State: The Anatomy of Crape Murder
Walk through almost any suburban neighborhood in the American South, and you will likely witness the tragic aftermath of 'crape murder.' This colloquial term refers to the severe, improper topping of crape myrtle trees (Lagerstroemia indica), where homeowners or misguided landscapers hack off the entire upper canopy, leaving behind blunt, ugly stubs. The 'before' state of a topped crape myrtle is characterized by knobby, swollen wound sites, a proliferation of weak, spindly epicormic sprouts, and a distinct lack of natural grace.
From a physiological standpoint, topping is devastating. According to the principles of tree compartmentalization, severe heading cuts bypass the tree's natural defense mechanisms. The International Society of Arboriculture (ISA) warns that topping removes 50 to 100 percent of a tree's leaf-bearing crown, effectively starving the tree and triggering a desperate, energy-depleting survival response. The resulting sprouts are anchored only in the outermost layers of the parent branch, making them highly susceptible to breaking during high winds or heavy summer storms. Furthermore, the massive, open wounds left by topping cuts rarely seal properly, inviting wood-decaying fungi and boring insects into the heartwood.
The 'After' Vision: What a Restored Tree Looks Like
The goal of crown restoration is to transform a butchered, hazardous tree back into a structurally sound, aesthetically pleasing specimen. The 'after' state of a successfully restored crape myrtle features a natural, vase-like architecture with strong, U-shaped branch crotches. Instead of hundreds of weak, whip-like sprouts crowding the canopy and blocking airflow (which leads to powdery mildew), the restored tree boasts a select few dominant leaders. The blooms on a restored tree are often fewer in number but significantly larger, sturdier, and less prone to flopping over in the rain. The bark, renowned for its beautiful exfoliating patterns, is allowed to mature and show off on the primary trunks rather than being hidden by a dense, chaotic thicket of water sprouts.
Tools and Materials for the Transformation
Restoring a topped tree requires precision, not brute force. You must make clean, targeted cuts to guide the tree's growth over several years. Gather the following equipment before beginning:
- Bypass Hand Pruners: (e.g., Felco 2) For precise cuts on branches up to 3/4 inch in diameter. Anvil pruners will crush the vascular tissue and invite disease.
- Bypass Loppers: (e.g., Corona SL 3266) For branches up to 1.5 inches thick. The long handles provide the leverage needed for clean cuts without tearing the bark.
- Pruning Saw: (e.g., Silky Gomboy 240) A curved, tri-cut blade is essential for removing thick, knobby stubs or large competing leaders without binding the blade.
- Sterilization Solution: 70% isopropyl alcohol or a 10% bleach solution in a spray bottle. You must sterilize your blades between every single tree, and periodically during heavy pruning, to prevent the spread of canker diseases and sooty mold.
- Wound Dressing (Optional/Debated): Modern arboriculture generally advises against pruning paints, as they can trap moisture and accelerate decay. Let the tree compartmentalize naturally.
The 3-Year Crown Restoration Schedule
You cannot fix years of 'crape murder' in a single afternoon. Attempting to remove all the weak sprouts and reshape the tree in one year will shock the tree and trigger another massive flush of erratic growth. Crown restoration is a multi-year process. As noted by Penn State Extension, gradual reduction cuts over multiple seasons allow the tree to adapt its root-to-shoot ratio safely.
| Year | Timing | Primary Action | Target Outcome |
|---|---|---|---|
| Year 1 | Late Winter (Feb) | Select new leaders; remove 50% of weak sprouts. | Establish a framework of 3-5 strong, outward-growing primary branches per trunk. |
| Year 2 | Late Winter (Feb) | Subordinate competing leaders; thin interior canopy. | Improve airflow, reduce disease pressure, and direct energy to the chosen leaders. |
| Year 3 | Late Winter (Feb) | Crown cleaning; remove deadwood and crossing branches. | Finalize the natural vase shape; encourage large, high-quality bloom panicles. |
Step-by-Step Execution Guide
Year 1: Selecting the New Leaders
Inspect the knobby, topped ends of your crape myrtle trunks. You will see a cluster of upright, spindly sprouts emerging from the wound site. Your goal is to select the strongest, best-angled sprouts to become the new permanent branches. Look for sprouts that are growing outward, away from the center of the tree, and that have a wide angle of attachment. Using your sterilized hand pruners, remove all the inward-growing, crossing, or excessively weak sprouts flush with the knobby swelling, being careful not to damage the bark of the selected leaders. Leave 3 to 5 well-spaced leaders per main trunk. If the original topped stub is excessively long and ugly, use your pruning saw to make a clean reduction cut just above the highest selected leader, angling the cut slightly to shed water.
Year 2: Thinning and Subordinating
By the second winter, your chosen leaders will have grown significantly and likely produced lateral branches. Now, you must establish apical dominance. Identify the single strongest, most upright branch on each leader to be the terminal extension. Any competing branches that are growing straight up and threatening to overtake your chosen leader must be 'subordinated.' This means cutting them back by one-third to one-half, making a reduction cut just above a lateral side branch. This slows their growth without removing them entirely, allowing them to continue producing energy for the tree while the primary leader takes over. Remove any new water sprouts that have emerged from the base of the tree or the lower trunk.
Year 3: Crown Cleaning and Final Shaping
The third year is about refinement. The Clemson University Home & Garden Information Center emphasizes that mature crape myrtles require minimal pruning once their structure is established. Focus on 'crown cleaning': removing dead, diseased, or damaged wood. Thin out any remaining branches that are rubbing against each other, as the friction creates wounds that invite pests. Step back frequently to assess the overall silhouette. You are aiming for an open, airy canopy where sunlight can penetrate to the inner branches and lower trunk, promoting the beautiful bark exfoliation crape myrtles are famous for.
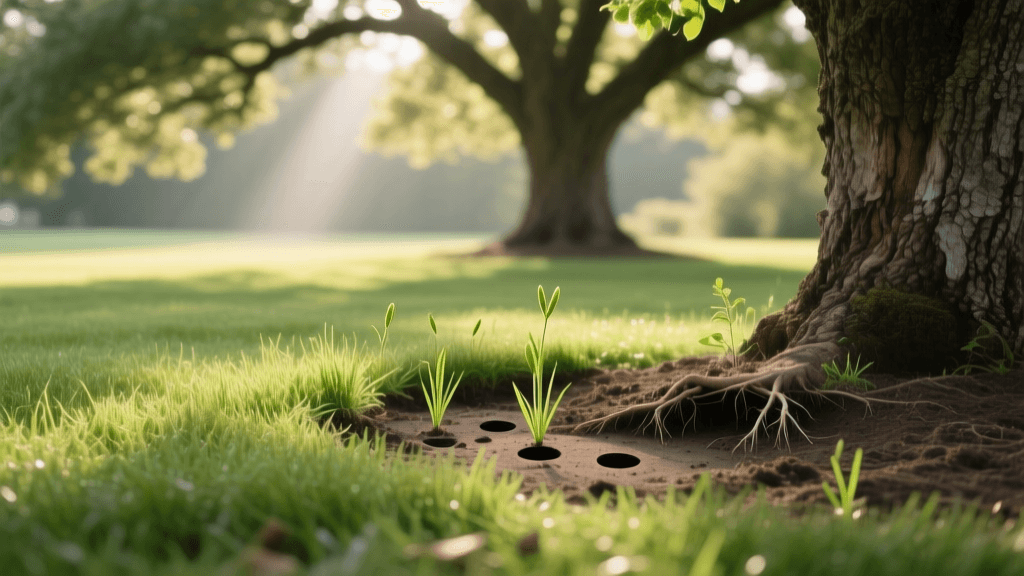
Post-Pruning Care: Mulching and Watering
The stress of crown restoration requires excellent aftercare to support the tree's recovery and new growth. Proper mulching and watering are non-negotiable.
'The most common mistake homeowners make after pruning is piling mulch against the trunk. This 'volcano mulching' keeps the bark constantly wet, leading to rot and providing a haven for rodents and fungal pathogens.' — Urban Forestry Best Practices
Apply a 2 to 4-inch layer of organic mulch (such as shredded hardwood or pine bark) in a wide ring around the tree. The mulch ring should extend at least to the tree's drip line if possible, but a minimum 3-foot radius is required for young or restoring trees. Crucially, keep the mulch at least 3 to 5 inches away from the actual trunk base, creating a 'donut' shape. During the first growing season after major pruning, provide deep, infrequent watering. Apply roughly 10 gallons of water per inch of trunk diameter once a week during dry spells, allowing the water to soak deeply into the root zone rather than just wetting the surface.
Common Mistakes to Avoid During Restoration
- Pruning in Late Summer or Fall: Pruning too late in the year stimulates new, tender growth that will not have time to harden off before the first frost, leading to severe winter dieback. Always prune in late winter while the tree is fully dormant.
- Over-Thinning (Lion's Tailing): Do not strip all the interior lateral branches off your chosen leaders, leaving only a tuft of leaves at the very end. This 'lion's tailing' removes vital photosynthetic capacity and leaves the long, bare branches highly vulnerable to sunscald and wind breakage.
- Ignoring the Root Flare: If your crape myrtle was planted too deeply or has girdling roots, no amount of pruning will fix its decline. Use a hand trowel or air spade to carefully excavate the root flare, ensuring the trunk widens naturally as it meets the soil.
Cost Analysis: DIY vs. Professional Arborist
Restoring a large, multi-trunk crape myrtle can be a significant physical undertaking. If you choose the DIY route, your primary costs are high-quality tools and time. A professional-grade pruning saw, loppers, and hand pruners will cost between $120 and $200. However, if your trees are over 15 feet tall, or if the original topping cuts have resulted in massive, hazardous deadwood that requires climbing or aerial lift access, hiring a professional is mandatory. A certified arborist typically charges between $150 and $400 per tree for complex crown restoration, depending on the tree's size, site accessibility, and the severity of the previous damage. While the upfront cost is higher, the investment ensures the tree's structural integrity and prevents catastrophic branch failure over your home or driveway in the years to come.
Conclusion
Transforming a topped crape myrtle from a knobby, hazardous eyesore into a graceful, blooming specimen is a test of patience and horticultural knowledge. By abandoning the destructive practice of heading cuts and embracing the science of reduction pruning and crown restoration, you can reverse years of damage. Stick to the 3-year schedule, maintain your tools, and respect the tree's natural biology. The 'after' transformation will not only elevate the beauty of your landscape but also ensure the long-term health and structural safety of your trees for decades to come.