
Revive Drought-Damaged Lawns With Smart Irrigation Tech
Reviving Your Outdoor Oasis: The Intersection of Lawn Recovery and Smart Technology
There is nothing quite as disheartening for a home and garden enthusiast as stepping onto the patio with a glass of iced tea, only to be greeted by a crunchy, sun-scorched lawn. Your lawn is an essential extension of your indoor living space, serving as the foundation for outdoor dining, garden-to-table gatherings, and weekend relaxation. When severe drought and extreme heat strike, the resulting damage can make your entire property feel neglected. However, a brown lawn is not necessarily a dead lawn, and modern landscaping offers incredible tools for recovery.
Reviving a drought-damaged lawn requires more than just leaving the sprinkler on for hours. It demands a strategic approach that bridges traditional horticulture with smart home integration. By combining soil health management, precision overseeding, and weather-based smart irrigation controllers, you can bring your turf back to life while conserving water and lowering your utility bills. This comprehensive guide will walk you through the exact steps to diagnose, treat, and permanently upgrade your lawn's resilience against future climate extremes.
Assessing the Damage: Dormant vs. Dead Turf
Before purchasing seed or adjusting your irrigation system, you must determine the actual state of your turfgrass. Grass has a remarkable survival mechanism: when water is scarce, it enters a state of dormancy to protect the vital crown (the growing point at the base of the plant). Dormant grass is brown, but the crown remains firm, white, and hydrated. Dead grass, on the other hand, is entirely desiccated, brittle, and the crown will be brown and dry.
To perform the 'tug test,' grab a handful of brown grass and pull gently. If it resists and holds fast to the soil, the roots are likely still viable, and the grass is dormant. If it pulls up effortlessly like loose straw, the turf is dead and will require complete renovation in that area. Additionally, perform a screwdriver test to check for soil compaction, which often worsens during droughts as the earth bakes and shrinks. If you cannot easily push a six-inch screwdriver into the soil, your lawn is severely compacted, preventing whatever water you do apply from reaching the root zone.
Soil Preparation and Core Aeration
Successful lawn renovation begins beneath the surface. According to guidelines from the USDA Natural Resources Conservation Service, maintaining soil organic matter is critical for water retention and root development. Drought-stressed soils are often hydrophobic, meaning they repel water rather than absorbing it.
To break up compaction and improve water infiltration, rent a gas-powered core aerator. Core aeration removes small plugs of soil (typically 2 to 3 inches deep and spaced 3 to 4 inches apart), allowing oxygen, water, and nutrients to penetrate the root zone. Following aeration, apply a topdressing of organic compost. Spread a 1/4-inch layer of screened compost across the entire lawn using a landscaping rake. This compost acts as a sponge, holding moisture around the grass crowns and introducing beneficial microbes that break down thatch and improve soil structure. Expect to spend approximately $40 to $60 per cubic yard of high-quality organic compost, which is a vital investment in long-term turf health.
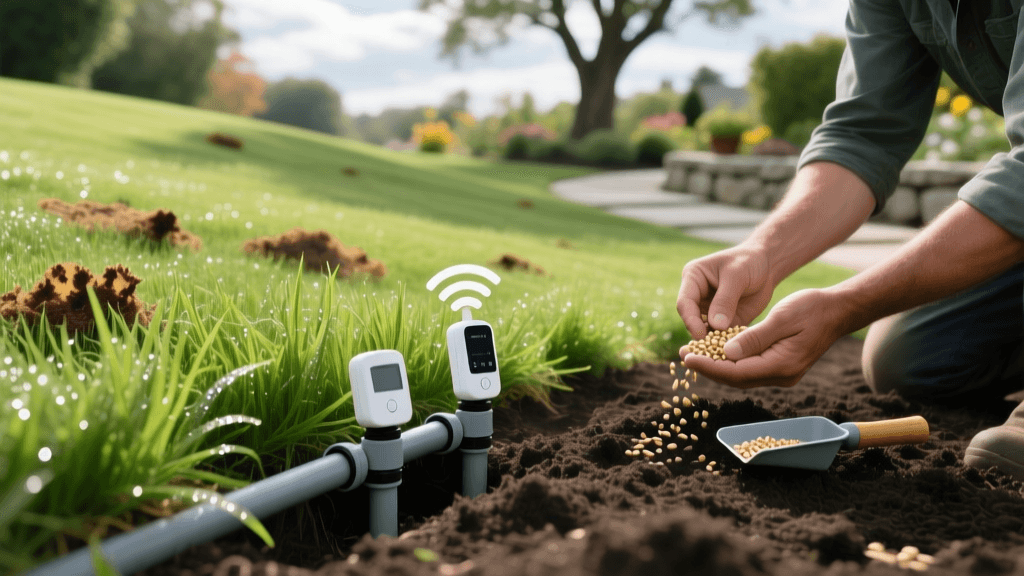
Smart Irrigation Integration for Precision Recovery
Traditional sprinkler timers are notoriously inefficient, often watering on fixed schedules regardless of recent rainfall or temperature fluctuations. To truly drought-proof your landscape and integrate your garden with smart home technology, upgrading to an EPA WaterSense-certified smart irrigation controller is essential. The EPA WaterSense program reports that weather-based smart controllers can save the average home nearly 7,600 gallons of water annually by adjusting watering schedules based on local evapotranspiration (ET) rates.
Devices like the Rachio 3 Smart Sprinkler Controller or the Orbit B-hyve connect directly to your home Wi-Fi and pull hyper-local weather data. If a heatwave is forecasted, the system automatically increases run times. If a rainstorm is approaching, it skips the scheduled watering entirely. For the ultimate precision, pair a smart controller with wireless soil moisture sensors placed in the sunniest and most shaded zones of your lawn. This ensures that the smart system only triggers irrigation when the soil volumetric water content drops below a critical threshold, eliminating guesswork and preventing fungal diseases caused by overwatering.
Smart Irrigation System Comparison
| System Type | Average Cost | Water Savings | Best Use Case | Smart Home Integration |
|---|---|---|---|---|
| Traditional Mechanical Timer | $40 - $80 | 0% (Often overwaters) | Simple, small lawns with uniform sun | None |
| Weather-Based Smart Controller (WBIC) | $150 - $250 | 20% - 40% | Most residential lawns, variable climates | Wi-Fi, Alexa, Google Home, IFTTT |
| Soil Moisture Sensor (SMS) System | $200 - $350 | 30% - 50% | Lawns with heavy clay or extreme shade/sun mixes | Wi-Fi, App Alerts, Automated Valves |
Overseeding with Drought-Tolerant Varieties
Once the soil is aerated and the smart irrigation is calibrated, it is time to overseed the thin and dead patches. Timing is critical: cool-season grasses (like Tall Fescue and Kentucky Bluegrass) should be renovated in early fall, while warm-season grasses (like Bermuda and Zoysia) are best planted in late spring to early summer.
For cool-season lawns, transition away from thirsty Kentucky Bluegrass and opt for modern Turf-Type Tall Fescue blends, such as Scotts Turf Builder Tall Fescue Mix or Jonathan Green Black Beauty. These varieties feature deep root systems that can reach up to three feet into the soil, accessing moisture that shallow-rooted grasses cannot reach. Apply seed at a rate of 5 to 6 pounds per 1,000 square feet for overseeding. Use a broadcast spreader for even coverage, and follow up by dragging a piece of chain-link fence or a stiff broom over the area to ensure vital seed-to-soil contact. The seed must touch the soil, not rest on top of dead thatch, to germinate successfully.
The Recovery Watering Schedule
Watering a newly renovated lawn requires a delicate balance. The goal is to keep the top inch of soil consistently moist without drowning the seed or encouraging shallow root growth. According to turf experts at the Texas A&M AgriLife Extension, deep and infrequent watering is the key to building drought-resistant root systems once the grass is established.
- Days 1 to 14 (Germination Phase): Program your smart controller to water 2 to 3 times per day for just 5 to 10 minutes per zone. The goal is to keep the seed bed damp. If the seed dries out even once during germination, it will die.
- Days 15 to 30 (Establishment Phase): As seedlings reach 1.5 inches tall, reduce watering frequency to once per day, but increase the duration to 15 to 20 minutes to encourage roots to chase the moisture deeper into the soil.
- Days 30 and Beyond (Maintenance Phase): Transition to the standard 1 to 1.5 inches of water per week, applied in one or two deep soakings. Use the 'tuna can test'—place empty tuna cans around the lawn and time how long it takes your smart sprinklers to fill them to the 1-inch mark.
Integrating Lawn Recovery with Garden-to-Table Landscaping
A smart irrigation system doesn't just save your lawn; it revolutionizes how you manage your entire outdoor living space, including your garden-to-table vegetable beds. Most smart controllers support multiple independent zones with different watering strategies. While your lawn zone utilizes high-efficiency rotary nozzles (which apply water slowly to prevent runoff on compacted soil), you can dedicate a separate zone to a drip irrigation system for your raised vegetable beds and fruit trees.
Drip irrigation delivers water directly to the base of your tomatoes, peppers, and herbs, reducing evaporation by up to 90% compared to overhead spraying. By integrating your lawn and garden watering into a single smart hub, you ensure that your evening outdoor dinners are never interrupted by rogue sprinklers, and your culinary garden receives the precise hydration it needs to thrive alongside your newly recovered turf.
Mowing Practices During and After Recovery
As your drought-damaged lawn begins to green up and the new seed fills in, your mowing habits will dictate the long-term success of the renovation. Never scalp a recovering lawn. Set your mower deck to its highest setting, ideally between 3 and 4 inches. Taller grass blades provide essential shade to the soil surface, drastically reducing evaporation and keeping the root zone cool during late-summer heat spikes.
Furthermore, ensure your mower blades are freshly sharpened. Dull blades tear and fray the grass tips, causing moisture loss and leaving the turf vulnerable to fungal pathogens. Adopt a 'mulch-mowing' strategy, leaving the clippings on the lawn. As they decompose, they return valuable nitrogen and organic matter back to the soil, acting as a free, natural fertilizer that supports the soil health initiatives you started with your compost topdressing.
Conclusion
Renovating a drought-scorched lawn is a highly rewarding project that bridges the gap between traditional gardening and modern smart home technology. By accurately assessing turf health, alleviating soil compaction, selecting deep-rooted seed varieties, and upgrading to an EPA-certified smart irrigation controller, you are not just fixing a temporary eyesore. You are fundamentally upgrading your landscape's infrastructure. The result is a lush, resilient outdoor living space that conserves water, supports your garden-to-table lifestyle, and remains vibrantly green long after the summer heat has faded.

