
Revive Drought-Damaged Lawns: Smart Irrigation and Aeration Guide
Assessing Drought Damage: Dead vs. Dormant Turf
When extreme heat and prolonged dry spells strike, even the most meticulously maintained lawns can succumb to severe drought stress, turning lush green landscapes into brittle, brown expanses. However, before you invest time and money into a full-scale lawn renovation, it is critical to determine whether your turf is merely dormant or completely dead. Cool-season grasses like Kentucky Bluegrass and Tall Fescue possess a natural survival mechanism that allows them to enter a state of dormancy during severe water deficits, conserving energy in the root system until moisture returns.
To diagnose the state of your lawn, perform the 'Tug Test'. Grab a handful of brown grass and pull gently. If the grass resists and stays anchored, the root system is likely still alive and dormant. If it pulls up effortlessly with no resistance, the plant has perished. Next, inspect the crown—the base of the grass plant where the blades meet the roots. Using a pocket knife, slice a small section of the turf. A healthy, dormant crown will appear white or pale green and feel firm, whereas a dead crown will be brown, brittle, and dry. According to experts at the NC State University TurfFiles program, dormant turf can typically survive up to four weeks of severe drought without permanent damage, provided it receives at least a quarter-inch of water every two weeks to keep the crown hydrated.
Step 1: Deep Core Aeration to Break Hydrophobic Soil
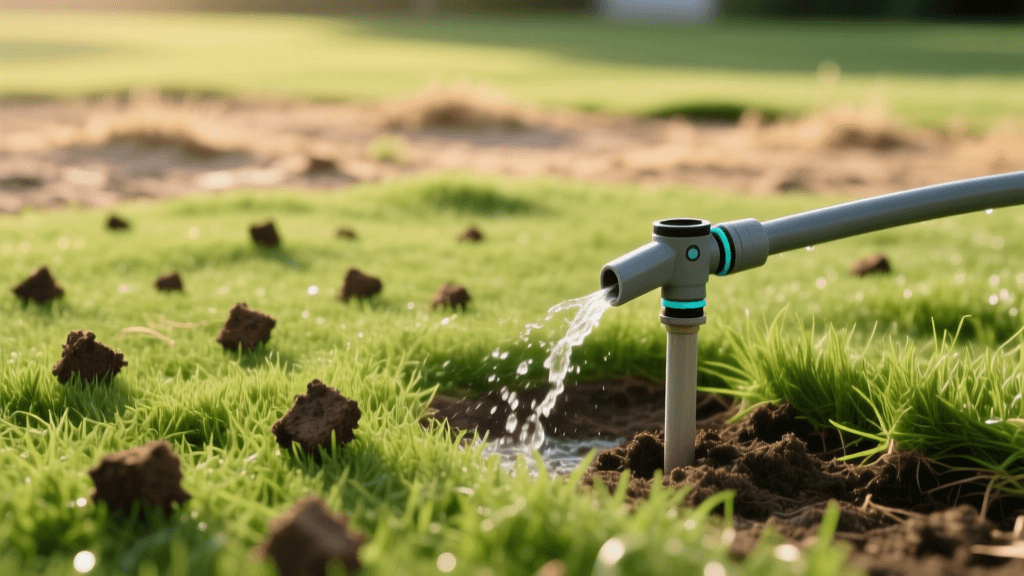
Prolonged drought often causes clay-heavy soils to bake and compact, creating a hydrophobic barrier that repels water rather than absorbing it. When the rains finally return or you turn on the sprinklers, the water simply runs off into the street. Deep core aeration is the most effective mechanical intervention to break this barrier.
Rent a walk-behind core aerator from a local hardware store (typically costing between $80 and $120 per day). Ensure the machine pulls actual soil plugs rather than simply poking holes with solid tines, which can worsen compaction. Aim for plugs that are 2 to 3 inches deep and spaced no more than 3 inches apart. For severely compacted, drought-damaged lawns, make two passes over the entire area in perpendicular directions. Leave the extracted soil cores on the lawn; they will break down naturally over the next few weeks, depositing beneficial microbes back onto the surface and helping to decompose thatch.
Step 2: Selecting Drought-Tolerant Seed Varieties
Overseeding is a vital component of lawn recovery, but renovating a drought-prone yard with the same water-thirsty grass species is a recipe for future failure. Use this renovation as an opportunity to transition your lawn to more resilient, energy-efficient landscaping. The University of California Integrated Pest Management (UC IPM) program highly recommends selecting turfgrass species that align with your local microclimate and water availability.
- Tall Fescue (Cool-Season): Ideal for transition zones and northern climates. Its deep root system (reaching up to 24 inches) allows it to access subterranean moisture that shallow-rooted grasses cannot reach. Apply at a rate of 5 to 8 lbs per 1,000 square feet.
- Bermudagrass (Warm-Season): Exceptional for southern, high-heat regions. It requires full sun and boasts incredible drought recovery once established. Apply hulled seed at 2 to 3 lbs per 1,000 square feet.
- Buffalograss (Warm-Season): A native prairie grass that requires a fraction of the water needed by traditional lawns. It is slow to establish but virtually maintenance-free regarding irrigation once mature.
Step 3: Soil Amendment and Topdressing
Seed-to-soil contact is the golden rule of overseeding. After aerating, apply a thin layer of organic compost topdressing (about 1/4 inch thick) across the entire lawn. This compost acts as a moisture-retentive sponge, protecting the delicate new seeds from drying out in the sun while providing a slow-release nutrient boost. Use a landscape rake or a push broom to work the compost and seed down into the aeration holes. The cost for bulk organic compost averages $30 to $50 per cubic yard, which is sufficient to topdress approximately 1,000 square feet at a 1/4-inch depth.
Step 4: Upgrading to Smart Irrigation for Precision Recovery
The cornerstone of modern lawn renovation is upgrading from a traditional, 'set-it-and-forget-it' timer to a smart irrigation system. Drought recovery requires precise moisture management; too much water will rot new seeds and invite fungal diseases, while too little will kill the germinating turf. According to the EPA WaterSense program, upgrading to a smart irrigation controller can save the average home nearly 7,600 gallons of water annually while ensuring optimal soil moisture levels.
Smart controllers utilize local weather data and Evapotranspiration (ET) rates to automatically adjust watering schedules based on real-time temperature, humidity, and rainfall. For the ultimate precision in lawn recovery, pair a Wi-Fi smart controller (such as the Rachio 3 or Orbit B-hyve) with wireless soil moisture sensors placed in the lawn's sunniest and shadiest zones. This prevents the system from watering when the root zone is already saturated.
| System Type | Average Cost | Water Savings | Recovery Efficacy |
|---|---|---|---|
| Traditional Mechanical Timer | $40 - $80 | 0% (Often over-waters) | Low (High disease risk) |
| Wi-Fi Smart Controller (ET-Based) | $150 - $250 | 20% - 40% | High (Weather adaptive) |
| Smart Controller + Soil Moisture Sensors | $250 - $400 | 40% - 60% | Maximum (Root-zone precise) |
Step 5: The 30-Day Post-Renovation Watering Matrix
Newly aerated and overseeded lawns require a highly specific watering cadence to ensure germination and deep root establishment. Use your smart irrigation system to program the following 30-day recovery matrix:
- Days 1 to 14 (Germination Phase): The seed must remain constantly moist but not waterlogged. Program your smart controller for 3 to 4 short cycles per day (e.g., 5 minutes at 7 AM, 11 AM, 2 PM, and 5 PM). The goal is to keep the top 1 inch of soil and compost damp.
- Days 15 to 21 (Establishment Phase): As seeds sprout and roots begin to anchor, reduce frequency to once daily in the early morning (around 5 AM) for 15 to 20 minutes. This encourages roots to stretch deeper into the aeration holes to find moisture.
- Days 22 to 30 (Deep Root Training): Transition to deep, infrequent watering. Water only 2 days a week, applying about 1/2 inch of water per session. This trains the turf to become drought-resistant, aligning with long-term energy-efficient landscaping goals.
Smart Home Integration and Long-Term Maintenance
Bridging the gap between outdoor landscaping and indoor smart home ecosystems elevates your property's efficiency. Modern Wi-Fi irrigation controllers integrate seamlessly with platforms like Amazon Alexa, Google Home, and Apple HomeKit. You can create automated routines—for instance, triggering your smart outdoor lighting to illuminate the yard when the irrigation system finishes its evening cycle, or using IFTTT (If This Then That) applets to pause your smart sprinklers automatically if your personal weather station detects a freeze warning.
Finally, once the 30-day recovery period is complete, maintain your renovated lawn by setting your smart mower to the highest recommended cutting height for your grass species (typically 3 to 4 inches for Tall Fescue). Taller grass blades shade the soil surface, drastically reducing evaporation rates and suppressing weed germination. By combining mechanical soil disruption, biological amendments, and intelligent water management, your drought-damaged lawn will not only recover but will emerge more resilient, eco-friendly, and cost-effective for years to come.

