
Reviving a Heat-Scorched Lawn: Smart Irrigation and Recovery Guide
Bridging Outdoor Living and Lawn Recovery
A lush, vibrant lawn is the foundational canvas for your outdoor living space. It seamlessly connects your garden-to-table dining areas, frames your smart home landscape lighting, and provides a soft, inviting surface for family gatherings. However, after a brutal summer of high temperatures and drought conditions, many homeowners are left staring at a patchy, heat-scorched yard. Lawn renovation and recovery require more than just throwing down seed and turning on the hose. It demands a strategic approach that combines traditional agronomic practices with modern smart home integration.
In this comprehensive guide, we will walk you through the exact steps to revive a damaged lawn, focusing on soil decompaction, strategic overseeding, and the integration of weather-based smart irrigation systems to ensure your turf recovers efficiently and sustainably.
Step 1: Assessing the Damage — Dormant vs. Dead Turf
Before investing time and money into renovation, you must determine if your brown lawn is dead or simply dormant. Cool-season grasses like Kentucky Bluegrass and Tall Fescue have a natural survival mechanism: they go dormant during extreme heat and drought to protect the crown (the growing point at the soil line).
To perform the 'tug test', grab a handful of brown grass and pull firmly. If the grass pulls out easily with shallow, brittle roots, the turf is likely dead and requires complete renovation. If the grass resists and holds firmly to the soil, the crown is probably still alive. You can also inspect the crown by slicing a single plant vertically; a firm, whitish-green center indicates dormancy, while a brown, mushy center indicates death. Research from the UC Agriculture and Natural Resources highlights that properly managed dormant lawns can survive up to a month without water, but pushing beyond that threshold often leads to irreversible crown desiccation.
Step 2: Core Aeration and Soil Decompaction
Summer foot traffic, heavy equipment, and dry soil often lead to severe compaction. Compacted soil prevents water, oxygen, and nutrients from reaching the root zone, effectively suffocating your recovering turf. Core aeration is the process of removing small plugs of soil (typically 2 to 3 inches deep and 0.5 inches wide) to alleviate this compaction.
- Timing: Perform core aeration in early fall when soil temperatures are cooling but still warm enough to encourage root growth.
- Preparation: Water the lawn deeply 24 hours before aerating to soften the soil, allowing the aerator tines to penetrate fully.
- Execution: Rent a walk-behind core aerator (typically $80 to $120 per day). Make two passes over the lawn in perpendicular directions to ensure maximum plug extraction.
- Post-Aeration: Leave the soil plugs on the lawn. They will break down naturally over the next few weeks, depositing beneficial soil microbes back onto the thatch layer to aid in decomposition.
Step 3: Strategic Overseeding and Topdressing
Overseeding introduces new, drought-tolerant turfgrass varieties into your existing lawn, thickening the canopy and choking out weeds. According to experts at NC State University TurfFiles, selecting regionally appropriate, disease-resistant cultivars is the most critical decision in the renovation process.
For cool-season lawns, a blend of Turf-Type Tall Fescue and a touch of Kentucky Bluegrass offers excellent wear tolerance and deep-rooted drought resistance. Apply seed at a rate of 5 to 8 pounds per 1,000 square feet for overseeding (use 10 to 12 pounds if doing a complete renovation). To maximize seed-to-soil contact, follow aeration with a light topdressing of screened compost (about 1/4 inch thick). The compost holds moisture around the germinating seed and provides a gentle, organic nutrient boost.
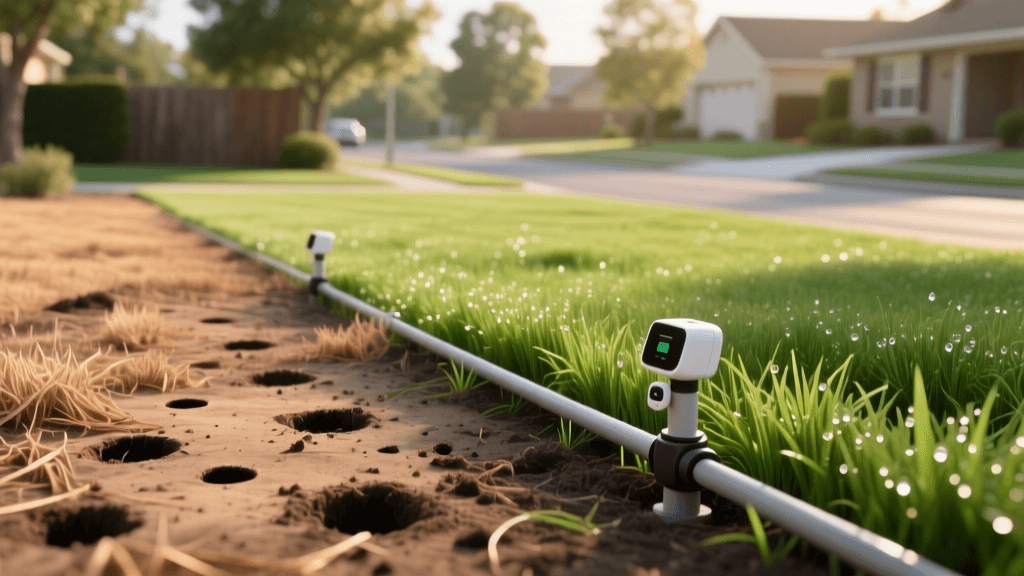
Step 4: Smart Home Irrigation Integration
The most common point of failure in lawn recovery is improper watering. New seed requires consistent moisture to germinate, but established recovering roots need deep, infrequent watering to grow downward. This is where smart home integration transforms your landscape maintenance.
Upgrading from a traditional dial timer to a WiFi-enabled smart irrigation controller (such as the Rachio 3, Hunter Hydrawise, or B-hyve) allows your system to adjust watering schedules based on real-time local weather data, Evapotranspiration (ET) rates, and soil moisture levels. According to the EPA WaterSense program, smart irrigation controllers can save the average home nearly 15,000 gallons of water annually while preventing the fungal diseases associated with overwatering.
| Feature | Traditional Dial Timer | Smart WiFi Controller (ET-Based) |
|---|---|---|
| Weather Adaptation | None (waters during rain) | Automatic rain and freeze skips |
| Soil Moisture Integration | Not supported | Supports wireless soil moisture sensors |
| Water Savings | Baseline (often over-waters) | Up to 30-50% reduction in water use |
| Recovery Efficiency | Low (promotes shallow roots) | High (encourages deep root chasing) |
| Upfront Cost | $40 - $80 | $150 - $250 |
For newly seeded areas, program your smart controller to run multiple short cycles per day (e.g., 5 minutes, three times a day) to keep the top inch of soil moist. Once the grass reaches two inches in height, transition the smart controller to a deep-and-infrequent schedule, utilizing soil moisture sensors to trigger watering only when the top 3 inches of soil become dry.
"Water deeply and infrequently to encourage roots to chase the moisture downward, creating a drought-resilient turf system that anchors the soil and supports heavy outdoor living activities."
Step 5: Targeted Fertilization for Stressed Turf
A recovering lawn needs fuel, but applying the wrong fertilizer can burn stressed roots or push excessive top growth at the expense of root development. Begin with a comprehensive soil test to determine your exact pH and nutrient deficiencies. Most turfgrass thrives at a pH between 6.0 and 7.0.
During fall renovation, utilize a starter fertilizer high in phosphorus (the middle number in the NPK ratio) to stimulate rapid root establishment. An organic option like Milorganite provides slow-release nitrogen and iron, which greens up the lawn without the risk of chemical burn. Apply at the manufacturer's recommended rate, typically yielding 0.5 to 1 pound of actual nitrogen per 1,000 square feet. Avoid fast-release synthetic urea until the new grass has been mowed at least three times.
Step 6: Mowing and Ongoing Maintenance
As your newly renovated lawn begins to fill in, proper mowing practices are essential to maintain density and shade out weed seeds. Set your mower deck to a minimum of 3.0 to 3.5 inches. Taller grass blades shade the soil surface, reducing evaporation and keeping the root zone cooler during unexpected late-season heat spikes.
Ensure your mower blades are freshly sharpened. Dull blades tear the grass tissue, leaving jagged edges that lose moisture rapidly and invite opportunistic pathogens. Integrate your smart home ecosystem by linking your irrigation controller to your local weather hub, ensuring your outdoor lighting and irrigation systems work in tandem to create a seamless, energy-efficient landscape that bridges the gap between nature and modern technology.
Conclusion
Lawn renovation is a rewarding investment that revitalizes your home's exterior and enhances your outdoor living spaces. By combining the mechanical benefits of core aeration and strategic overseeding with the precision of smart home irrigation technology, you can transform a heat-scorched yard into a resilient, lush oasis. Embrace the data-driven approach to landscape management, and your lawn will not only recover from this season's stress but will be fortified to withstand whatever the elements bring next year.

