
Revive Heat-Stressed Lawns: Smart Irrigation and Soil Recovery Guide
The Hidden Toll of Summer Heat on Your Outdoor Living Space
A thriving lawn is the foundation of any exceptional outdoor living space. It acts as a natural air conditioner, cooling the microclimate around your patio, reducing dust and allergens near your garden-to-table vegetable beds, and providing a lush, inviting carpet for outdoor furniture and entertainment. However, extreme summer heat and prolonged dry spells can push even the most resilient turfgrass to the brink. When your lawn turns brown, thins out, or develops bare patches, it doesn't just diminish your curb appeal; it compromises the entire ecosystem of your home and garden.
Lawn renovation and recovery require more than just turning on the sprinkler and hoping for the best. True recovery bridges the gap between traditional landscaping and modern smart home technology. By integrating weather-based smart irrigation, performing targeted soil amendments, and utilizing strategic overseeding, you can transform a scorched, heat-stressed yard into a vibrant, resilient outdoor oasis. This comprehensive guide will walk you through the exact steps, product recommendations, and timing needed to successfully revive your lawn and elevate your outdoor living experience.
Step 1: Diagnose the Damage — Dormant vs. Dead
Before investing time and money into renovation, you must accurately assess the state of your turf. Cool-season grasses like Kentucky Bluegrass and Tall Fescue have a natural defense mechanism against extreme heat and drought: dormancy. During dormancy, the grass halts top-growth and turns brown to conserve moisture and protect the crown and root system. As noted by the University of California Agriculture and Natural Resources, allowing lawns to go dormant during peak drought is a vital survival mechanism, but distinguishing between dormancy and death is critical for your recovery plan.
Perform the 'tug test' to diagnose your lawn. Grab a handful of brown grass and pull gently. If the grass resists and holds firmly to the soil, the roots are still alive, and the lawn is likely dormant. If the grass pulls up effortlessly with no root resistance, the turf has died and the area will require complete renovation, including tilling and reseeding. For dormant lawns, a phased rehydration approach paired with smart technology will trigger a green-up within 10 to 14 days.
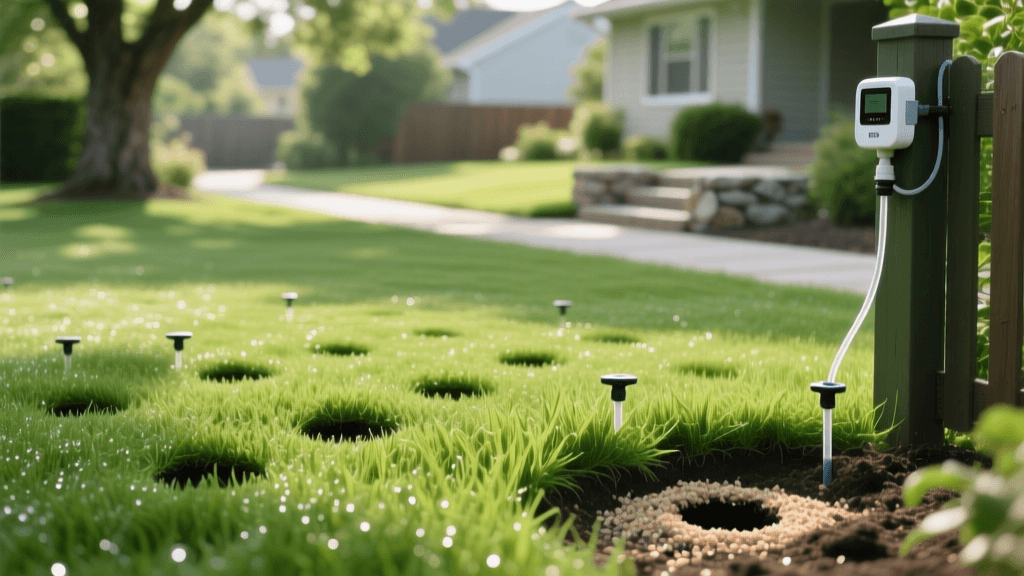
Step 2: Upgrade to Smart Irrigation for Precision Recovery
Overwatering a stressed lawn is just as damaging as underwatering. Soggy soil deprives roots of oxygen and invites fungal diseases like Pythium blight. This is where smart home integration becomes a game-changer for lawn recovery. Upgrading to a Weather-Based Irrigation Controller (WBIC) ensures your lawn receives the precise amount of moisture it needs based on real-time local weather data, soil type, and slope.
According to the Environmental Protection Agency (EPA), WaterSense labeled smart irrigation controllers can save the average home nearly 7,600 gallons of water annually while preventing the shallow root growth associated with frequent, light watering. For deep recovery, roots need infrequent but deep soaking to encourage downward growth.
Smart Controller Comparison Chart
| Smart Controller Model | Key Features | Estimated Cost | Best For |
|---|---|---|---|
| Rachio 3 (8-Zone) | Hyperlocal weather intelligence, soil moisture tracking, app integration | $229 | Tech-savvy homeowners wanting total app control |
| Orbit B-hyve XR | Indoor/outdoor use, weather-based scheduling, manual override | $149 | Budget-conscious smart home upgraders |
| Rain Bird ESP-TM2 (with LNK WiFi) | Commercial-grade durability, modular zones, WiFi add-on | $185 | Large properties with complex irrigation zones |
Pro Tip: Pair your smart controller with a wireless soil moisture sensor (like the Toro Precision Soil Sensor) placed in the lawn's driest zone. This prevents the system from running if the soil already holds adequate moisture, protecting recovering roots from rot.
Step 3: Core Aeration and Soil Amendment
Heat stress often coincides with soil compaction, especially in high-traffic areas near outdoor dining sets, fire pits, and garden pathways. Compacted soil prevents water, oxygen, and nutrients from reaching the root zone. Core aeration is the mechanical process of extracting small plugs of soil (typically 2 to 3 inches deep) to alleviate compaction and create channels for vital resources.
The University of Minnesota Extension recommends core aeration as a foundational step for lawn renovation, particularly when paired with topdressing. For cool-season lawns, early fall (late August to September) is the optimal time for this process, while warm-season lawns should be aerated in late spring to early summer.
The Aeration and Topdressing Process
- Prep the Lawn: Water the lawn deeply 24 hours before aerating to soften the soil, ensuring the aerator tines can penetrate deeply.
- Rent or Hire: Rent a walk-behind core aerator from a local hardware store (approx. $70-$90 for four hours) or hire a professional landscaping service ($75-$150 per 5,000 sq. ft.).
- Double Pass: Make two passes over the lawn—one in a north-south direction, and one east-west—to ensure maximum plug extraction.
- Leave the Plugs: Do not rake up the extracted soil cores. Allow them to break down naturally over the next two weeks, returning valuable microorganisms to the thatch layer.
- Topdress with Compost: Apply a 1/4-inch layer of finely screened organic compost over the aerated lawn. Use a push broom to work the compost into the aeration holes. This improves soil structure, increases water retention, and introduces beneficial microbes essential for heat-stressed root recovery.
Step 4: Strategic Overseeding and Fertilization
Once the soil is aerated and amended, it is time to fill in bare patches and thicken the turf canopy. A thick lawn is the best natural defense against weeds and future heat stress. When selecting grass seed, consider the microclimates of your outdoor living space. Areas shaded by pergolas or large shade trees require fine fescues, while high-traffic zones near patios benefit from turf-type tall fescue due to its deep root system and wear tolerance.
Apply seed at a rate of 4 to 6 pounds per 1,000 square feet for overseeding. To ensure seed-to-soil contact, lightly rake the seeded areas and roll the lawn with a water-filled lawn roller. Keep the top inch of soil consistently moist (watering lightly 2-3 times a day) until the seeds germinate, which typically takes 7 to 21 days depending on the grass variety.
Expert Insight on Fertilization: Avoid high-nitrogen, quick-release synthetic fertilizers on heat-stressed lawns. The sudden flush of top-growth will divert energy away from root recovery. Instead, opt for an organic, slow-release fertilizer like Milorganite (6-4-0) or a specialized starter fertilizer high in phosphorus (e.g., 10-18-10) to stimulate robust root development in newly overseeded areas.
Step 5: Ongoing Maintenance and Microclimate Management
Renovation is only the beginning. To maintain a lush lawn that complements your garden-to-table lifestyle and outdoor entertaining spaces, you must adopt long-term maintenance habits. Set your smart irrigation system to deliver 1 to 1.5 inches of water per week, ideally split into two deep watering sessions. Adjust your mower blade to a height of 3 to 4 inches; taller grass shades the soil, reducing evaporation and keeping the root zone cooler during summer heatwaves.
Furthermore, consider how your landscape design impacts lawn health. Strategic placement of deciduous trees and large shrubs can provide afternoon shade, reducing the ambient temperature of your lawn and patio by up to 10 degrees. By integrating smart home technology, prioritizing soil biology, and understanding the unique needs of your turf, you can cultivate a resilient, vibrant lawn that serves as the perfect backdrop for your home and garden lifestyle for years to come.

