
Landscaping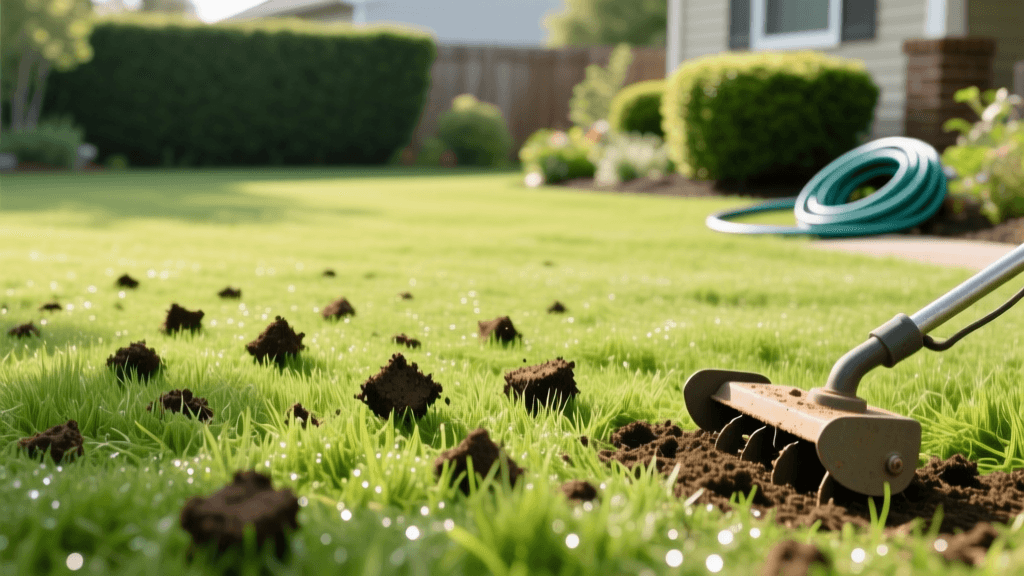
How to Revive a Thinning Lawn With Aeration and Overseeding
Why Lawns Thin and Fail
A once-thick, vibrant lawn can gradually succumb to environmental stress, heavy foot traffic, and poor soil conditions. If your turf is looking sparse, patchy, or overrun with weeds, the underlying culprit is often soil compaction and thatch buildup. Over time, soil particles are pressed together, eliminating the vital pore spaces that allow oxygen, water, and nutrients to reach the root zone. When roots cannot breathe or drink, the grass thins out, leaving bare patches vulnerable to invasive weeds and erosion.
Before you consider the drastic and expensive measure of tearing up your entire yard and starting from scratch, consider the powerful combination of core aeration and overseeding. According to turfgrass experts, if your lawn still consists of at least 50% desirable grass, a targeted renovation can restore its density and health in a single season. This guide will walk you through the exact science, timing, and actionable steps required to successfully renovate a thinning lawn.
Diagnosing Compaction: The Screwdriver Test
Before renting equipment, confirm that compaction is actually the issue. You can perform a simple diagnostic evaluation known as the screwdriver test. Take a standard 6-inch flathead screwdriver and attempt to push it into your lawn soil by hand. If you meet heavy resistance before the blade is fully submerged, your soil is severely compacted. Clay-heavy soils are particularly prone to this issue, but even sandy loams can compact under the weight of frequent mowing and foot traffic.
Additionally, check your thatch layer. Thatch is the interwoven layer of living and dead stems and roots that sits between the green vegetation and the soil surface. A half-inch of thatch is beneficial, acting as a natural mulch. However, if the thatch layer exceeds 0.75 inches, it will block water and fertilizer from penetrating the soil. If your thatch is too thick, you may need to rent a power dethatcher before proceeding with aeration.
Core Aeration: The Foundation of Recovery
Core aeration involves using a machine to physically extract small plugs of soil and thatch from the lawn. This process immediately relieves compaction, creates channels for water and air, and stimulates the growth of new, deeper roots. It is critical to use a core aerator (which removes plugs) rather than a spike aerator (which simply pokes holes). Spike aerators actually worsen compaction by pressing the surrounding soil tightly together laterally.
For optimal results, the aerator should pull plugs that are 2 to 3 inches deep and spaced about 2 to 3 inches apart. The University of Minnesota Extension recommends leaving the extracted soil plugs on the lawn. They will break down naturally over the next two to three weeks, depositing beneficial soil microorganisms back onto the thatch layer to accelerate its decomposition.
Timing Your Aeration
Timing is everything in lawn renovation. You must aerate and overseed when your specific grass type is entering its peak growing season, allowing the new seedlings to establish before extreme weather hits.
- Cool-Season Grasses (Tall Fescue, Kentucky Bluegrass, Perennial Ryegrass): Early fall (late August through mid-October) is the ideal window. The soil is still warm from summer, promoting rapid germination, while cooler autumn air reduces heat stress on young seedlings.
- Warm-Season Grasses (Bermudagrass, Zoysia, Centipedegrass): Late spring to early summer (May through June), once the grass has fully greened up and is actively growing.
Selecting the Right Seed for Overseeding
Overseeding introduces new, improved turfgrass varieties into your existing lawn, filling in bare spots and increasing overall density. Modern grass cultivars are bred for superior drought tolerance, disease resistance, and deeper root systems. Always choose a high-quality seed mix with a germination rate of 85% or higher and less than 0.5% weed seed content. Avoid cheap contractor-grade mixes, which often contain high percentages of annual ryegrass or weed seeds.
| Grass Type | Climate Zone | Overseeding Rate (per 1,000 sq ft) | Germination Time |
|---|---|---|---|
| Tall Fescue | Cool-Season / Transition | 5 - 8 lbs | 7 - 14 days |
| Kentucky Bluegrass | Cool-Season | 1 - 2 lbs | 14 - 30 days |
| Perennial Ryegrass | Cool-Season | 4 - 6 lbs | 5 - 10 days |
| Bermudagrass | Warm-Season | 1 - 2 lbs (hulled) | 10 - 21 days |
| Zoysiagrass | Warm-Season | 1 - 2 lbs | 14 - 21 days |
For cool-season lawns in the transition zone, a blend of 90% Tall Fescue and 10% Kentucky Bluegrass is often recommended by the University of California Agriculture and Natural Resources program to balance deep-rooted drought tolerance with the self-repairing rhizome spread of bluegrass.
Step-by-Step Lawn Renovation Guide
Follow this precise sequence to ensure maximum seed-to-soil contact, which is the single most important factor in successful overseeding.
Step 1: Mow Low and Bag
Mow your existing lawn to a height of 1 to 1.5 inches—much lower than your standard mowing height. This reduces competition from established grass and allows sunlight to reach the soil surface. Be sure to use a bagger attachment to remove all clippings, exposing the soil and thatch layer.
Step 2: Soften the Soil
Water your lawn deeply 24 hours before you plan to aerate. The soil should be moist but not muddy. If the ground is too dry, the aerator tines will not penetrate deeply enough to pull proper plugs. If it is too wet, the machine will sink and tear the turf.
Step 3: Core Aerate in Two Directions
Rent a walk-behind core aerator from a local equipment rental center. Make one pass over the lawn in a north-south direction, and a second pass in an east-west direction. This cross-hatch pattern ensures maximum plug extraction and relieves compaction evenly.
Step 4: Overseed the Lawn
Load your broadcast or drop spreader with the appropriate amount of seed based on the table above. Apply the seed evenly across the lawn, again using a cross-hatch pattern to avoid missed stripes. The aeration holes will catch a significant amount of the seed, providing a perfect, protected microenvironment for germination.
Step 5: Apply Starter Fertilizer
New seedlings require immediate access to phosphorus for root development. Apply a high-quality starter fertilizer (such as a 10-18-10 NPK ratio) immediately after seeding. Aim for an application rate of 1.0 pound of actual nitrogen per 1,000 square feet. Avoid standard weed-and-feed products, as the herbicides will prevent your new grass seed from germinating.
Step 6: Topdress and Drag
For premium results, apply a thin layer (about 1/4 inch) of screened compost or topsoil over the seeded area. Use a piece of chain-link fence or a specialized lawn drag mat to work the seed and compost into the aeration holes and the thatch layer.
Pro-Tip: Never cover newly planted grass seed with straw. Straw often contains agricultural weed seeds and can harbor mold. If you must use a mulch to retain moisture on sloped areas, opt for a weed-free straw alternative like peat moss, coconut coir, or a specialized paper/cellulose seed mulch.
DIY vs. Professional Renovation Costs
Deciding whether to tackle this project yourself or hire a landscaping professional depends on your budget, physical capability, and access to equipment. Core aerators are heavy, difficult to transport, and require physical exertion to maneuver.
| Service / Material | DIY Cost (5,000 sq ft lawn) | Professional Cost (5,000 sq ft lawn) |
|---|---|---|
| Core Aeration Equipment | $80 - $120 (4-hour rental) | Included in service |
| Premium Grass Seed | $100 - $150 | Included in service |
| Starter Fertilizer | $30 - $45 | Included in service |
| Topdressing Compost | $50 - $100 (Bulk delivery) | $250 - $400 |
| Labor | 1 Full Day (Sweat Equity) | 1 - 2 Hours |
| Estimated Total | $260 - $415 | $450 - $850 |
Post-Renovation Watering and Maintenance
The renovation process does not end once the seed is on the ground. The next 30 days are critical. Grass seed must remain consistently moist to germinate; if the seed dries out even once during the germination phase, the embryo will die.
- Weeks 1 and 2: Water the lawn lightly 2 to 3 times per day for about 5 to 10 minutes per zone. The goal is to keep the top inch of soil damp, not saturated. Adjust this schedule based on rainfall and temperature.
- Weeks 3 and 4: As seedlings emerge and establish roots, reduce the frequency of watering to once per day, but increase the duration to 15 to 20 minutes to encourage deeper root growth.
- Week 5 and Beyond: Transition back to a standard deep-and-infrequent watering schedule, aiming for 1 to 1.5 inches of water per week, including rainfall.
Hold off on mowing until the new grass reaches about 3.5 inches in height. When you do mow, ensure your mower blades are razor-sharp to prevent tearing the delicate new seedlings out of the soil. Finally, wait until the new grass has been mowed at least three times before applying any post-emergent broadleaf herbicides to tackle remaining weeds.

