Tree Care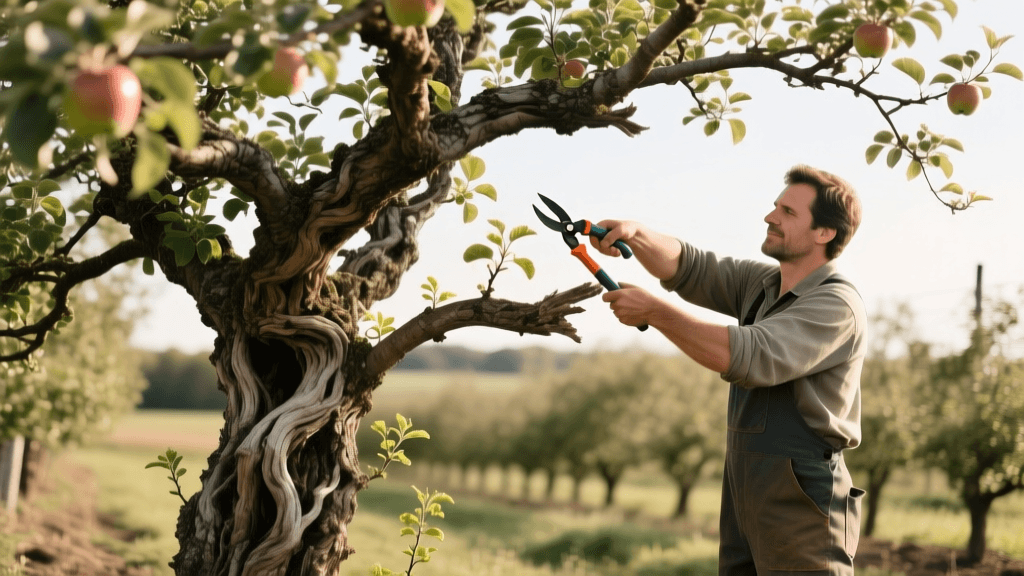
Before & After: Reviving Overgrown Apple Trees via Pruning
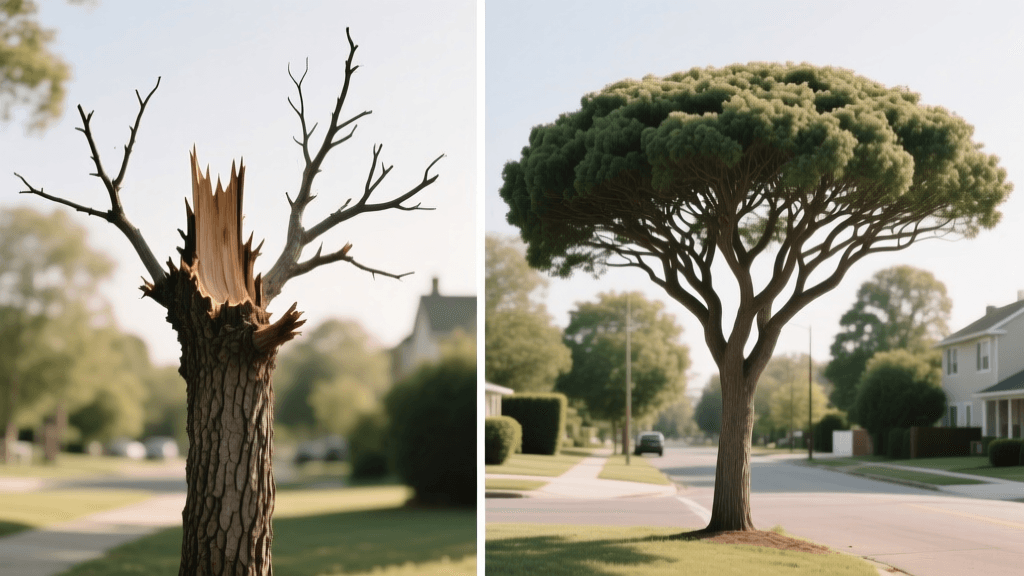
The Allure and Reality of the Neglected Apple Tree
There is a distinct romance to a mature, sprawling apple tree anchoring the backyard of an older home. However, the reality of an unpruned, neglected apple tree is often far less picturesque. Without regular maintenance, these trees devolve into dense, tangled thickets of crossing branches, water sprouts, and diseased wood. The "before" state of such a tree is characterized by small, bitter, worm-ridden fruit that drops prematurely, leaving a rotting mess on the lawn. The canopy becomes so dense that sunlight cannot penetrate to the inner branches, creating a perfect humid microclimate for fungal diseases like cedar apple rust and powdery mildew.
Fortunately, apple trees (Malus domestica) are incredibly resilient. Through a systematic process known as renovation pruning, you can orchestrate a stunning before and after transformation. This guide will walk you through the multi-year journey of reviving an overgrown apple tree, restoring its structural integrity, and bringing back the crisp, abundant harvests it was meant to produce.
The "Before" State: Diagnosing a Neglected Canopy
Before making a single cut, it is crucial to understand what happens to an apple tree left to its own devices for a decade or more. Apical dominance—the biological mechanism where the main central stem suppresses the growth of lateral branches—breaks down. The result is a chaotic explosion of epicormic shoots, commonly known as water sprouts, which grow vertically and sap the tree's energy without producing fruit.
In the "before" phase, you will typically observe:
- Excessive Canopy Density: Leaves in the interior of the tree yellow and drop due to a lack of photosynthesis.
- Biennial Bearing or Total Crop Failure: The tree may produce a massive, branch-breaking crop one year, followed by zero fruit the next, as it exhausts its carbohydrate reserves.
- Structural Hazards: Narrow crotch angles (less than 45 degrees) and included bark create weak branch unions that are highly susceptible to splitting under the weight of snow or fruit.
- Pest Havens: Crevices in overlapping branches provide ideal overwintering sites for codling moths and apple maggots.
Assessing Viability: Should You Prune or Remove?
Not every neglected tree is a candidate for a before and after transformation. Before committing to a three-year renovation plan, evaluate the trunk and root flare. If the tree exhibits extensive heartwood rot, deep longitudinal cracks, or large, shelf-like fungal conks (such as Ganoderma) at the base, the tree is structurally compromised and should be removed. Renovation pruning is an investment of time and energy; it is only worth undertaking if the primary scaffold branches and the main trunk are fundamentally sound.
Understanding Tree Biology: The 25% Rule
The most critical rule of renovation pruning is patience. According to the University of Minnesota Extension, removing too much live wood at once severely shocks the tree. A stressed apple tree will respond defensively by pushing out hundreds of vigorous, non-fruiting water sprouts, effectively undoing your work and creating a denser canopy than you started with. To avoid this, never remove more than 25% to 30% of the live canopy in a single dormant season. This biological constraint dictates that a true transformation requires a phased, three-year approach.
The Transformation: A 3-Year Renovation Pruning Schedule
All major structural pruning should be performed in late winter or early spring, just before bud break but while the tree is still fully dormant. This timing allows you to see the branch architecture clearly and ensures the tree has maximum stored energy to heal the wounds rapidly as spring growth begins.
Year 1: The Structural Reset and the "Three Ds"
The first year of the transformation focuses entirely on health and major structural corrections. Begin by removing the "Three Ds": Dead, Diseased, and Damaged wood. Cut these branches back to their point of origin or to a healthy lateral branch. Next, identify any major branches that are crossing through the center of the tree or rubbing against one another. Remove the weaker of the two conflicting branches.
If the tree has multiple competing central leaders (a common issue in neglected trees), select the strongest, most vertical leader and remove the others using reduction cuts. Do not top the tree; instead, use thinning cuts to remove entire branches back to the branch collar. By the end of Year 1, the tree may look sparse, but you have laid the groundwork for light penetration.
Year 2: Thinning and Sunlight Penetration
As expected, Year 1 cuts will have triggered a flush of water sprouts in Year 2. Your primary task now is to manage this vigorous regrowth. Rub off as many soft, green water sprouts as possible by hand in early summer. For the remaining sprouts that have lignified (hardened into wood), thin them out during the following winter. Leave a few well-placed sprouts that are growing outward at a wide angle; these can be trained into new fruiting branches.
During Year 2, focus on lowering the overall height of the tree if necessary, using drop-crotch cuts to redirect growth to a lower, outward-facing lateral branch. The goal is to open the center of the canopy so that a dappled sunlight pattern reaches the lower scaffolds.
Year 3: Detail Pruning and Fruiting Wood Management
By the third year, the dramatic before and after transformation becomes fully apparent. The tree's structure is now open, balanced, and bathed in sunlight. Year 3 pruning shifts from structural correction to fruit quality management. Focus on thinning out overcrowded fruiting spurs. Apple trees produce fruit on short, knobby twigs called spurs, which can remain productive for up to a decade. Remove old, unproductive spurs and thin out clusters to ensure the remaining spurs have adequate space and sunlight to develop large, sweet fruit.
"The most common mistake homeowners make when reviving an old tree is trying to do all the pruning in a single weekend. This shocks the tree and triggers a massive, unmanageable explosion of water sprouts. Patience over three years is the secret to a sustainable transformation."
Before & After Transformation Metrics
The following table illustrates the typical progression of tree health and productivity metrics over the course of a successful three-year renovation project.
| Metric | Before (Year 0) | Mid-Transformation (Year 2) | After (Year 4) |
|---|---|---|---|
| Canopy Sunlight Penetration | Less than 10% | Approximately 40% | Optimal 60-70% |
| Annual Fruit Yield | Erratic / Biennial | Reduced (Recovery Phase) | Consistent & Abundant |
| Fruit Size & Quality | Small, bitter, blemished | Medium, improving color | Large, sweet, high blush |
| Water Sprout Density | High (Choked canopy) | Very High (Post-shock flush) | Low (Managed & minimized) |
| Pest & Disease Incidence | Severe (Fungal & Insect) | Moderate (Improving airflow) | Low (Excellent spray coverage) |
Essential Tools and the Wound Dressing Myth
Executing a clean, precise transformation requires the right tools. Invest in a high-quality pair of bypass hand pruners (such as the Felco 2 or Corona ClassicCut) for cuts up to 3/4 inch in diameter. For branches between 1 inch and 3 inches, use a pair of long-handled bypass loppers to maintain leverage and keep a safe distance. For major scaffold removals, a curved-blade pruning saw (like the Silky Gomboy) is essential for making flush, clean cuts without tearing the bark.
When making your final cuts, always locate the branch collar—the swollen area where the branch meets the trunk—and cut just outside of it. Never make a flush cut against the trunk, as this destroys the tree's natural compartmentalization zone (CODIT) and invites decay.
Furthermore, resist the urge to paint your pruning cuts. As noted by Texas A&M Aggie Horticulture, applying wound dressings, pruning paints, or sealants does not prevent decay and can actually trap moisture and pathogens against the wound, accelerating rot. A healthy apple tree will naturally seal its own wounds through chemical compartmentalization; your only job is to make a clean cut and let nature take its course.
Aftercare: Supporting the "After" Phase
The physical pruning is only half of the transformation. To support the tree's recovery and maximize your new harvest, implement a rigorous aftercare routine.
- Mulching: Apply a 2-to-3-inch layer of organic wood chip mulch in a wide ring around the tree, extending out to the drip line. Keep the mulch at least 6 inches away from the trunk to prevent "volcano mulching," which causes bark rot and encourages girdling roots.
- Fertilization: Do not blindly apply high-nitrogen fertilizers, especially in the first year after heavy pruning, as this will only encourage more vegetative water sprout growth. Conduct a soil test first. The Michigan State University Extension recommends basing fertilizer applications entirely on soil test results and annual shoot growth measurements.
- Fruit Thinning: In early summer, after the natural "June drop," manually thin the remaining apples. Leave only one fruit per cluster, spaced about 6 inches apart along the branch. This prevents branch breakage, ensures the remaining apples grow to a marketable size, and prevents the tree from slipping back into a biennial bearing cycle.
Conclusion
Transforming an overgrown, neglected apple tree is not a weekend chore; it is a multi-year horticultural partnership between you and the tree. By respecting the tree's biology, adhering to the 25% annual removal rule, and focusing on light penetration and structural integrity, you can reverse years of neglect. The before and after results of a properly executed renovation pruning plan are nothing short of spectacular—turning a tangled, diseased hazard into a beautiful, productive centerpiece of your home landscape for decades to come.