Pest Control
Seasonal Trap Cropping Schedules for Organic Garden Pest Control
The Strategic Advantage of Seasonal Trap Cropping
For home gardeners and small-scale growers, the arrival of spring and summer brings not only the promise of a bountiful harvest but also the inevitable return of destructive insect pests. While many gardeners rely on reactive chemical sprays after damage has already occurred, a more proactive and sustainable approach lies in manipulating your planting schedules. This method, known as trap cropping, leverages the natural preferences of pests to draw them away from your prized cash crops. When combined with precise seasonal timing, trap cropping becomes one of the most effective tools in your pest control arsenal.
Trap cropping involves planting a highly attractive 'sacrificial' crop near your main harvest. The goal is simple: lure the pests to the trap crop, concentrate them in a specific area, and then manage or destroy the trap crop before the pest population can explode. However, the success of this strategy hinges entirely on timing. If your trap crop is not established and actively emitting the volatile organic compounds (VOCs) that attract pests before your main crop emerges, the pests will simply bypass the trap and attack your primary vegetables.
Trap Cropping vs. Companion Planting: Understanding the Difference
It is common to confuse trap cropping with companion planting, but the two serve different functions within a garden ecosystem. Companion planting generally involves growing plants together for mutual benefit, such as repelling pests, enhancing soil nutrients, or providing structural support. For example, planting marigolds near tomatoes to deter root-knot nematodes is a classic companion planting strategy.
Trap cropping, on the other hand, is an attractant strategy. You are intentionally inviting pests into your garden, but directing them to a specific, manageable location. While companion planting aims to mask the scent of your main crop or create a hostile environment for pests, trap cropping rolls out the red carpet for them—just not where you plan to harvest. Understanding this distinction is crucial for planning your seasonal garden layout and ensuring you do not accidentally plant a pest-repellent near a trap crop, which would neutralize your efforts.
Integrating Trap Crops into Your IPM Strategy
Trap cropping is a cornerstone of Integrated Pest Management (IPM), a holistic approach to pest control that minimizes environmental and economic risks. According to the Environmental Protection Agency (EPA), IPM principles focus on long-term prevention of pests through a combination of techniques such as biological control, habitat manipulation, and modification of cultural practices. By altering your planting schedule to include trap crops, you are engaging in cultural habitat manipulation, significantly reducing the need for broad-spectrum synthetic pesticides.
When you reduce your reliance on chemical sprays, you protect vital pollinators and beneficial predatory insects, such as ladybugs, lacewings, and parasitic wasps. In fact, many trap crops double as 'nurse crops' for these beneficial insects, providing them with nectar, pollen, and a steady food source (the trapped pests) to sustain their populations throughout the growing season.
The Master Seasonal Planting Schedule
To successfully implement a trap cropping system, you must align your seed-starting and direct-sowing schedules with the emergence patterns of your local pests. Below is a comprehensive seasonal schedule detailing the most effective trap crops, their target pests, and the required planting lead times.
| Season / Timing | Target Pest | Primary Trap Crop | Planting Lead Time | Placement Strategy |
|---|---|---|---|---|
| Early Spring | Flea Beetles | Radishes (Daikon or Cherry Belle) | 14–21 days before main crop | Interplanted or perimeter border |
| Early Summer | Squash Vine Borers, Cucumber Beetles | Blue Hubbard Squash | 21 days before summer squash | Perimeter planting |
| Mid-Summer | Aphids, Harlequin Bugs | Nasturtiums, Collard Greens | 30 days before brassicas | Border planting or intercropping |
| Late Summer | Stink Bugs, Lygus Bugs | Sunflowers, Sorghum, Millet | 45 days before late crops | Perimeter windbreaks |
Spring Action Plan: Defeating Flea Beetles with Radishes
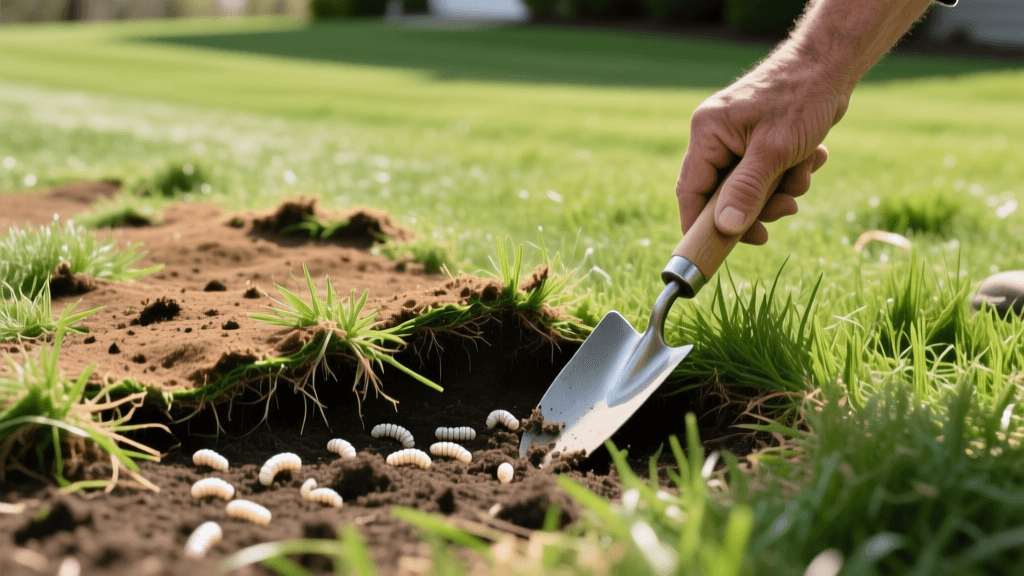
Flea beetles are notorious for decimating young seedlings of the Brassicaceae and Solanaceae families, leaving leaves riddled with tiny, shotgun-like holes. They emerge in early spring as soil temperatures reach 50°F (10°C). To protect your tomatoes, peppers, and eggplants, you must use radishes as a trap crop.
The Schedule: Direct-sow a thick border of radishes (varieties like 'Cherry Belle' or 'Daikon' work best) around your garden beds 14 to 21 days before you plan to transplant your nightshades. Radishes germinate rapidly, often within 3 to 5 days. By the time your vulnerable main crops are placed in the soil, the radishes will have developed their cotyledons and first true leaves, emitting the glucosinolates that flea beetles find irresistible.
Cost & Maintenance: A $5 packet of bulk radish seeds can protect a 100-square-foot garden area. Ensure the radishes are well-watered to maintain rapid growth. Once the flea beetles congregate on the radishes, you must monitor them daily.
Early Summer Action Plan: Blue Hubbard and Squash Vine Borers
The Squash Vine Borer (SVB) is a devastating moth whose larvae bore into the stems of cucurbits, causing sudden and fatal wilting. According to the University of California Statewide Integrated Pest Management Program (UC IPM), managing SVBs requires precise timing and cultural controls, as chemical sprays are ineffective once the larva is inside the stem.
The Schedule: The 'Blue Hubbard' squash is vastly more attractive to SVBs and striped cucumber beetles than standard zucchini or yellow summer squash. Plant Blue Hubbard seeds along the perimeter of your garden three weeks before planting your main zucchini crop. You can start the Blue Hubbards indoors in peat pots to guarantee this three-week lead time, transplanting them outdoors after the last frost date.
Placement: Space the Blue Hubbard plants about 4 to 6 feet apart around the border of your garden. The goal is to intercept the female moths as they fly into the garden seeking a host, stopping them before they ever reach the zucchini in the center.
Mid-to-Late Summer: Managing Aphids and Stink Bugs
As the heat of summer peaks, aphid populations can explode, and stink bugs begin to seek out developing fruits. Nasturtiums are a legendary trap crop for aphids. Plant them 30 days before your brassicas (like kale and cabbage) or tomatoes. Nasturtiums will attract the aphids, keeping them off your primary harvest while providing a habitat for predatory ladybugs.
For stink bugs and leaf-footed bugs, tall trap crops like sunflowers or sorghum are highly effective. Plant these along the southern or western borders of your garden 45 days before your late-summer tomatoes and peppers begin to fruit. Stink bugs prefer to feed on the developing seeds of the sunflowers, sparing your vegetable crops.
The Critical Final Step: Trap Crop Destruction
The most common mistake gardeners make with trap cropping is failing to destroy the trap crop once it has done its job. If you allow a radish or Blue Hubbard plant to remain in the garden after it has attracted a high concentration of pests, it will transition from a 'trap' into a 'nursery,' breeding a second generation of pests that will eventually overwhelm your main crop.
Destruction Methods:
- Flaming: For robust trap crops like radishes or sorghum, a handheld agricultural propane torch is a highly effective, chemical-free way to destroy the plants and the eggs/larvae on them.
- Bagging and Solarizing: Carefully pull the trap crop (roots and all), place it immediately into heavy-duty black contractor trash bags, seal them, and leave them in the hot sun for 5 to 7 days. The heat will kill all life stages of the pests.
- Targeted Organic Sprays: If the trap crop is too large to remove (like a mature Blue Hubbard), spray it heavily with an organic insecticide containing Spinosad or Neem oil. Apply strictly in the late evening to minimize harm to foraging pollinators.
Cost-Benefit Analysis: Trap Cropping vs. Chemical Sprays
Implementing a seasonal trap cropping schedule is not only ecologically sound but also economically advantageous. Consider the costs over a standard 4-month growing season:
- Chemical Control: Purchasing broad-spectrum or systemic insecticides can cost between $20 and $50 per season, not including the cost of application equipment or the hidden environmental costs of soil degradation and pollinator loss.
- Trap Cropping: A diverse selection of trap crop seeds (radishes, nasturtiums, Blue Hubbard, sunflowers) will cost approximately $15 to $25 as a one-time purchase. Furthermore, crops like radishes and sunflowers can be harvested or enjoyed, providing a secondary yield while they perform their pest-control duties.
Conclusion
Mastering seasonal timing and planting schedules transforms you from a reactive gardener into a proactive ecosystem manager. By utilizing trap crops like radishes, Blue Hubbard squash, and nasturtiums, and strictly adhering to the required planting lead times, you can intercept pests before they ever damage your main harvest. Combine this strategy with vigilant monitoring and prompt trap-crop destruction, and you will cultivate a thriving, resilient garden that relies on nature's rhythms rather than synthetic chemicals.
For further reading on sustainable pest management and regional pest emergence data, consult resources from the USDA National Institute of Food and Agriculture (NIFA) and your local university extension office to fine-tune these schedules to your specific microclimate.