
Landscaping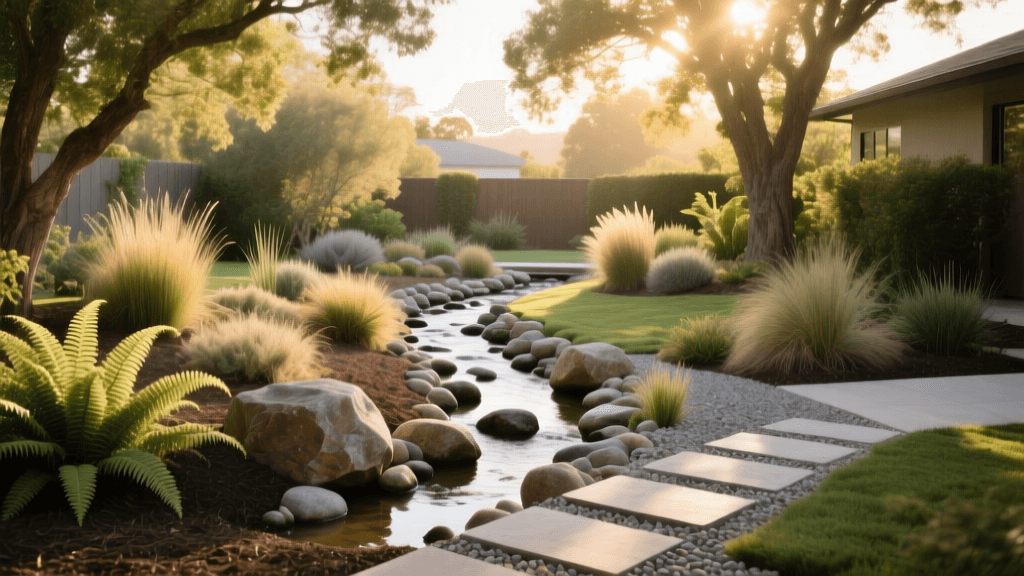
Side Yard Transformation: Dry Creek Bed and Shade Garden
The "Before" State: A Soggy, Forgotten Corridor
Side yards are notoriously the most neglected spaces in residential landscaping. Often relegated to storing trash cans or acting as a muddy shortcut to the backyard, they rarely receive the design attention given to front curb appeal or backyard patios. For this specific 40-foot by 5-foot side yard transformation, the "before" conditions were a homeowner's nightmare. The soil was heavy, compacted clay that refused to drain, creating a perpetual bog whenever it rained. Roof runoff from the main house's downspout flooded the narrow corridor, leading to standing water that bred mosquitoes and threatened the structural integrity of the wooden fence with constant moisture exposure.
Above the soggy soil, the area was choked by overgrown, invasive English ivy and a few struggling, spindly shrubs that lacked the sunlight necessary to thrive. The space was dark, uninviting, and entirely non-functional. The goal was clear: eliminate the standing water, create a visually appealing transition between the front and back yards, and establish a low-maintenance shade garden that could thrive in the limited light.
The Master Plan: Dry Creek Bed Meets Shade Garden
To solve the drainage issue while elevating the aesthetic, we designed a dry creek bed. According to the EPA's guidelines on green infrastructure, managing stormwater runoff at the source through landscaped channels and permeable surfaces is one of the most effective ways to reduce erosion and protect local waterways. A dry creek bed mimics a natural stream, channeling water away from the house and into a designated rain garden or municipal drain, while remaining a beautiful, dry hardscape feature during sunny days.
Flanking the creek bed, we planned a layered shade garden. Because the side yard was bordered by a six-foot privacy fence on one side and the two-story house on the other, it received less than three hours of dappled sunlight daily. We selected a palette of moisture-loving, shade-tolerant perennials and ferns that would provide lush texture and vibrant foliage without requiring constant pruning or full-sun exposure.
Step 1: Clearing, Grading, and Trenching
The first phase of any major landscape renovation is demolition and earthmoving. We spent the first weekend clearing out the invasive ivy, removing the dead shrubs, and extracting years of accumulated debris.
Calculating the Slope
For a dry creek bed to function properly, gravity must do the heavy lifting. We used a laser level and string line to establish a consistent slope. The golden rule for drainage channels is a minimum drop of 1/4 inch per linear foot. Over our 40-foot run, this meant the end of the creek bed needed to be roughly 10 inches lower than the starting point at the downspout.
Excavating the Trench
We excavated a winding, serpentine trench ranging from 24 to 36 inches wide and 12 to 18 inches deep. Creating gentle curves rather than a straight, rigid line is crucial for achieving a naturalistic look. The excavated clay soil was heavily compacted; rather than using it as backfill, we removed it entirely and later replaced it with a nutrient-rich, well-draining topsoil and compost blend for the planting beds.
- Tools Used: Spade, trenching shovel, mattock, laser level, masonry string line, and a heavy-duty wheelbarrow.
- Pro Tip: Call your local utility marking service (like 811 in the US) at least three days before digging to ensure you do not strike underground gas, water, or electrical lines.
Step 2: Hardscaping the Dry Creek Bed
With the trench dug and the slope verified, the next step was to armor the channel against erosion and suppress weed growth.
Laying the Foundation
We lined the entire trench with Mirafi 500X, a heavy-duty woven geotextile landscape fabric. Unlike cheap, non-woven black plastic weed barriers that tear easily and trap water, woven fabric allows water to percolate through while providing immense tensile strength to hold heavy stone. We overlapped the seams by 12 inches and secured the edges with 6-inch galvanized landscape staples driven deep into the soil walls.
Layering the Stone
The secret to a realistic dry creek bed is variation. Using only one size of rock looks artificial. We utilized a three-tier stone strategy:
- Base Layer: A 2-inch layer of 3/4-inch crushed angular gravel was spread across the bottom. The angular edges lock together, providing a stable, permeable base that prevents the larger rocks from sinking into the mud over time.
- Main Channel: We filled the center of the creek bed with 3-inch to 5-inch Mississippi river rock. The rounded, multi-colored stones mimic the look of a naturally weathered streambed.
- Edge Detailing: To blend the hardscape into the softscape, we bordered the edges with 1-inch to 2-inch river cobble, partially burying some stones to make them look like they had been sitting there for decades.
Design Insight: To anchor the landscape and provide visual weight, we strategically placed three large limestone boulders (weighing between 80 and 150 lbs each) at the sharpest curves of the creek bed. Burying the bottom third of each boulder into the soil makes them appear as natural geological outcroppings rather than rocks dropped from a truck.
Step 3: Soil Amendment and Shade Planting
With the drainage corridor secured, we turned our attention to the planting beds on either side of the stone channel. The native clay was amended with a 50/50 mix of premium topsoil and organic leaf compost, tilled to a depth of 8 inches to improve aeration and moisture retention.
Selecting the Right Plants
When designing a shade garden, foliage texture and color variation are far more important than flowers, as blooming periods in deep shade are often fleeting. We relied on resources like the Missouri Botanical Garden's Plant Finder to verify the exact light and moisture tolerances of our chosen species. Furthermore, we prioritized native and adaptive species to support local ecology, a practice heavily encouraged by the National Wildlife Federation's Garden for Wildlife program.
Our plant palette included:
- Ostrich Fern (Matteuccia struthiopteris): Placed in the wettest zones near the creek bed edges to soak up excess moisture and provide towering, prehistoric texture.
- Hosta 'Patriot': Chosen for its striking variegated leaves (deep green centers with bright white margins) which act as natural reflectors, brightening up the darkest corners of the side yard.
- Astilbe 'Deutschland' (White): Interplanted between the hostas to provide airy, vertical plumes of white flowers in early summer.
- Creeping Jenny (Lysimachia nummularia 'Aurea'): Used as a groundcover spilling over the larger limestone boulders, providing a vibrant chartreuse contrast against the grey stone.
Materials and Cost Breakdown
Budgeting accurately is essential for any hardscape project. Below is the itemized cost breakdown for this 200-square-foot side yard transformation. Prices reflect regional averages for materials sourced from local landscape supply yards rather than big-box home improvement stores, which often charge a premium for bulk stone and soil.
| Material | Quantity | Unit Cost | Total Cost |
|---|---|---|---|
| Mirafi 500X Woven Fabric (3x300 ft roll) | 1 Roll | $85.00 | $85.00 |
| 3/4" Crushed Gravel (Base) | 1 Ton | $45.00 | $45.00 |
| 3-5" Mississippi River Rock | 2 Tons | $110.00/ton | $220.00 |
| 1-2" River Cobble (Edges) | 0.5 Ton | $130.00/ton | $65.00 |
| Limestone Boulders | 3 Stones | $40.00/ea | $120.00 |
| Topsoil & Compost Blend | 3 Cubic Yards | $45.00/yd | $135.00 |
| Perennials & Ferns (1-gallon pots) | 24 Plants | $12.00/ea | $288.00 |
| Landscape Staples & Edging | Misc. | $35.00 | $35.00 |
| Total Estimated Cost | $993.00 |
The "After" Reveal and Long-Term Maintenance
The transformation was nothing short of miraculous. The "after" reveal showcased a lush, vibrant corridor that feels like a secret woodland path. The dry creek bed successfully captured the next heavy downpour, channeling the roof runoff smoothly down the 40-foot slope and into the municipal storm drain without a single puddle forming in the yard. The sound of water trickling over the river rock during a rainstorm added an unexpected, soothing auditory element to the space.
Maintenance Requirements
While this landscape is designed to be low-maintenance, it is not zero-maintenance. To keep the side yard looking pristine, the following seasonal tasks are required:
- Spring Cleanup: Use a leaf blower on a low setting or a flexible bamboo rake to gently remove fallen autumn leaves from the river rock. Avoid using stiff metal rakes, which can displace the smaller cobble stones and tear the underlying geotextile fabric.
- Weed Control: Despite the woven fabric, wind-blown weed seeds may occasionally germinate in the crevices between the rocks. Spot-treat these with an organic horticultural vinegar or hand-pull them while the roots are still shallow.
- Perennial Division: Every three to four years, the hostas and ostrich ferns will need to be dug up and divided in the early spring to prevent overcrowding and maintain vigorous growth.
- Rock Topping: Over time, the smaller gravel and cobble may settle or migrate. Budget for a half-ton top-up of river rock every five to seven years to maintain the depth and visual fullness of the creek bed.
By combining functional stormwater management with thoughtful, shade-tolerant horticulture, this once-useless side yard was reclaimed. It now serves as a beautiful, functional bridge between the front and back of the property, proving that even the most challenging, narrow spaces can be transformed into stunning landscape features with the right design principles and materials.

